
I never thought I would be building a greenhouse from scratch at the exact same time I was renovating my entire kitchen for the Jeffrey Court Renovation Challenge this spring, but that’s exactly what happened!

Trying to tackle two large building projects at the same time isn’t something I recommend, but I had already made plans to build a DIY greenhouse when the opportunity came along to participate in the JC Renovation challenge. Thankfully my family pitched in and I was able to meet my deadline with the kitchen renovation AND build the greenhouse in plenty of time to get my seeds started!
Why build a greenhouse?
My family and I love growing our own food. We don’t grow all of it, but we grow as much as we can. We live in zone 5, and the growing season can be up to 120 days and some years it’s shorter being closer to 105 days. Building a greenhouse will give us a much longer growing season and allow us to eat fresh food earlier in the spring and later in the fall!
Buying a greenhouse kit vs. building a greenhouse from scratch.
There are a lot of great greenhouse kit options available on the market these days making it simple to purchase any size greenhouse and style you’d like in a ready-to-assemble kit. With the price of lumber and other building materials on the rise, that may be a wonderful option for you if you’re looking to add a greenhouse to your yard. However, we decided that building a greenhouse from scratch was the best option for us for a couple of reasons.
First, building the greenhouse ourselves allowed us to design just what we wanted. We wanted our greenhouse to be a certain length and width, with a large dutch door.
Secondly, at the time (Jan of 2021) lumber was more affordable than it is now and the cost of the materials was less than half of a similar size greenhouse kit (actually it was closer to 1/3 of the cost). This project was not a sponsored project, however, we did purchase all our materials from Home Depot for our greenhouse and materials cost us around $1,600 (at the time).
Whether you decide to build a greenhouse or buy a kit, hopefully, this post helps you. Everyone has different goals for their garden and there are hundreds of DIY greenhouse designs that are beautiful. There are also companies that will come and completely set up the greenhouse for you. It just depends on what you are looking for, how much you want to do yourself, and what your budget is. The sky is the limit when it comes to greenhouses.
If you are not into DIY and want to order a greenhouse, here are a few great Greenhouse Kits that I think are great options and worth looking into. Be sure to check with your local building department to see if your greenhouse structure will require you to pull any permits. Our township requires us to pull a permit if our structure is larger than 200 sq ft. Your township may not require permitting if the greenhouse is on the smaller side, but it is something you will need to look into.
Beginner Basic Greenhouse Kit (under$1,000)
1. Coztway Greenhouse Kit
2. Outsunny Kit
Greenhouse Kits (under $3,000)
1. Palram Premium Class
2.Sunshine Gardenhouse
Some Of The BEST Prebuilt Greenhouses On The Market
1.Yoderbilt Greenhouse
2.Hartley Botanical Award-Winning English Greenhouses
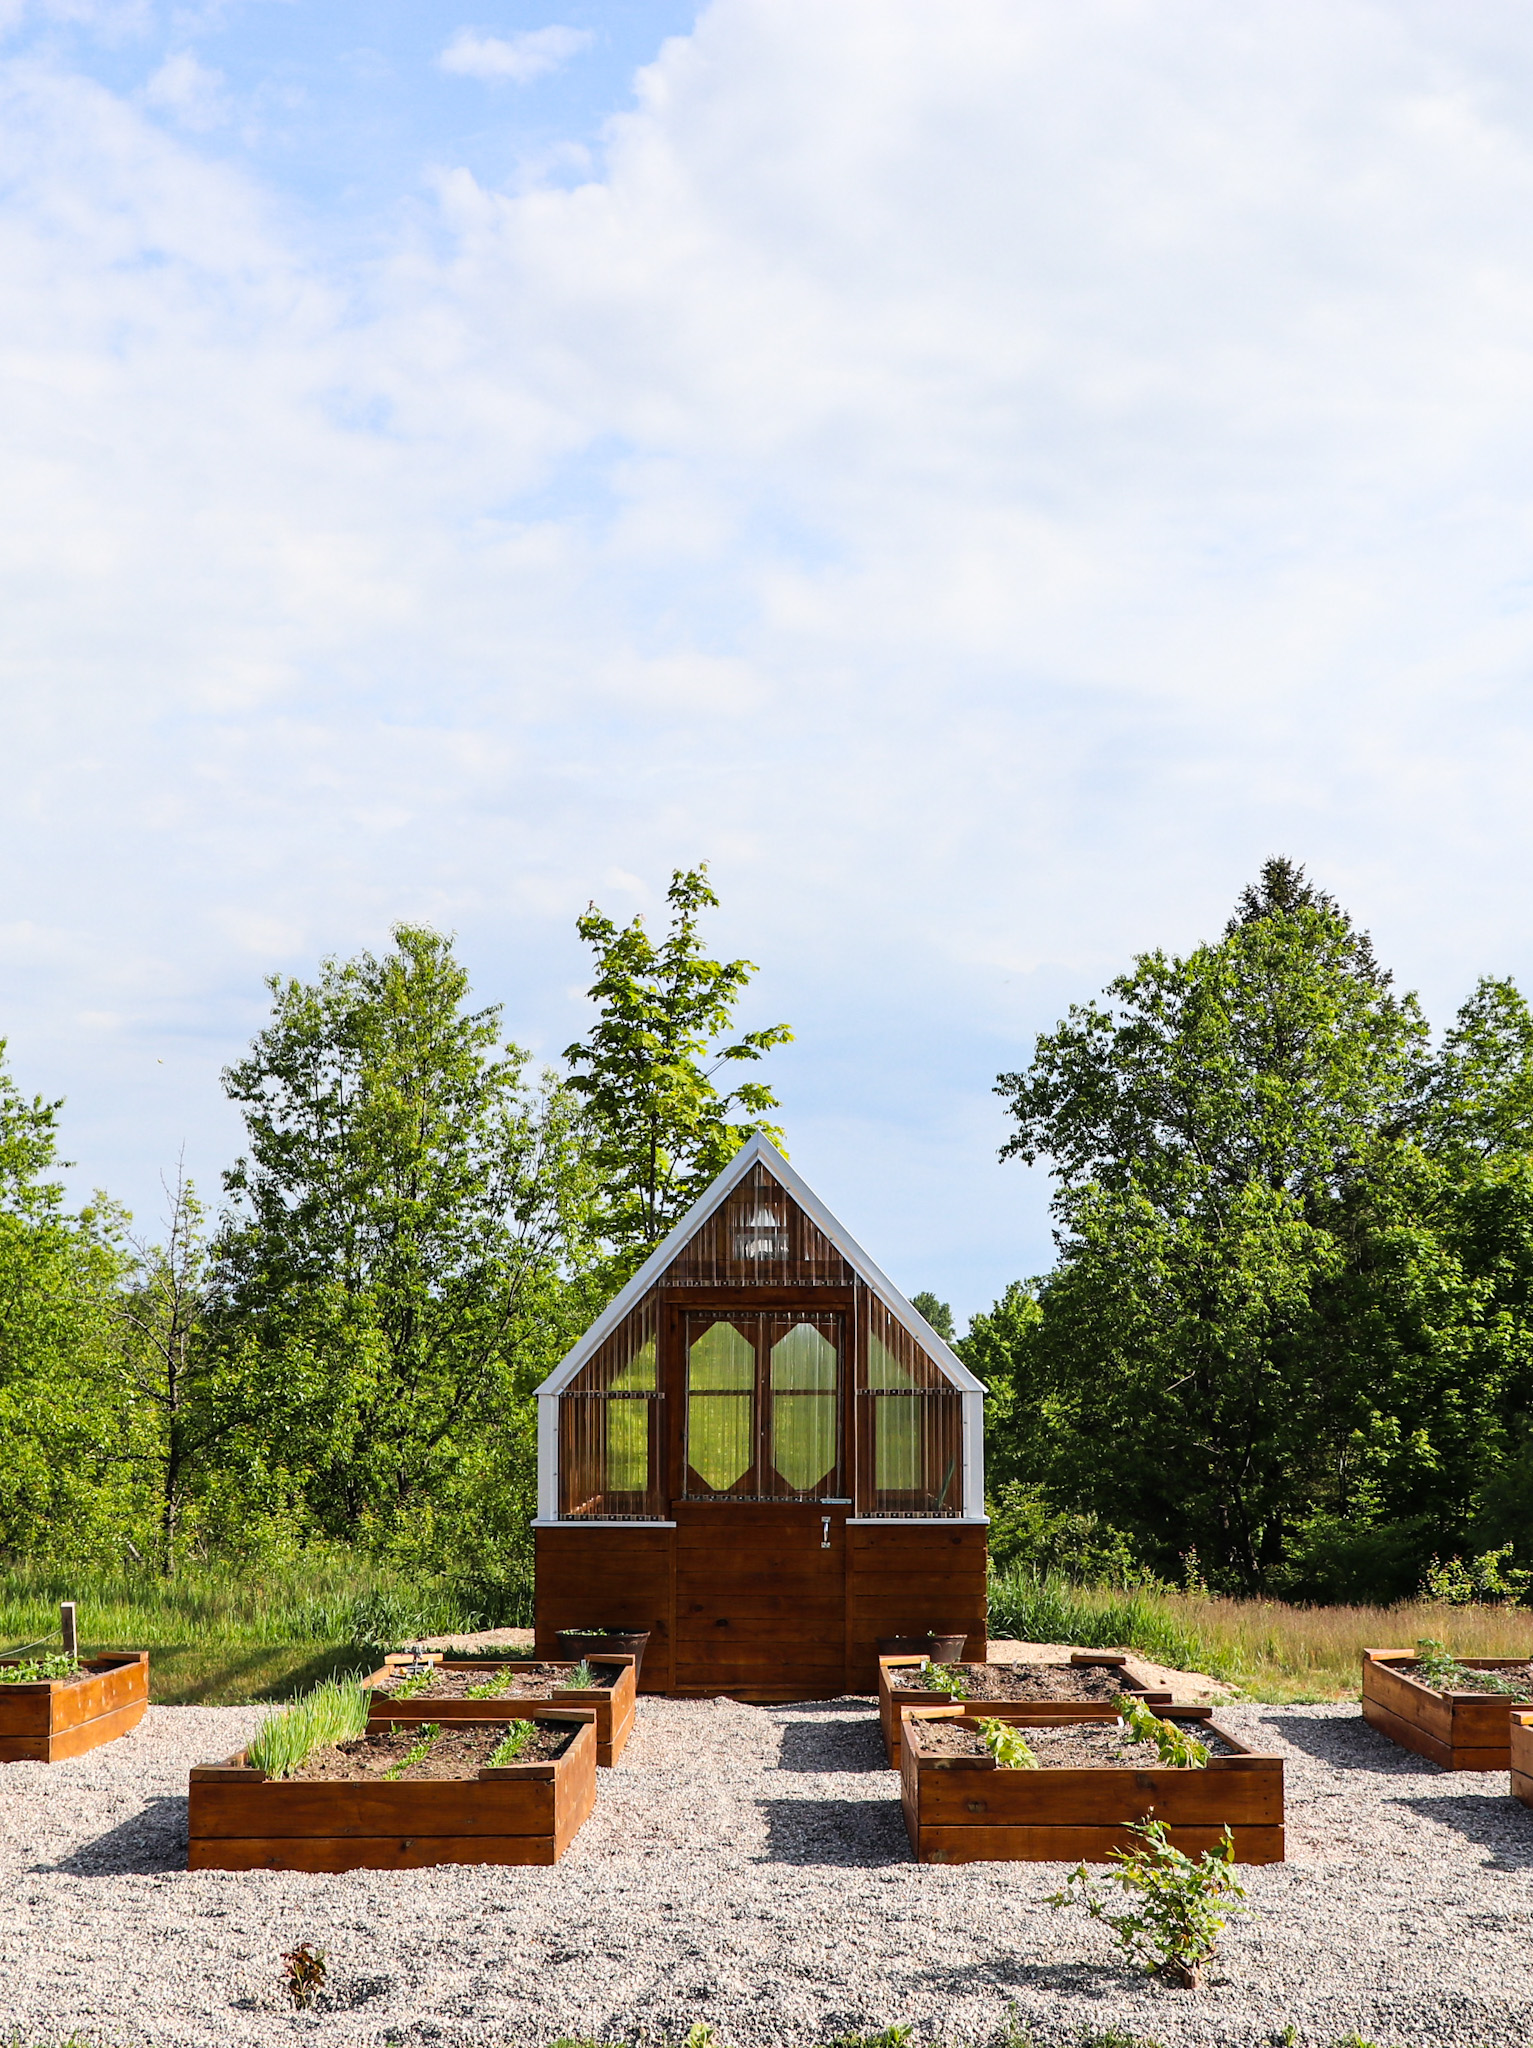
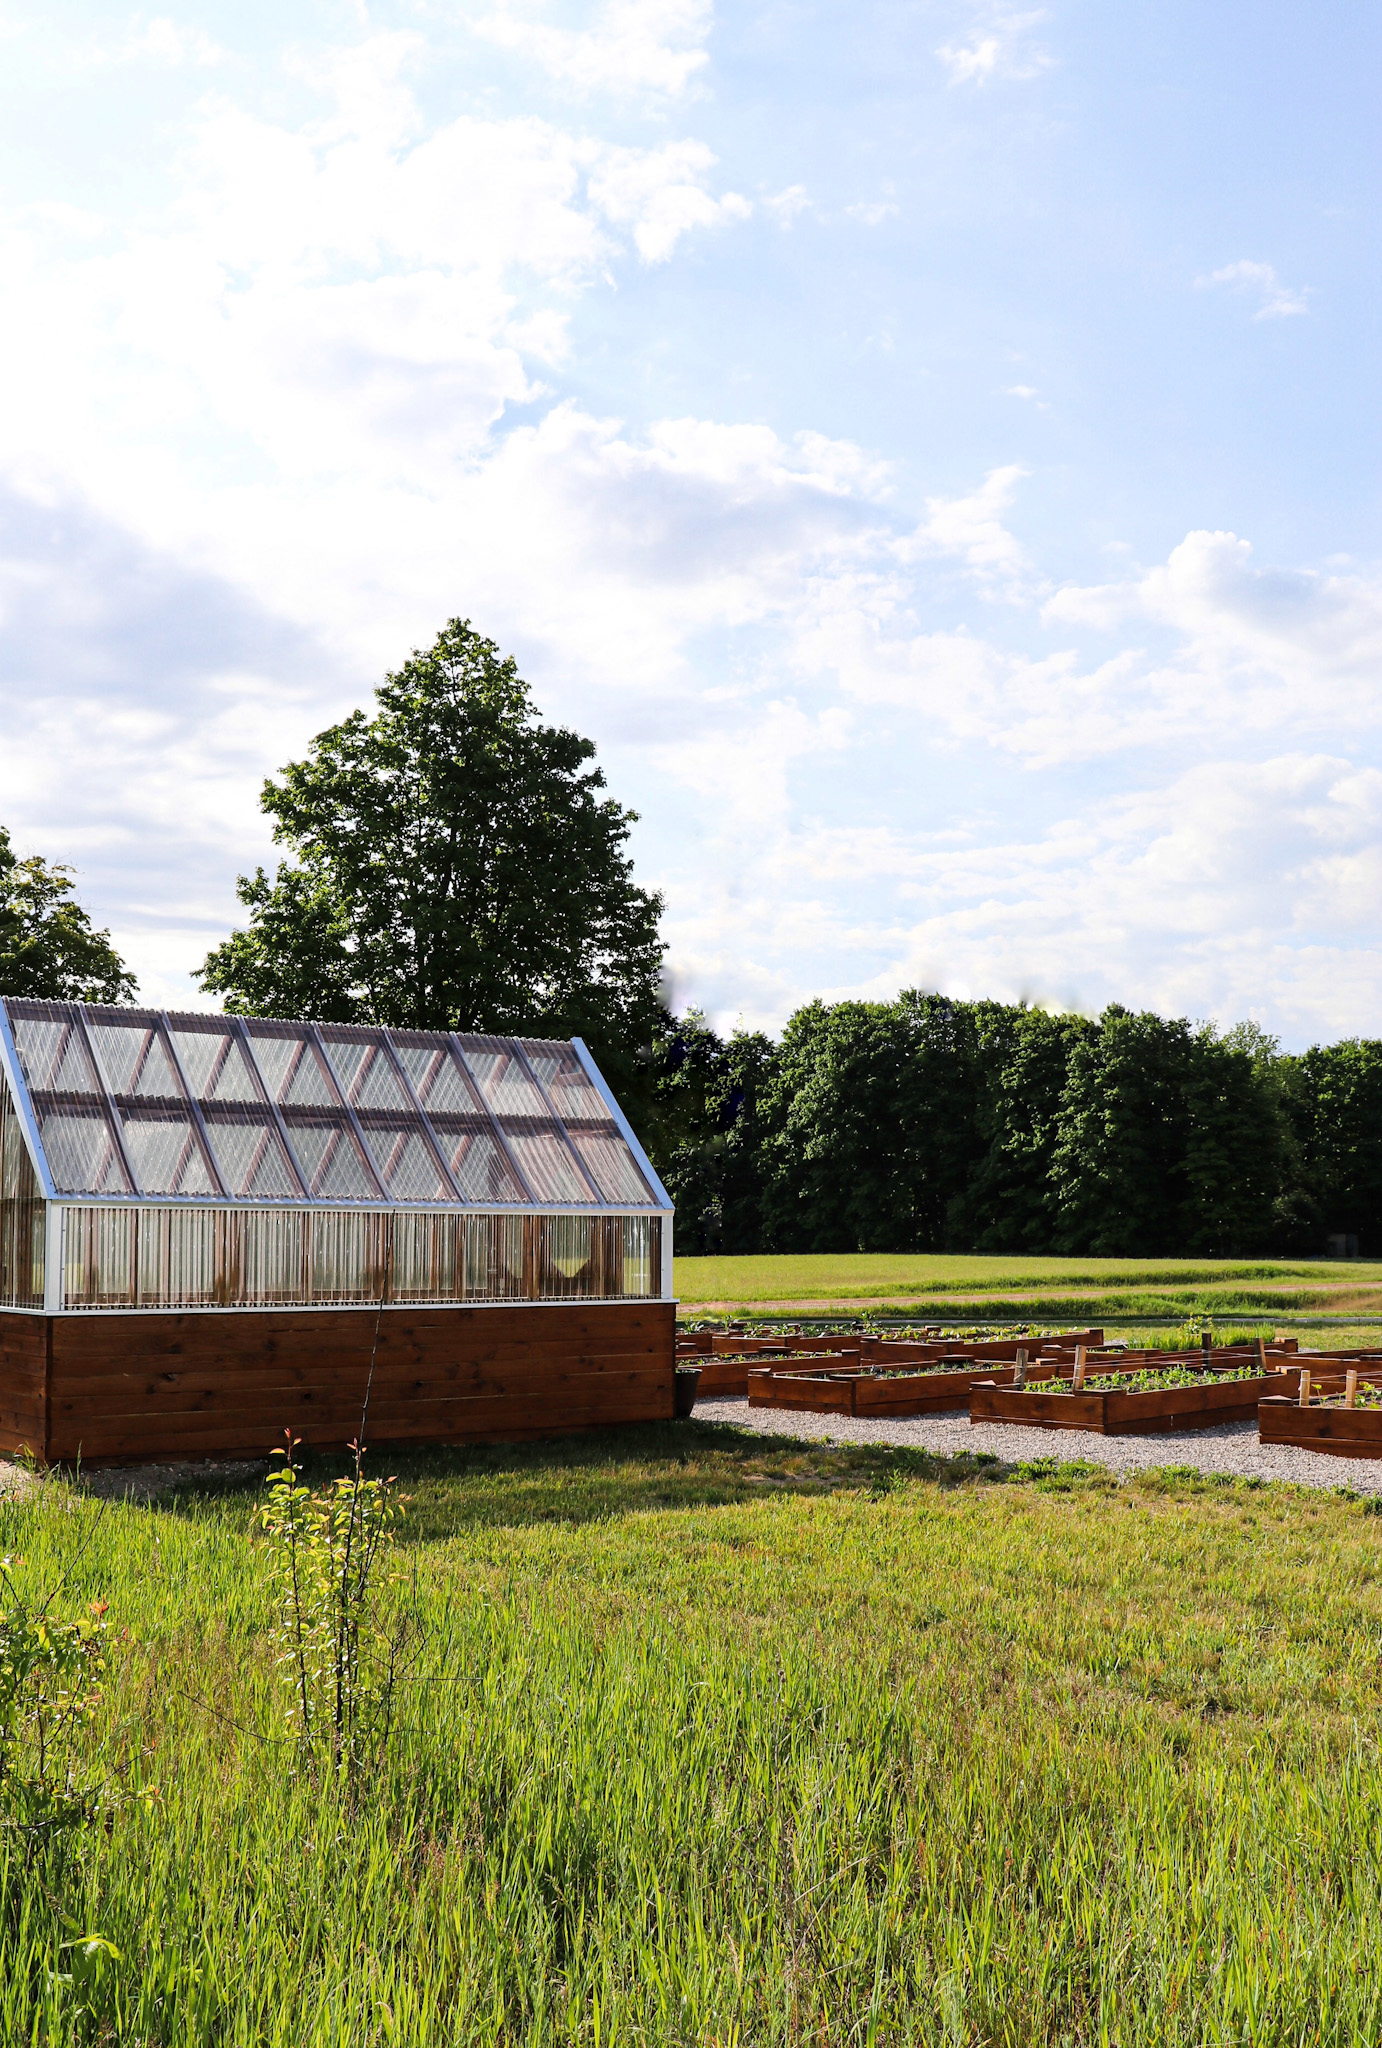
OUR GREENHOUSE
Designing Our DIY Greenhouse
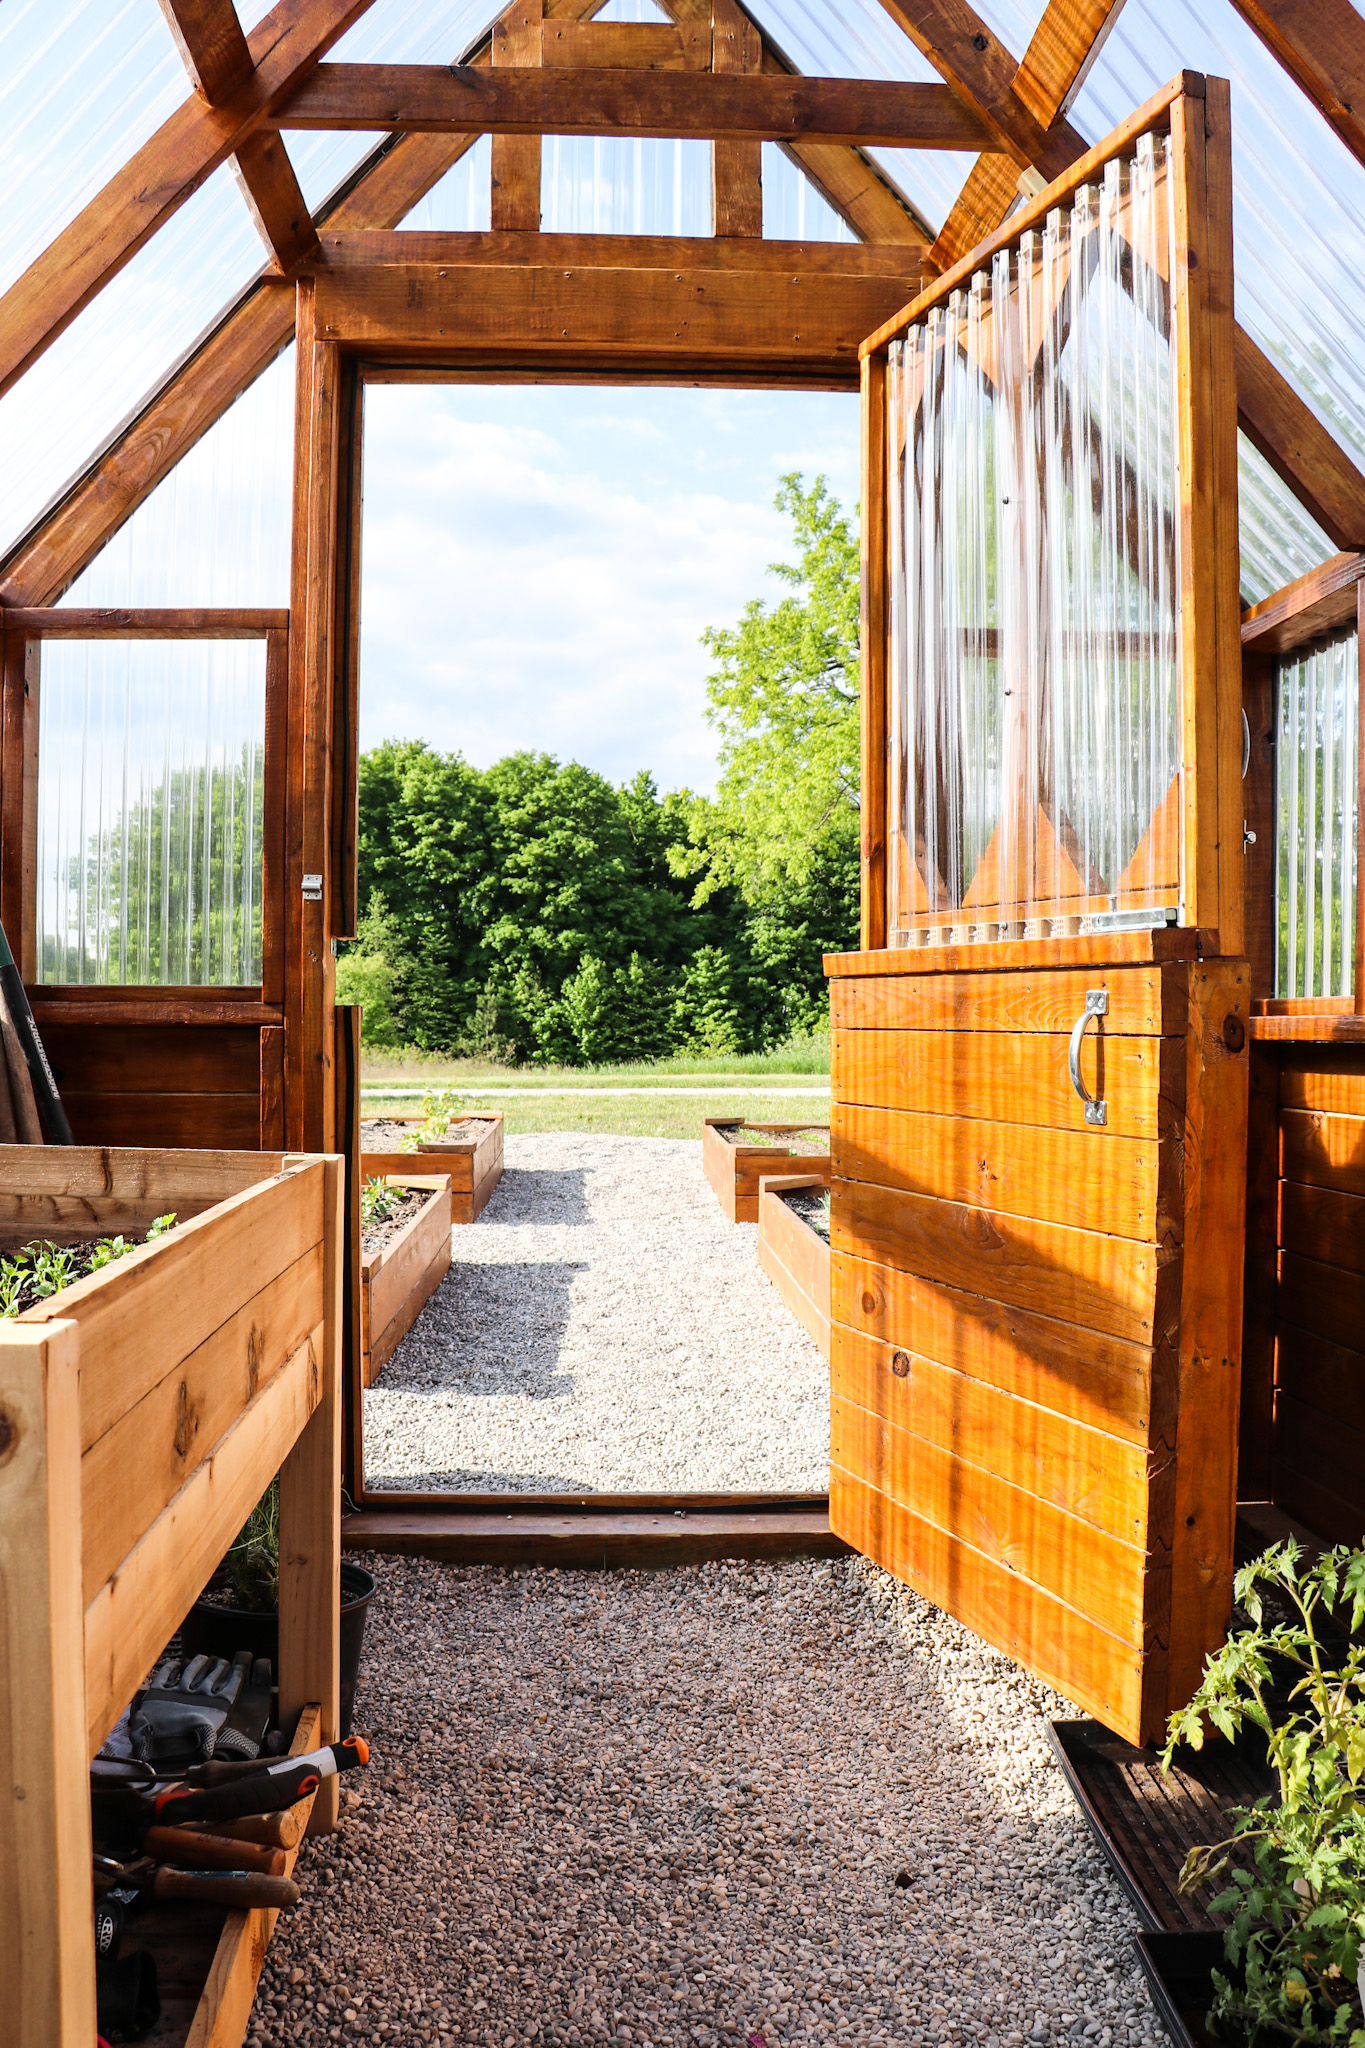
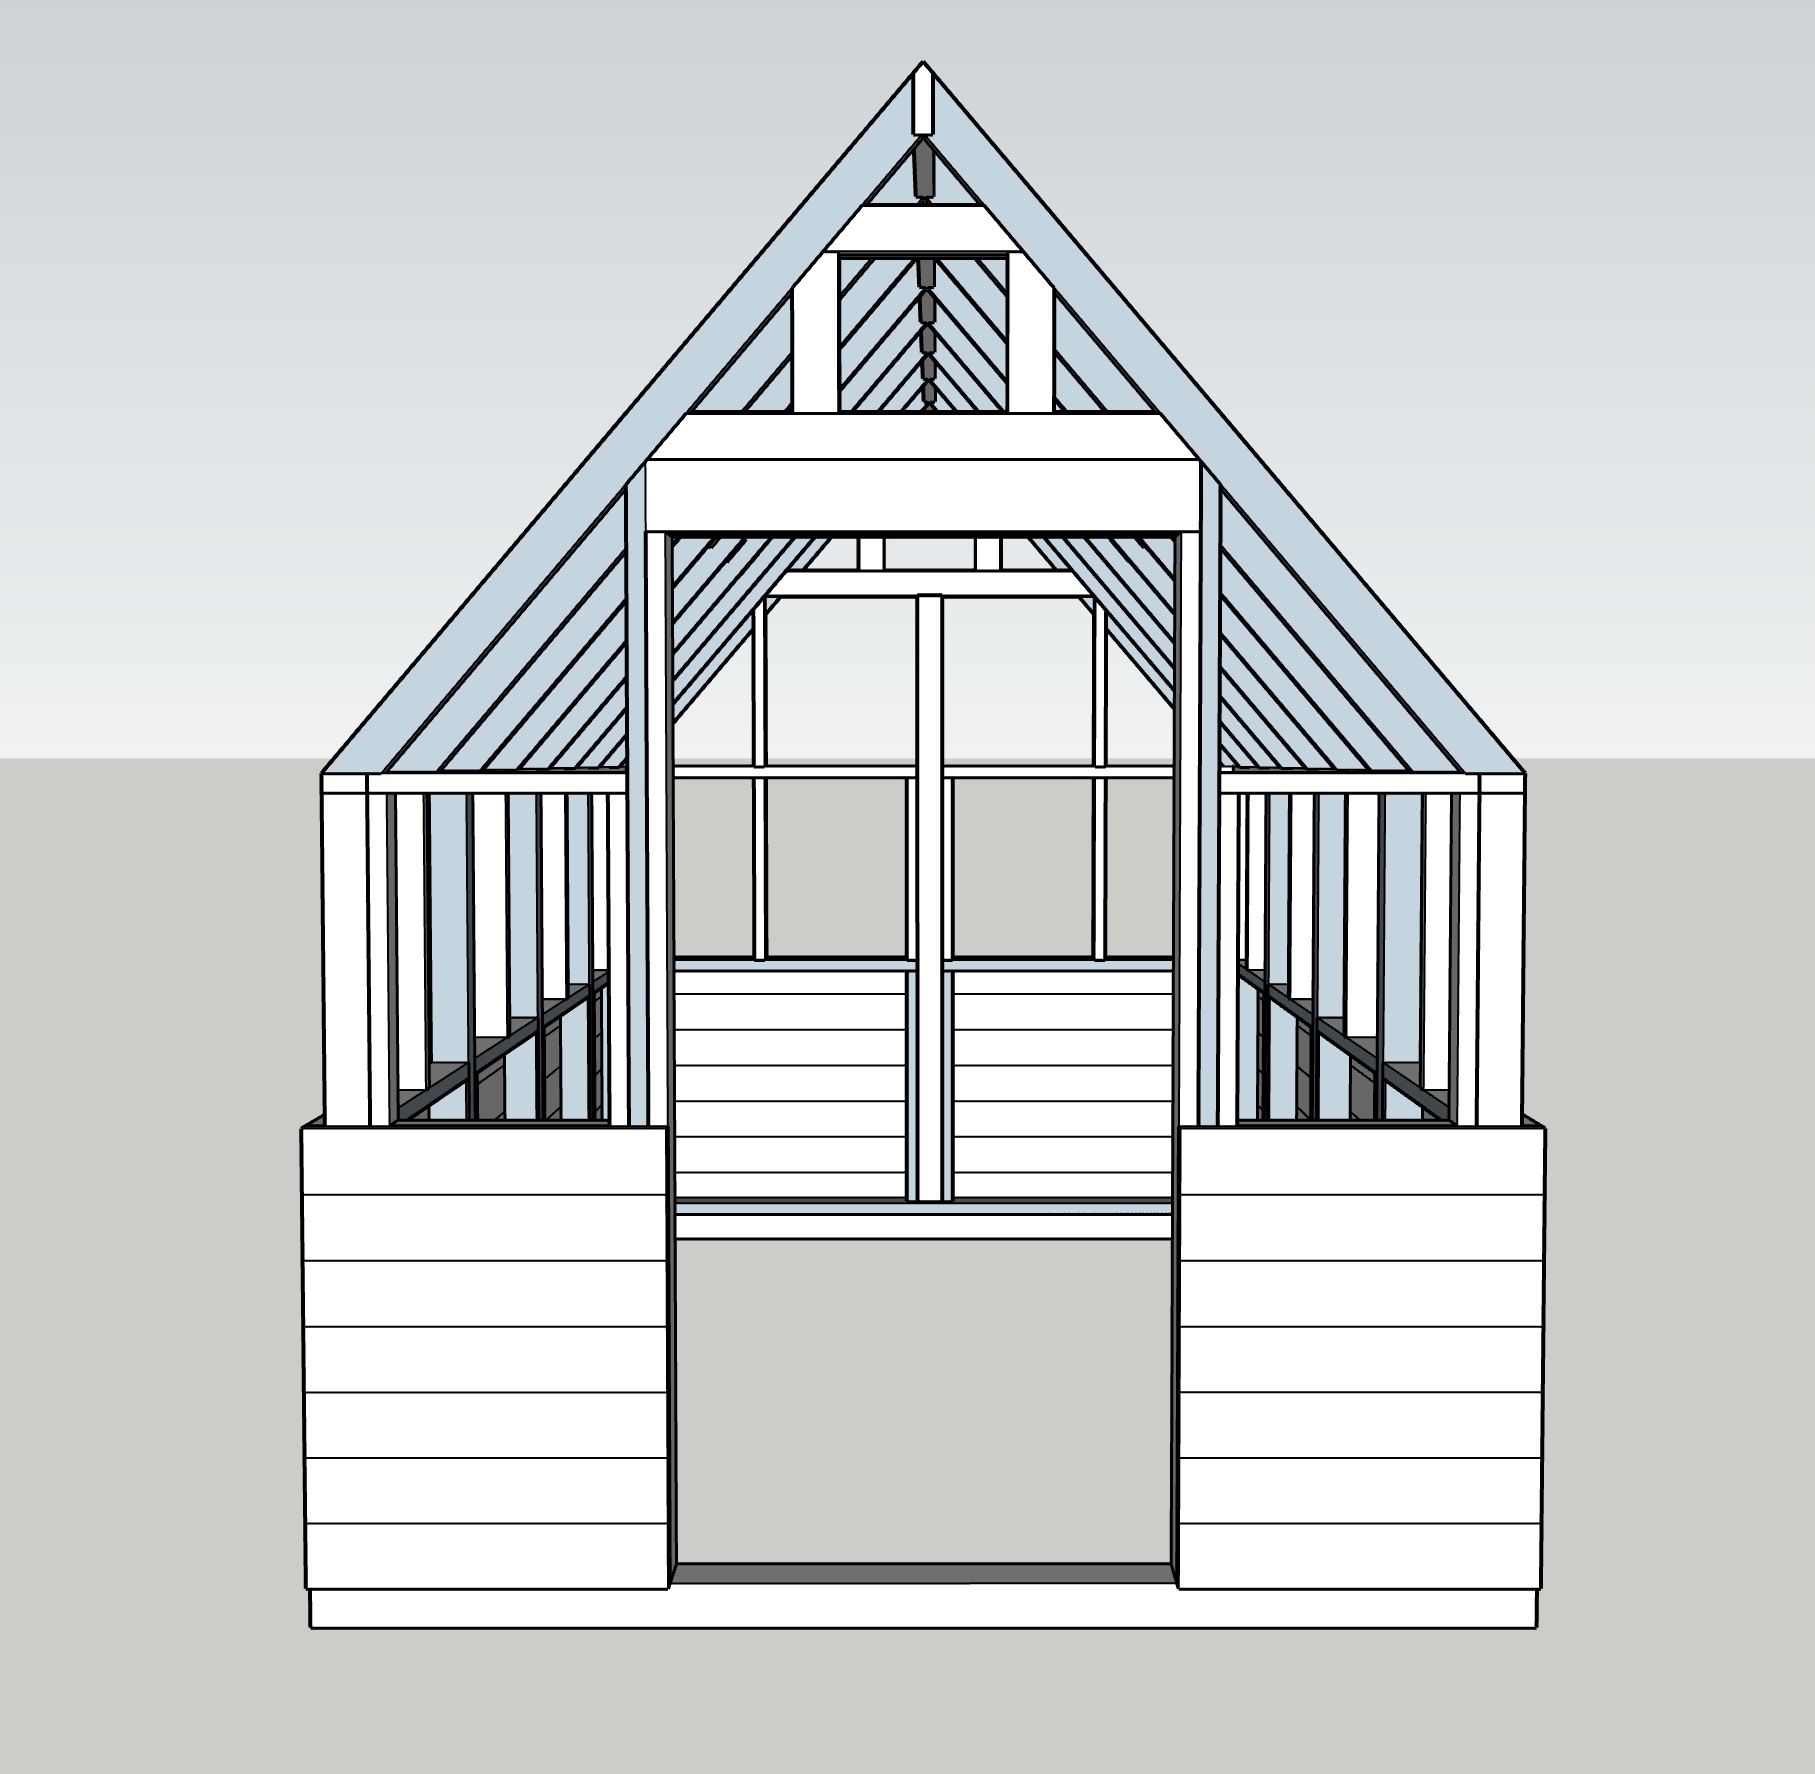
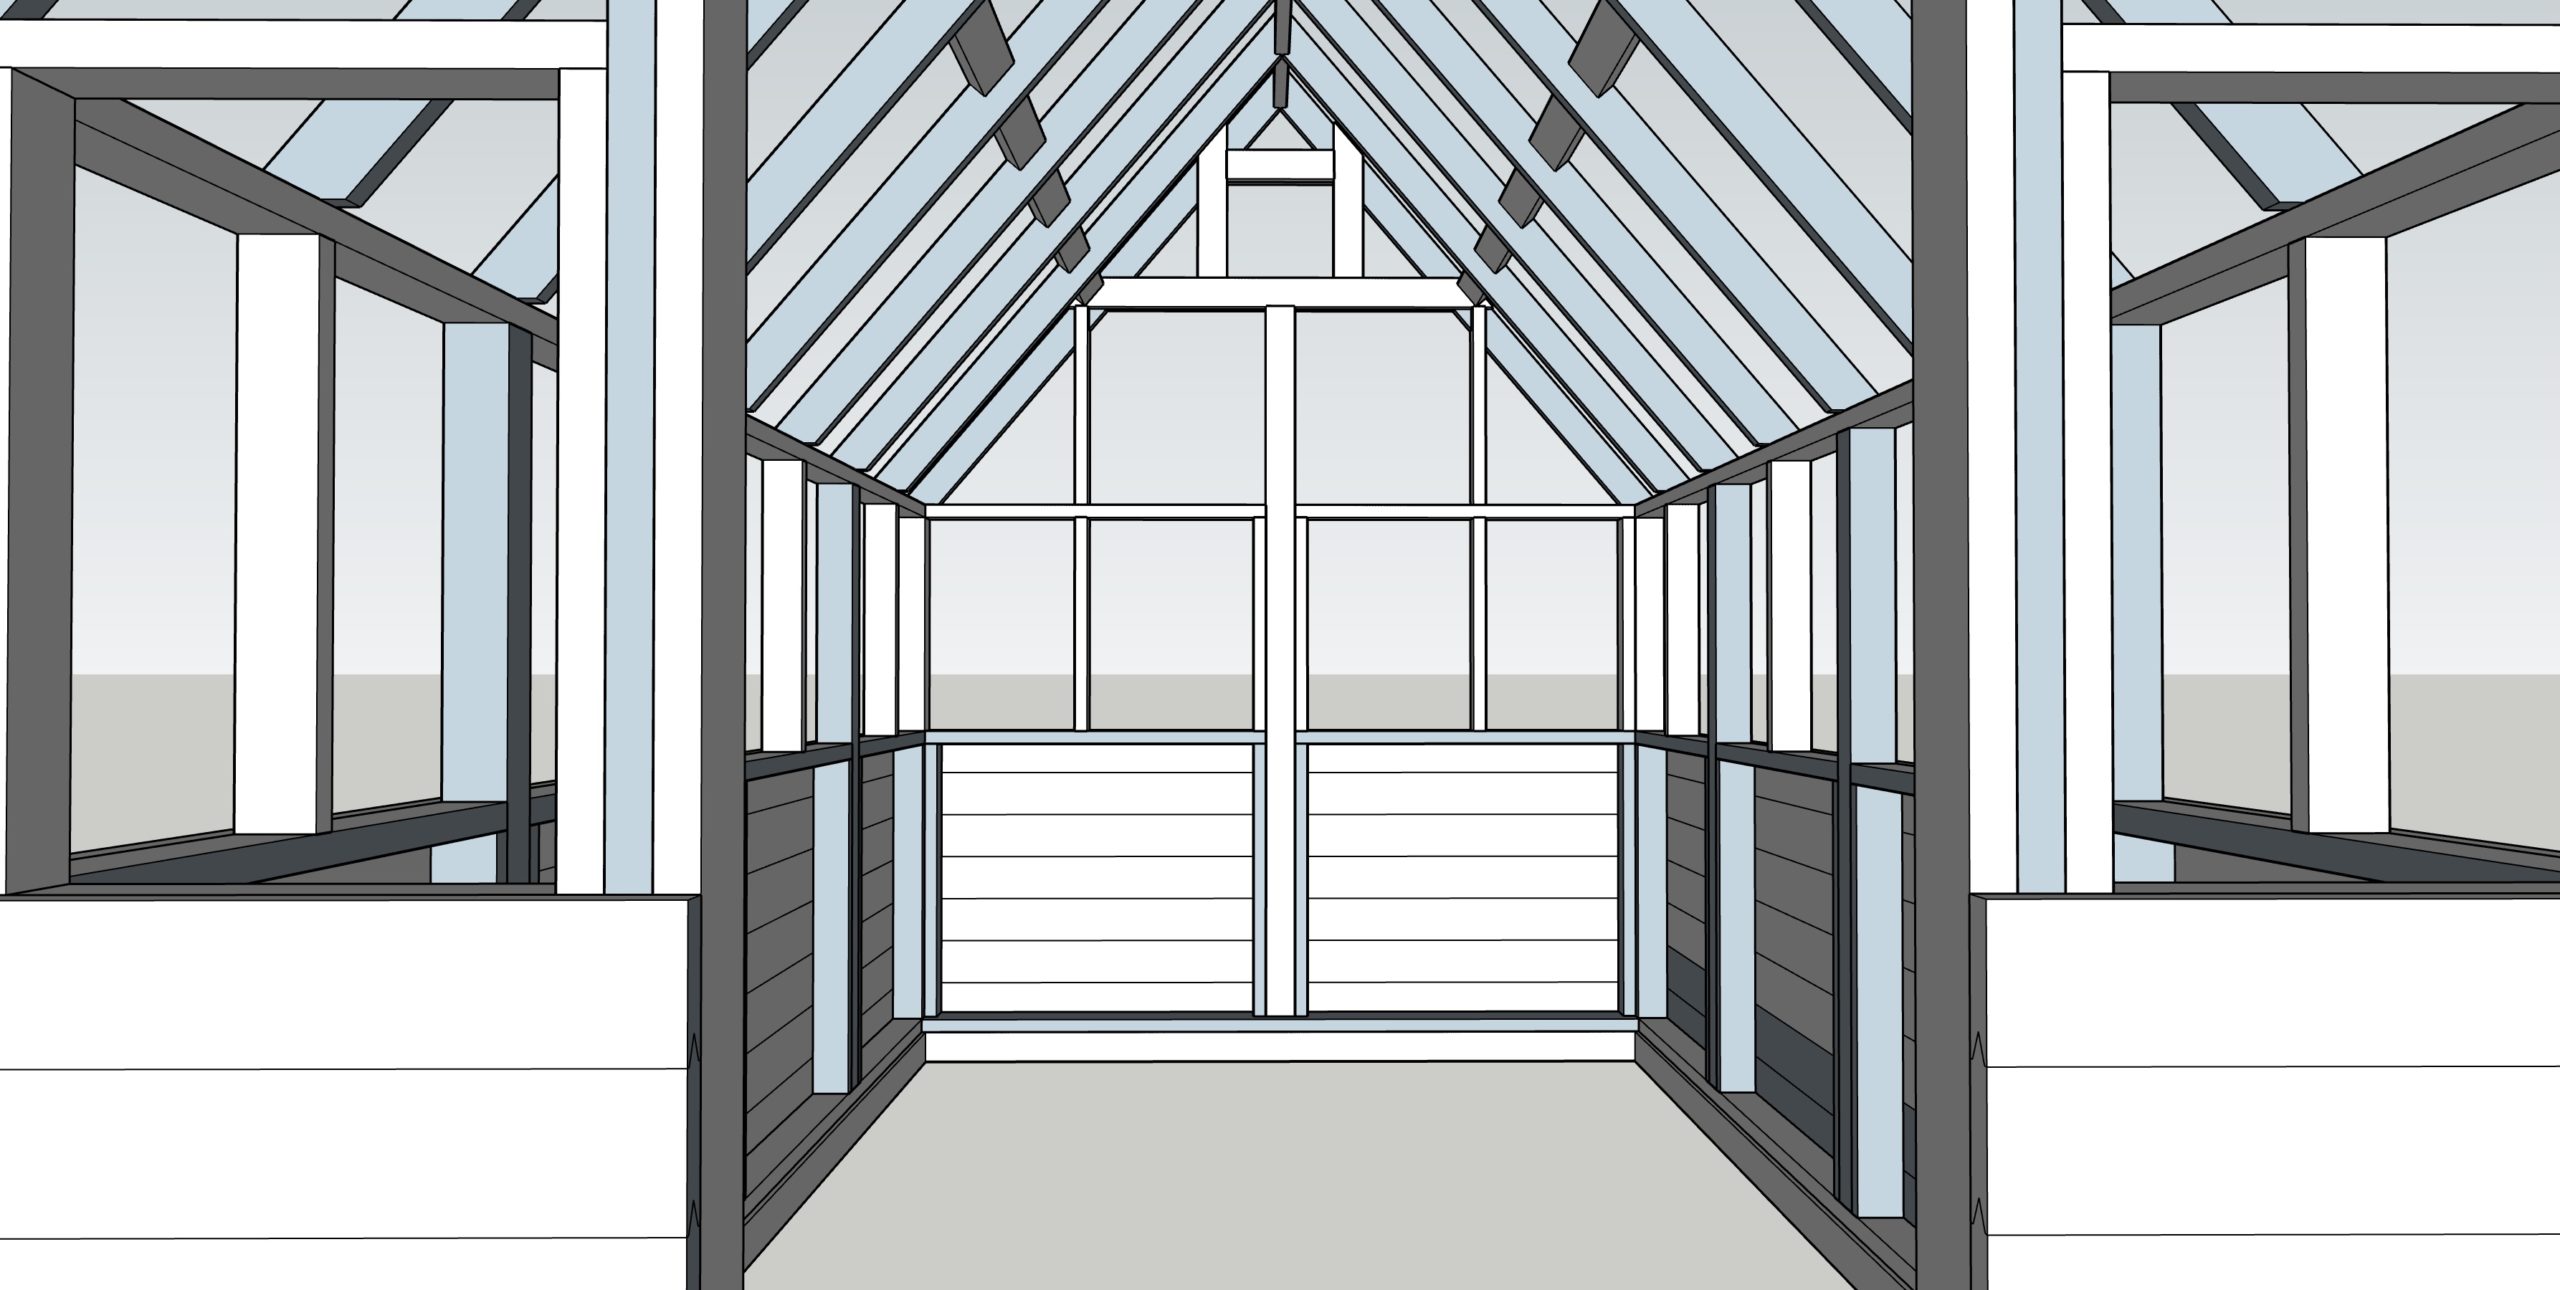
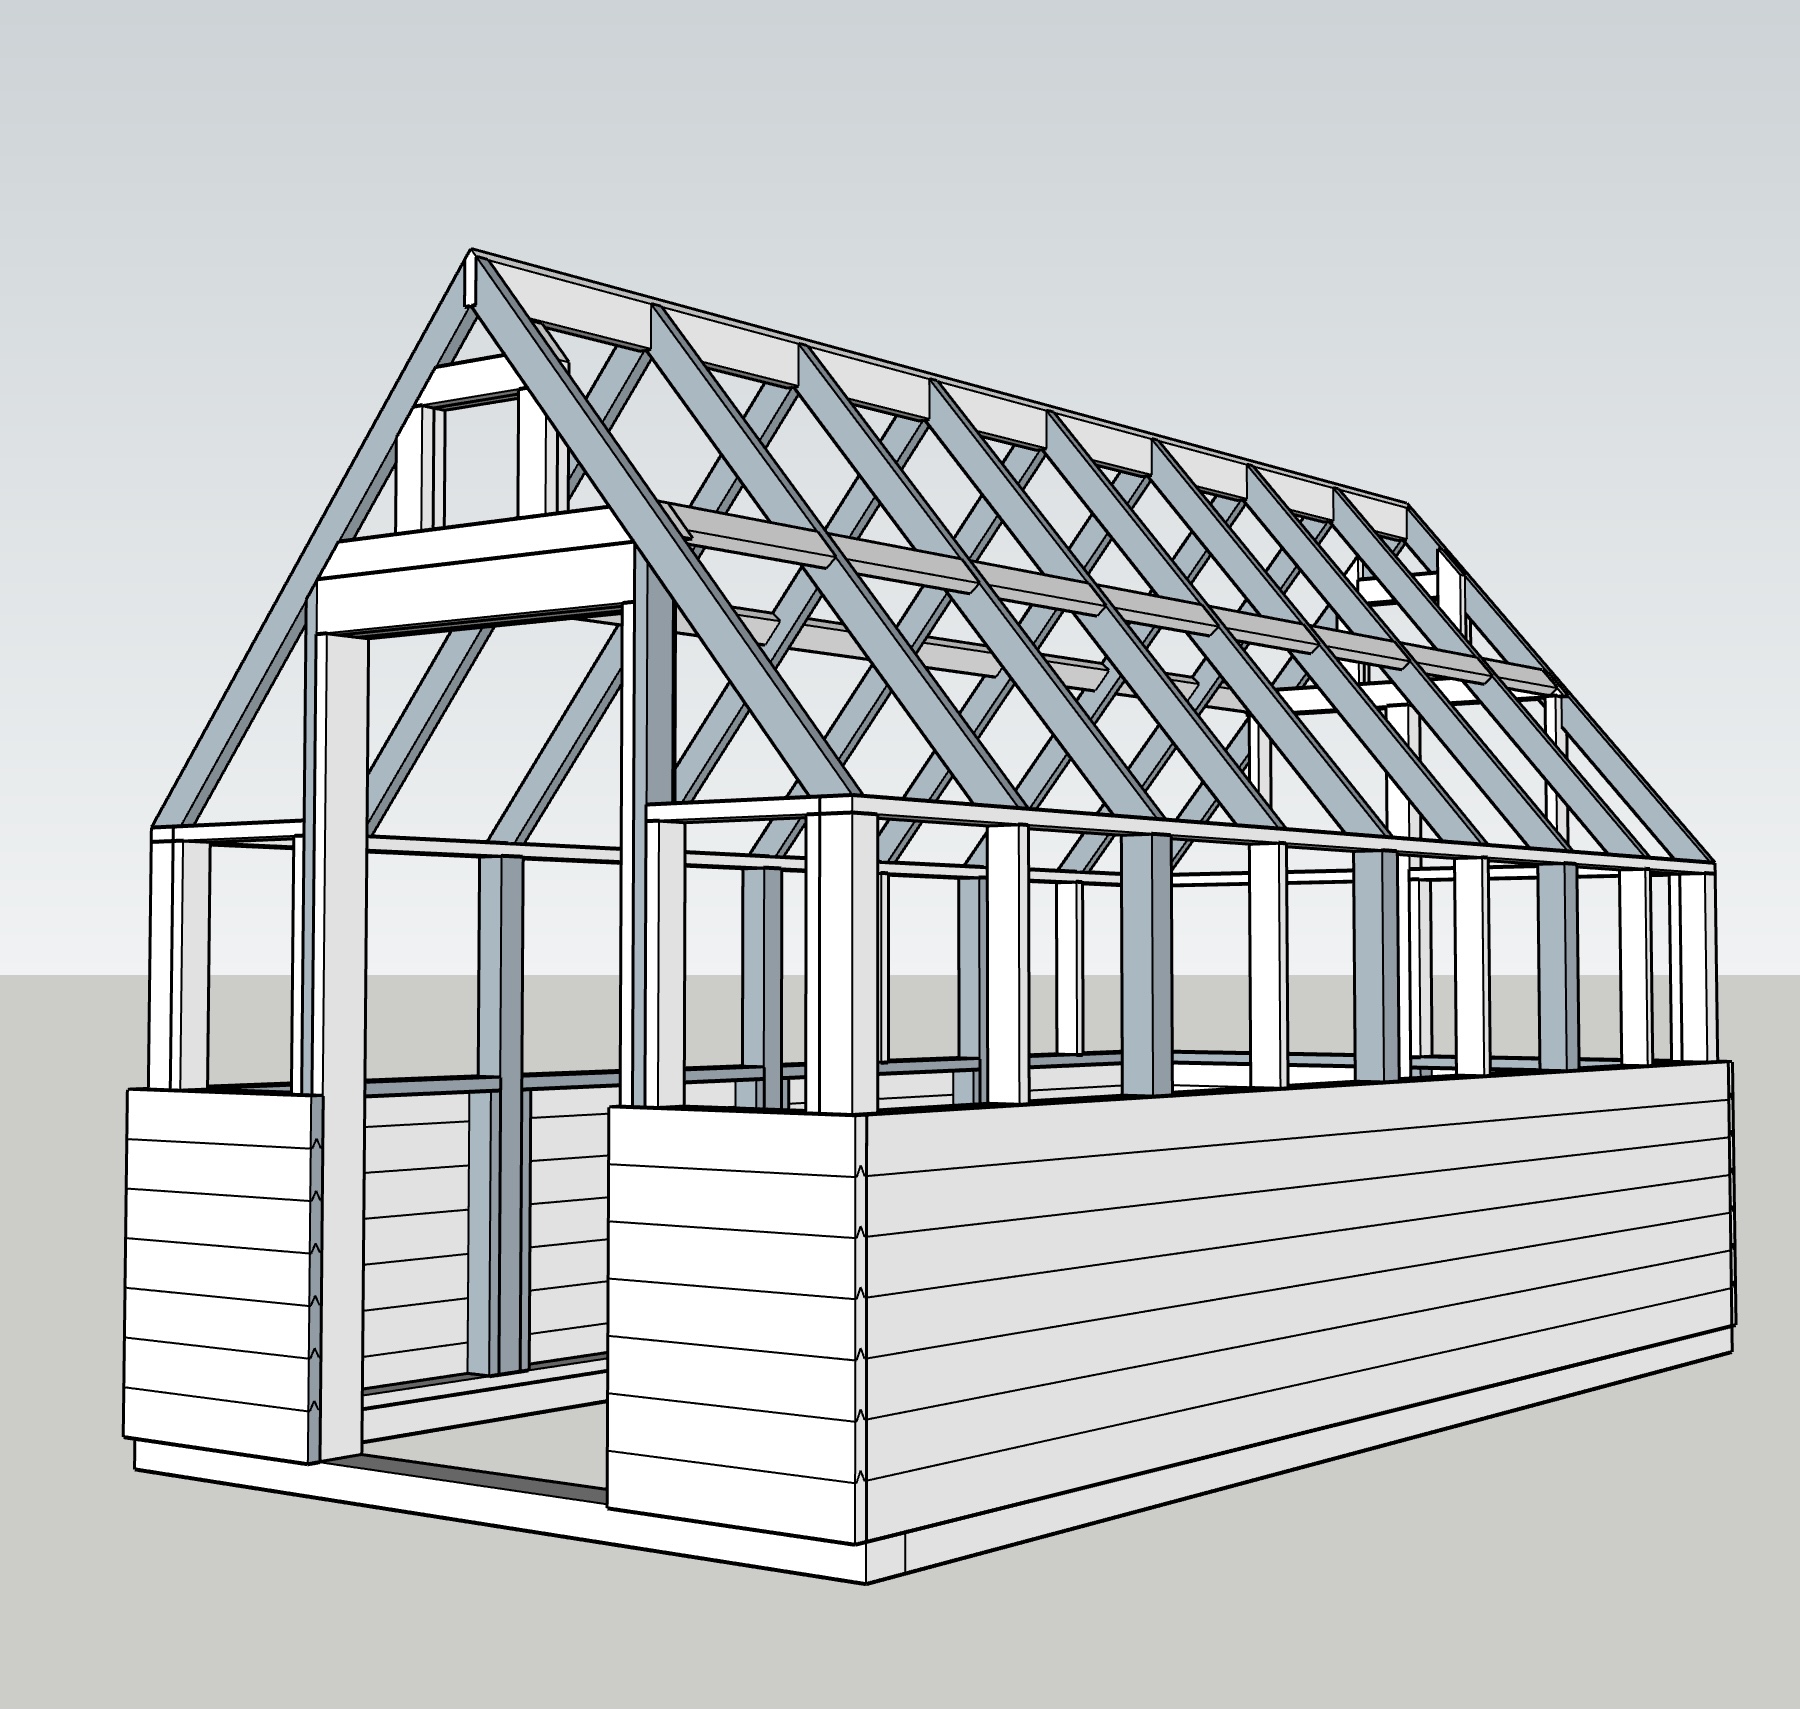
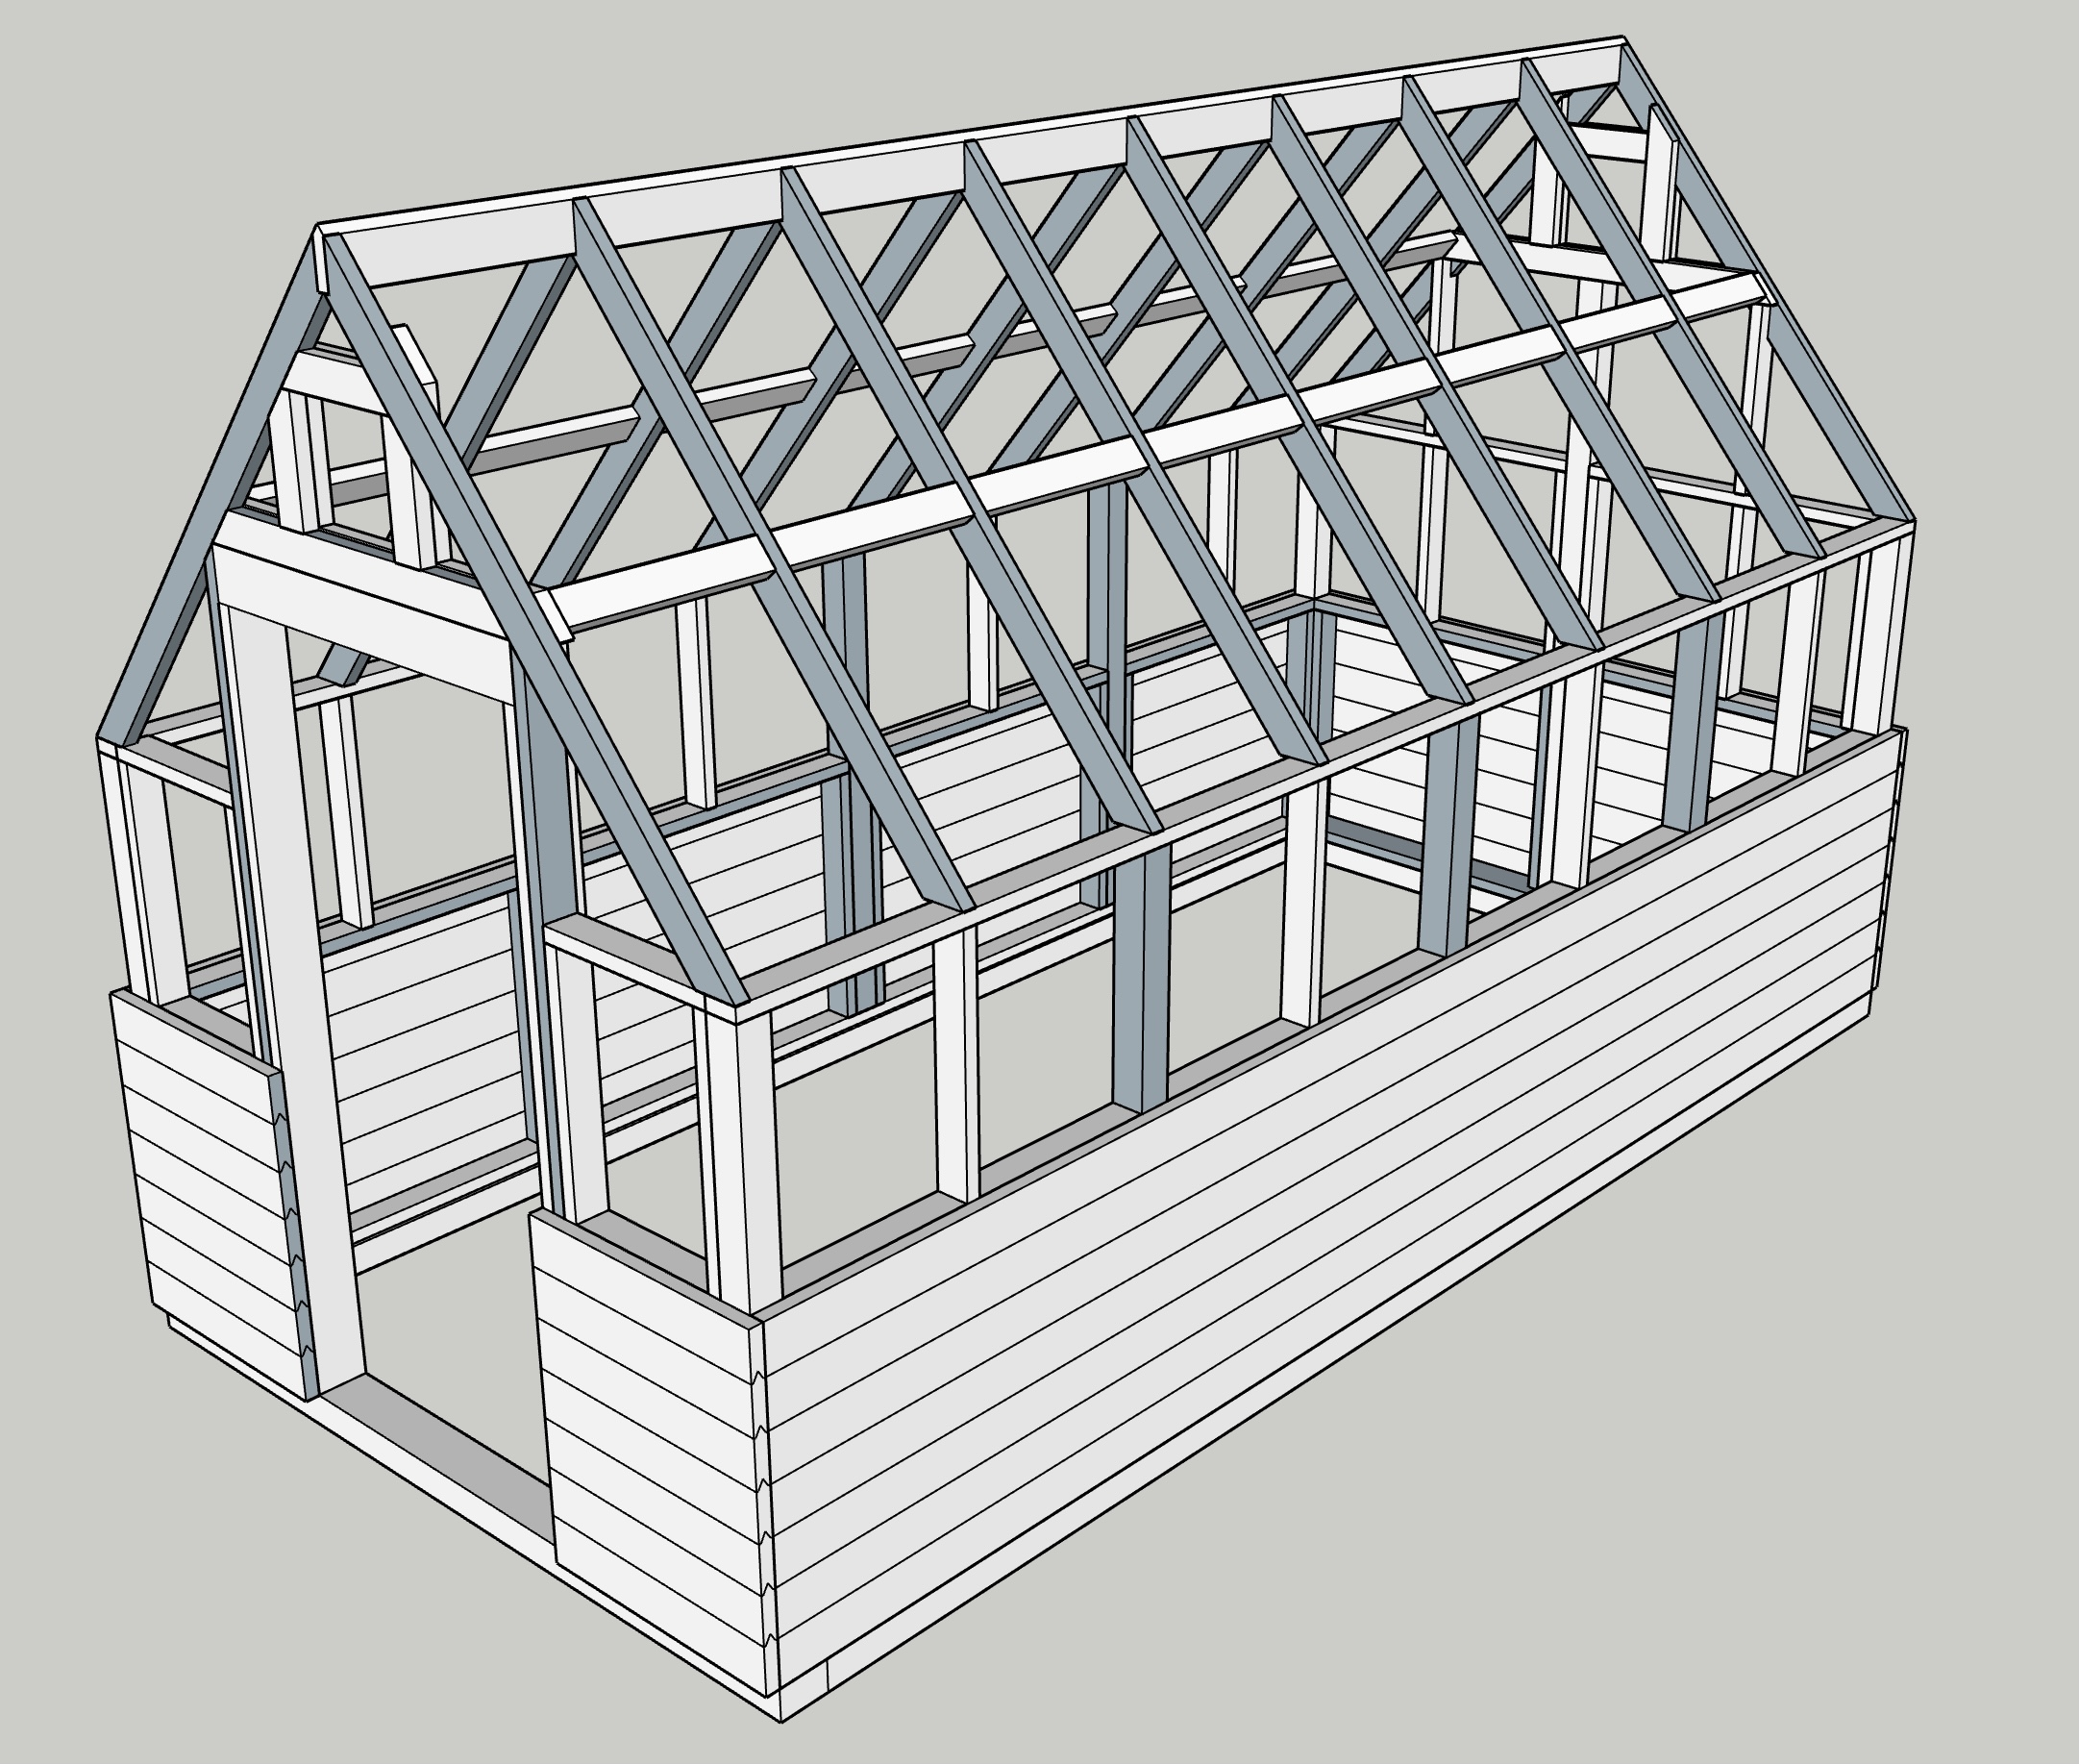
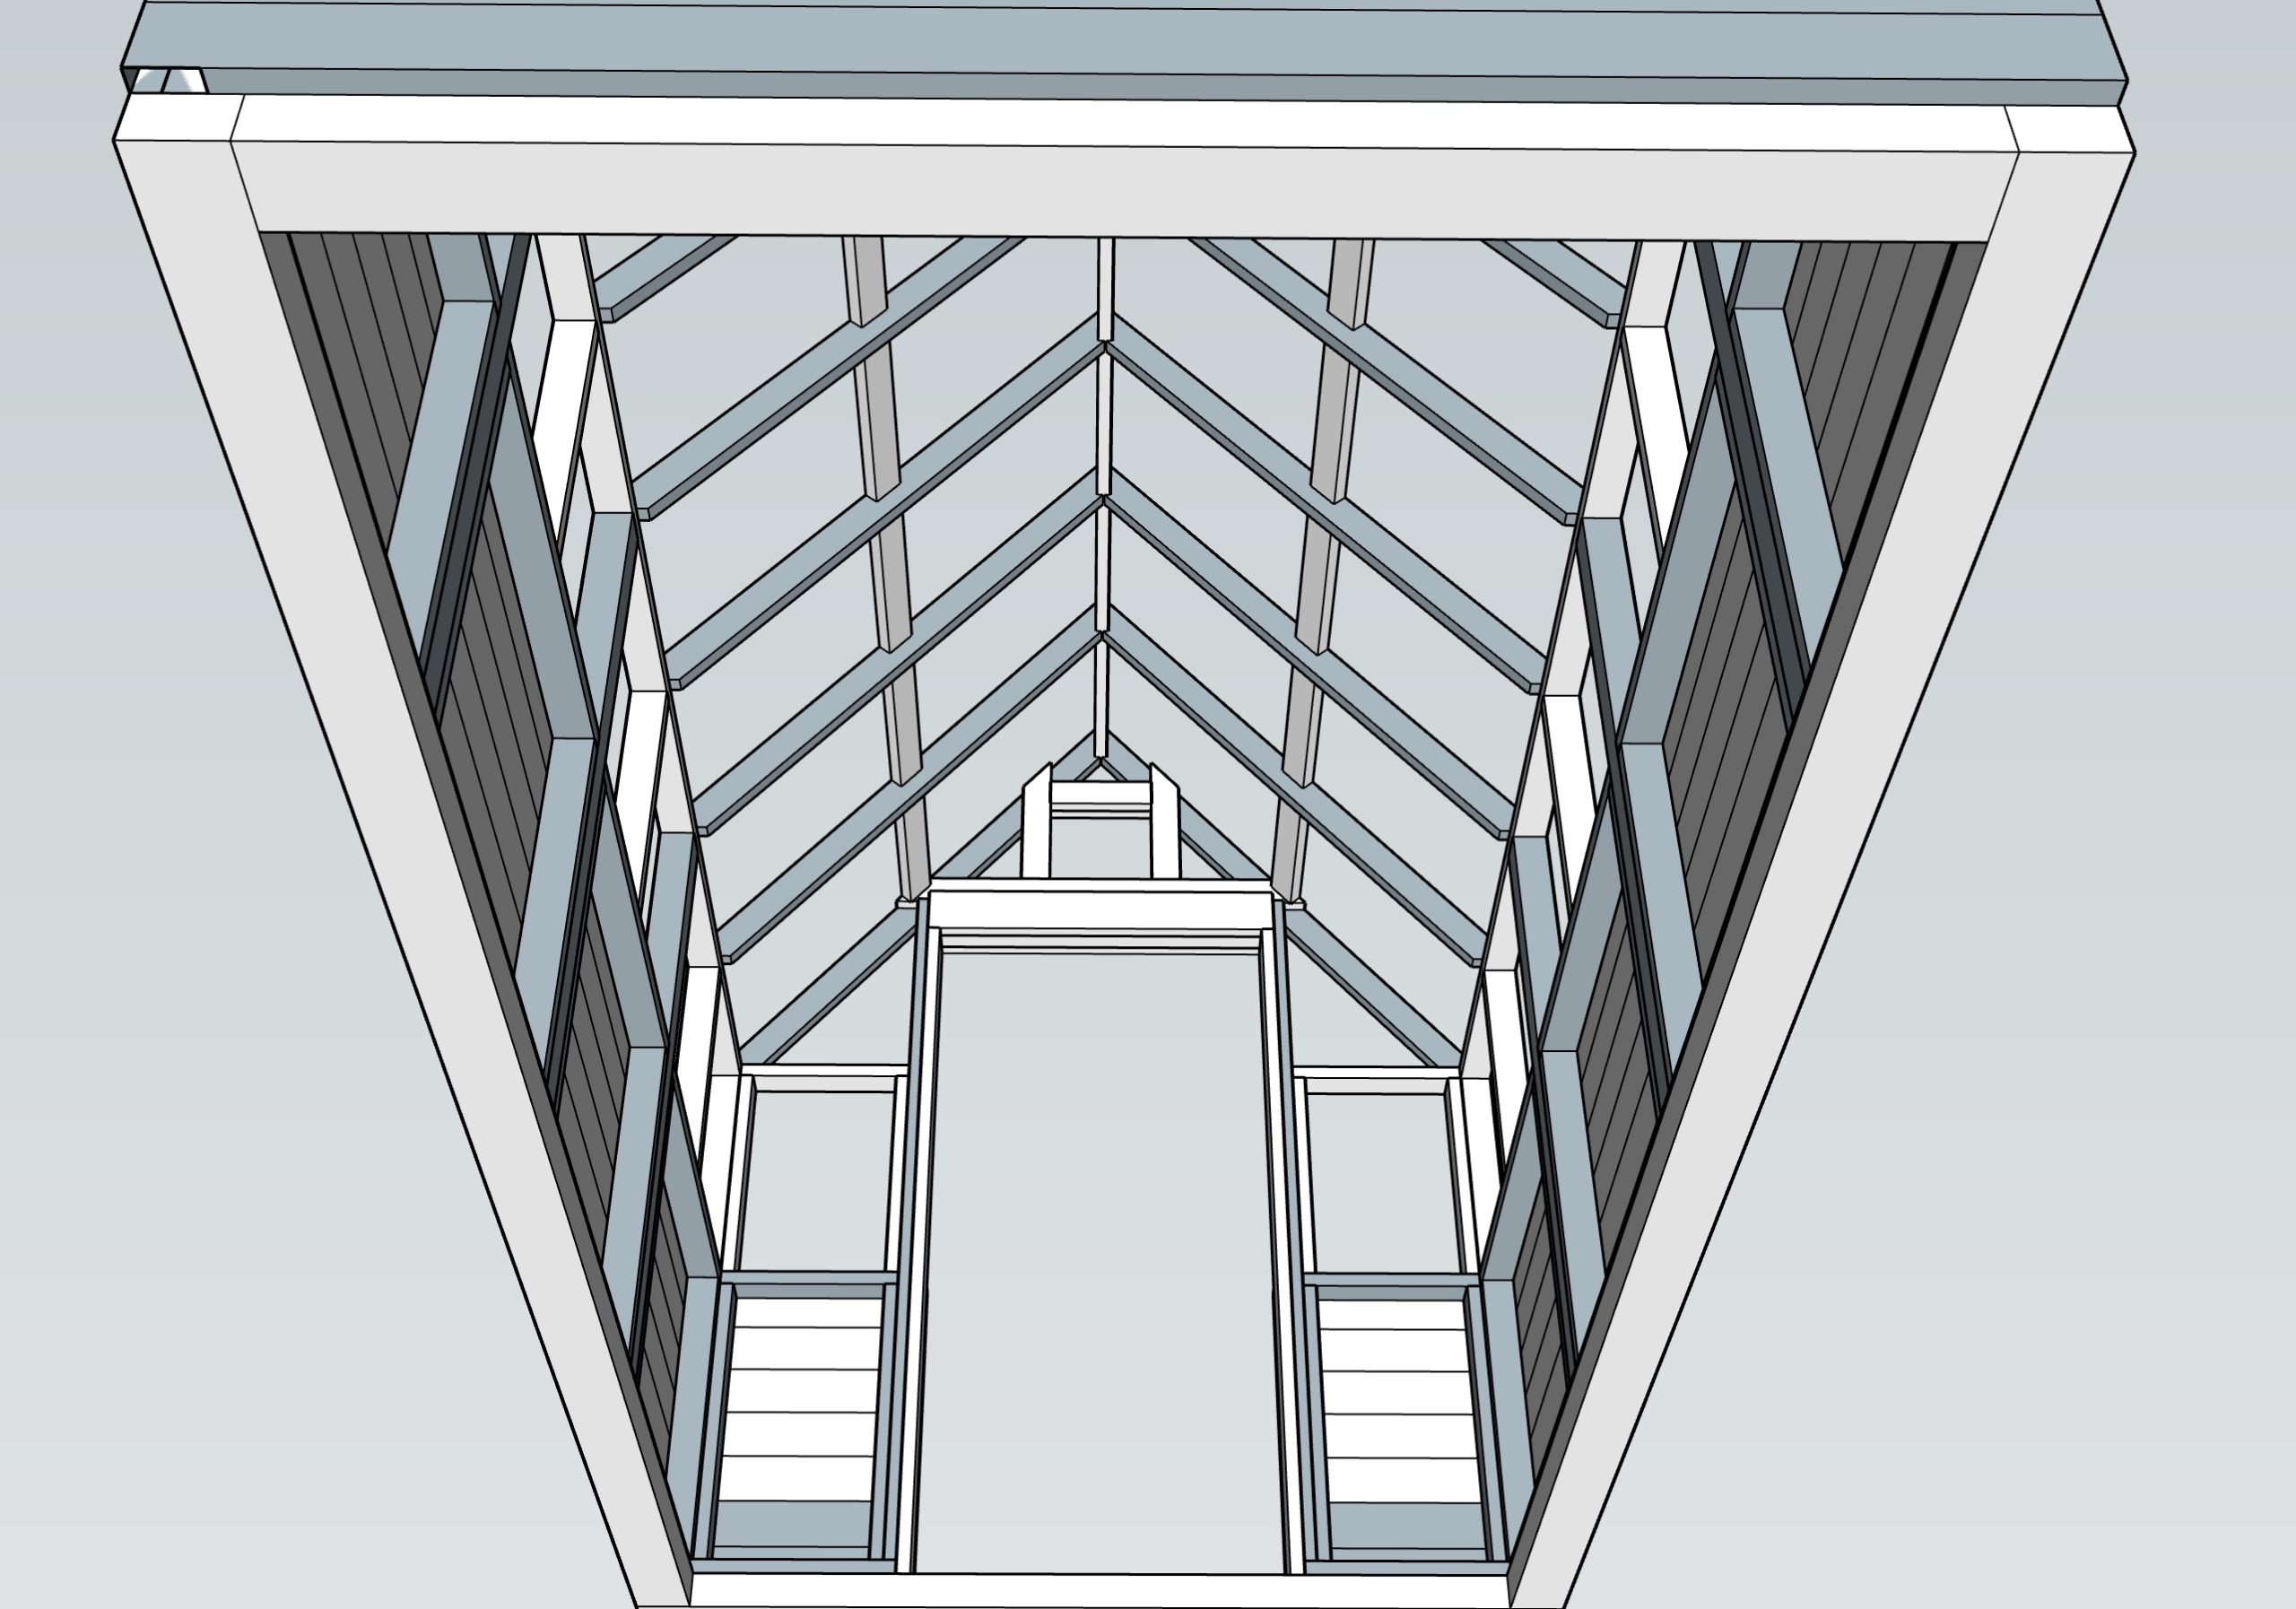
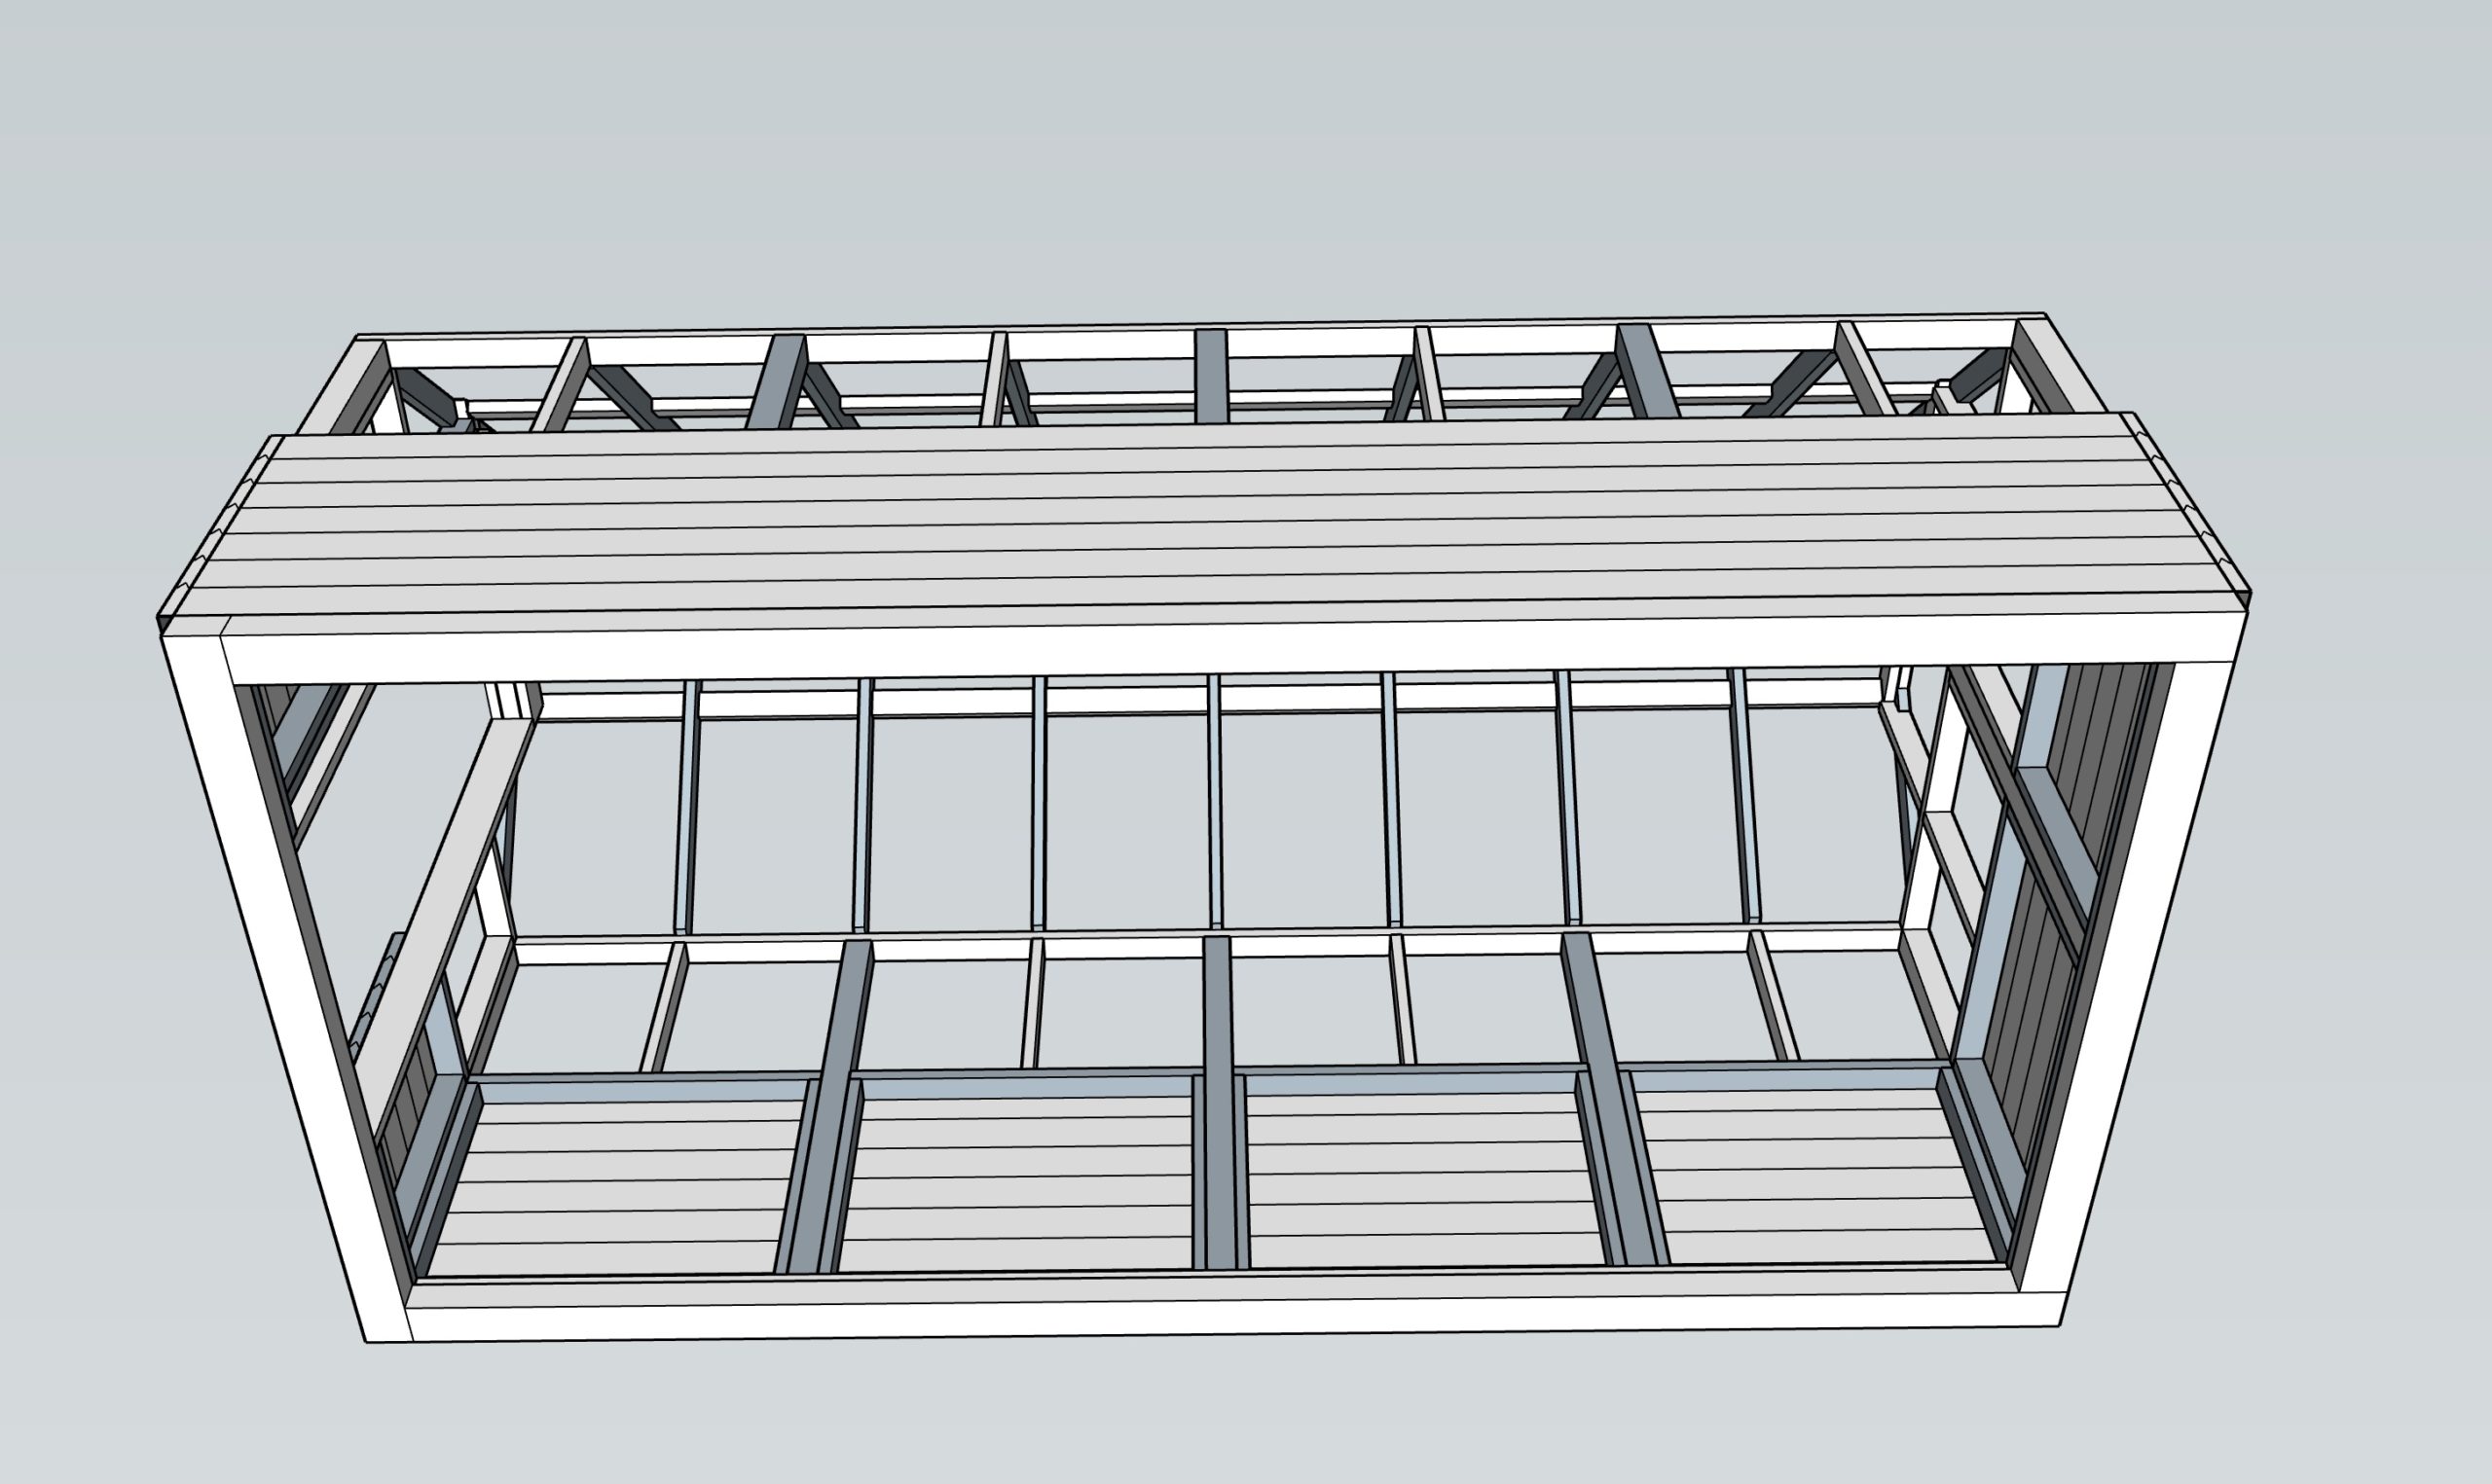
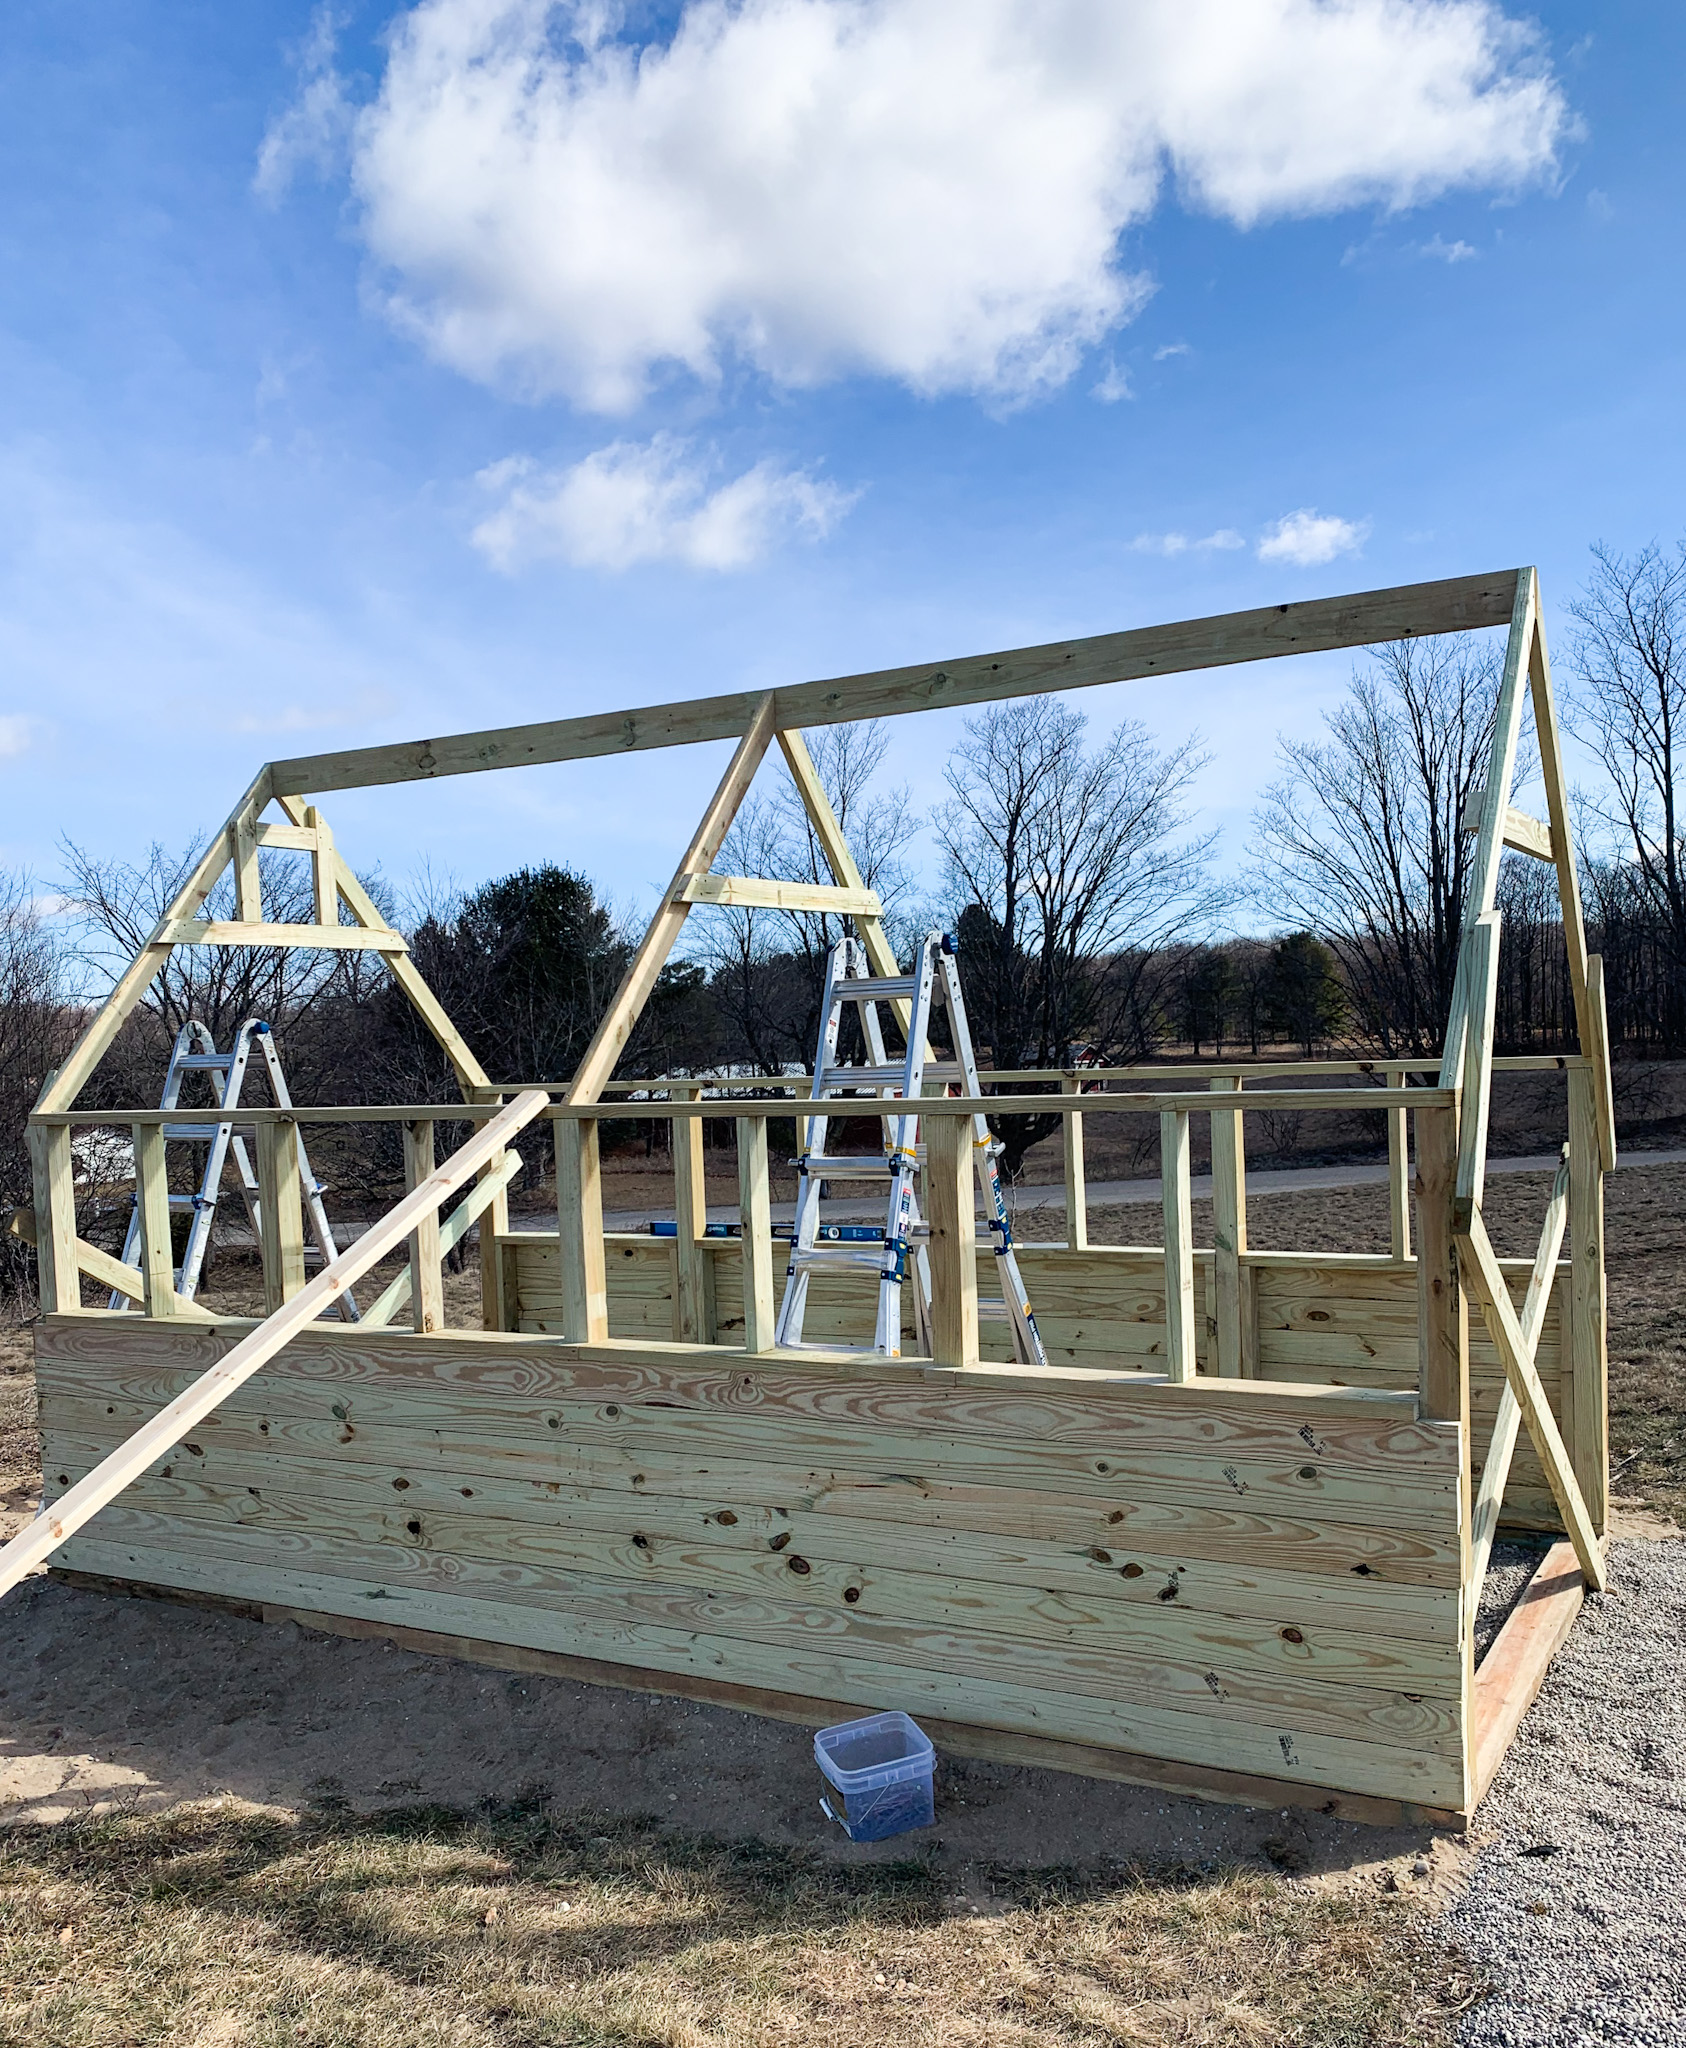
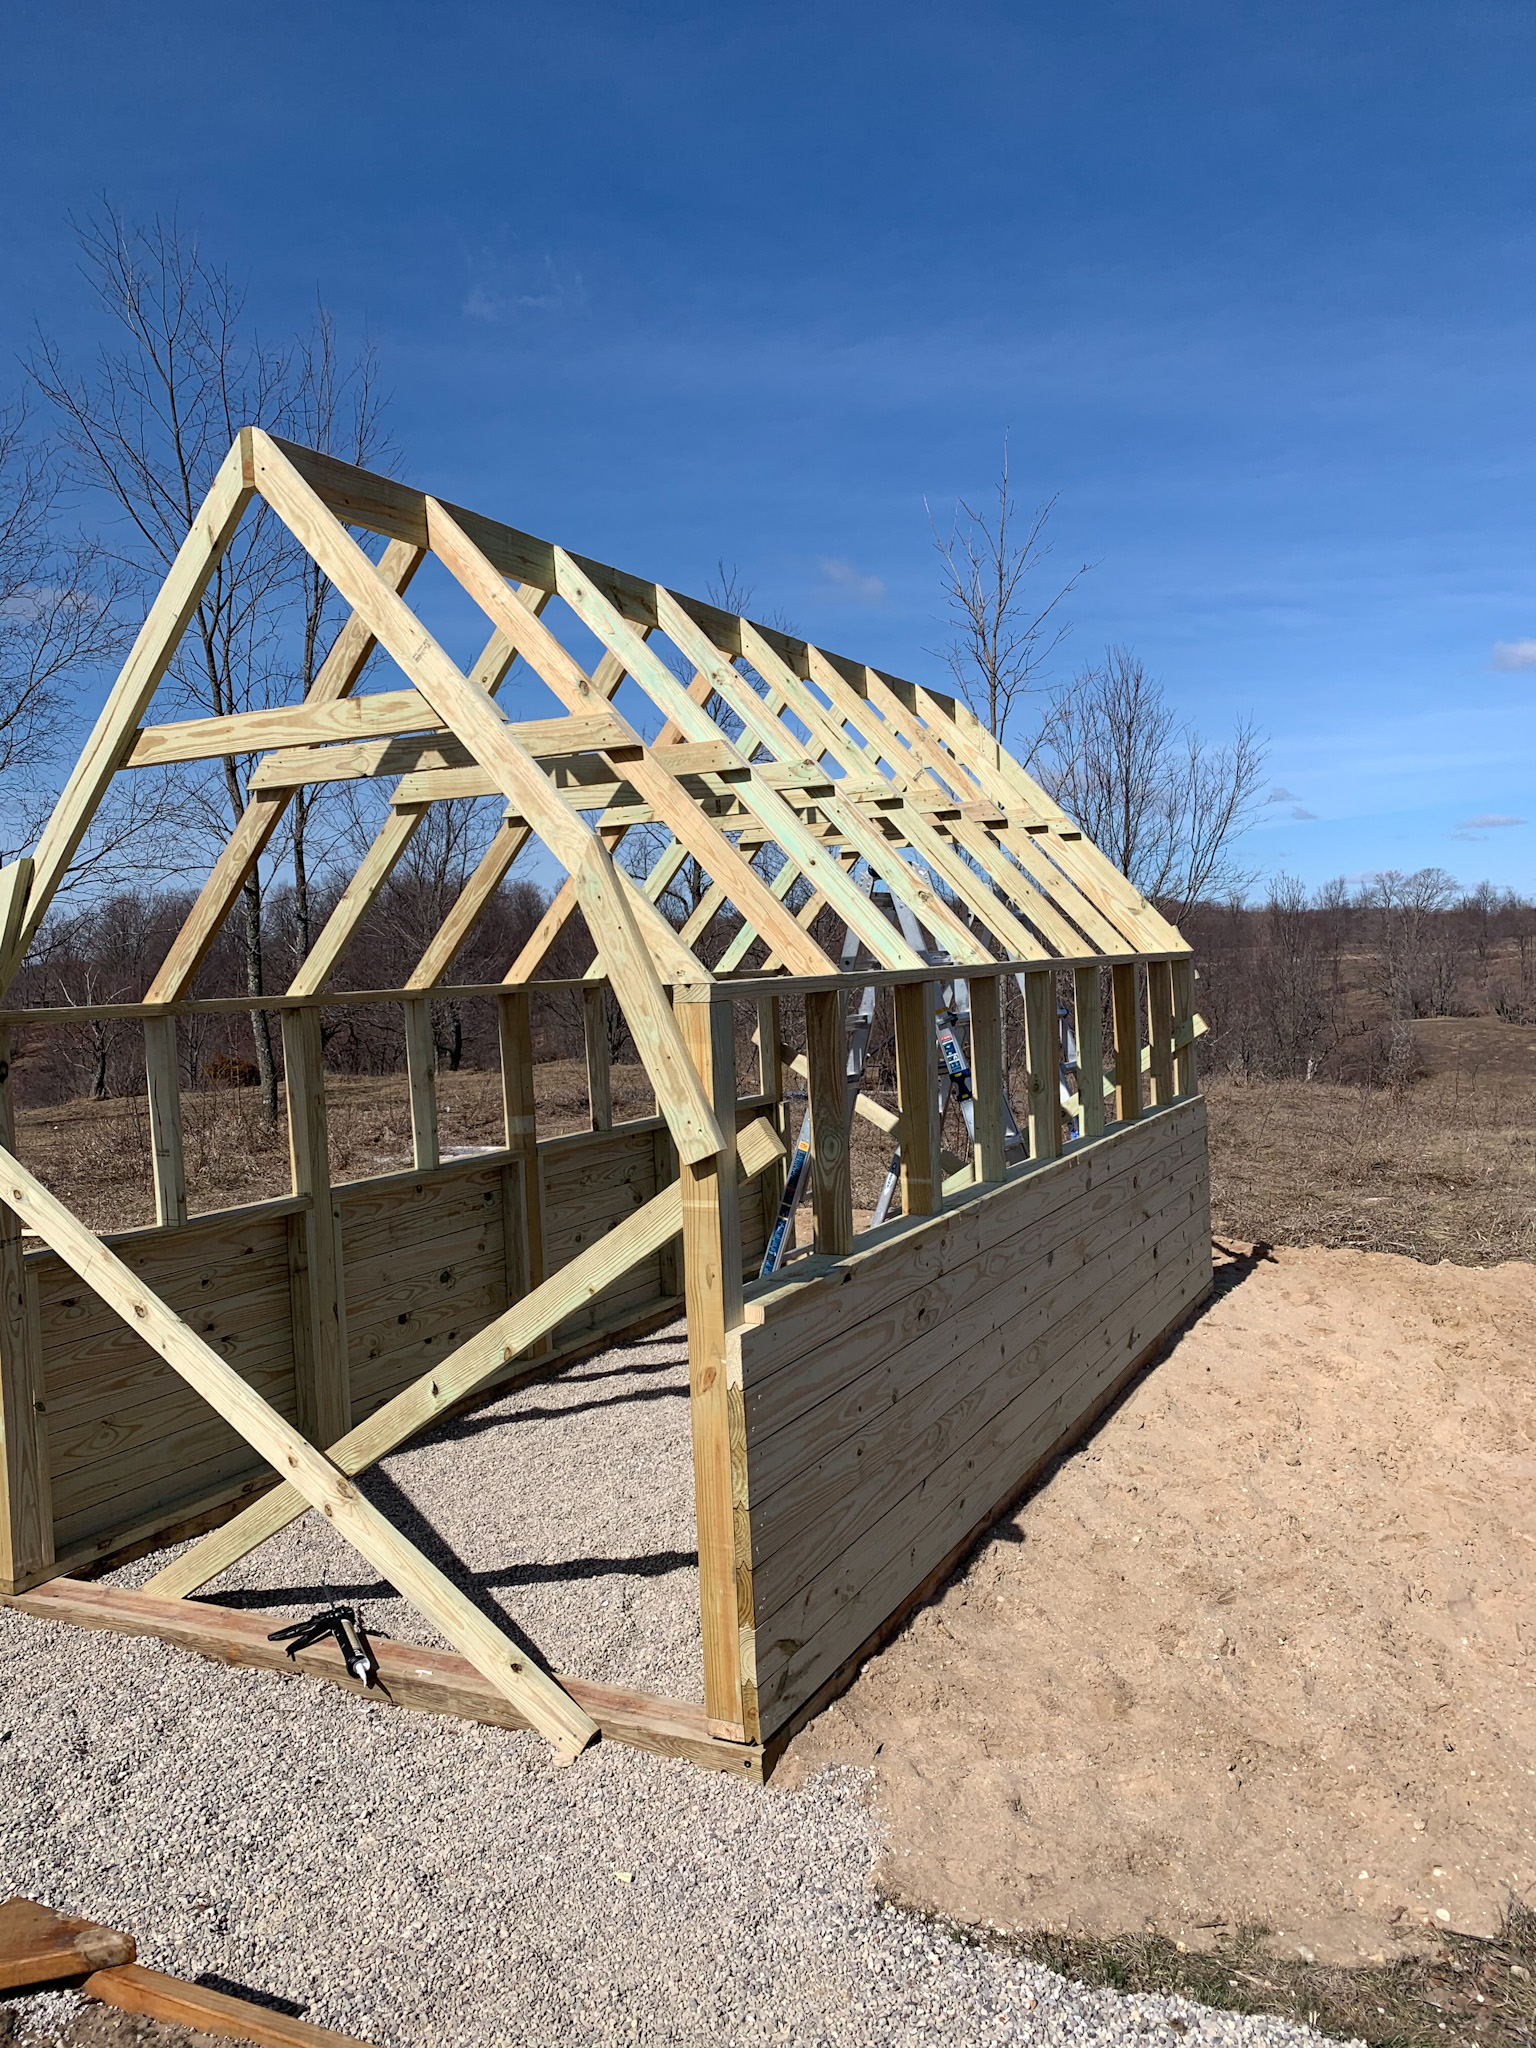
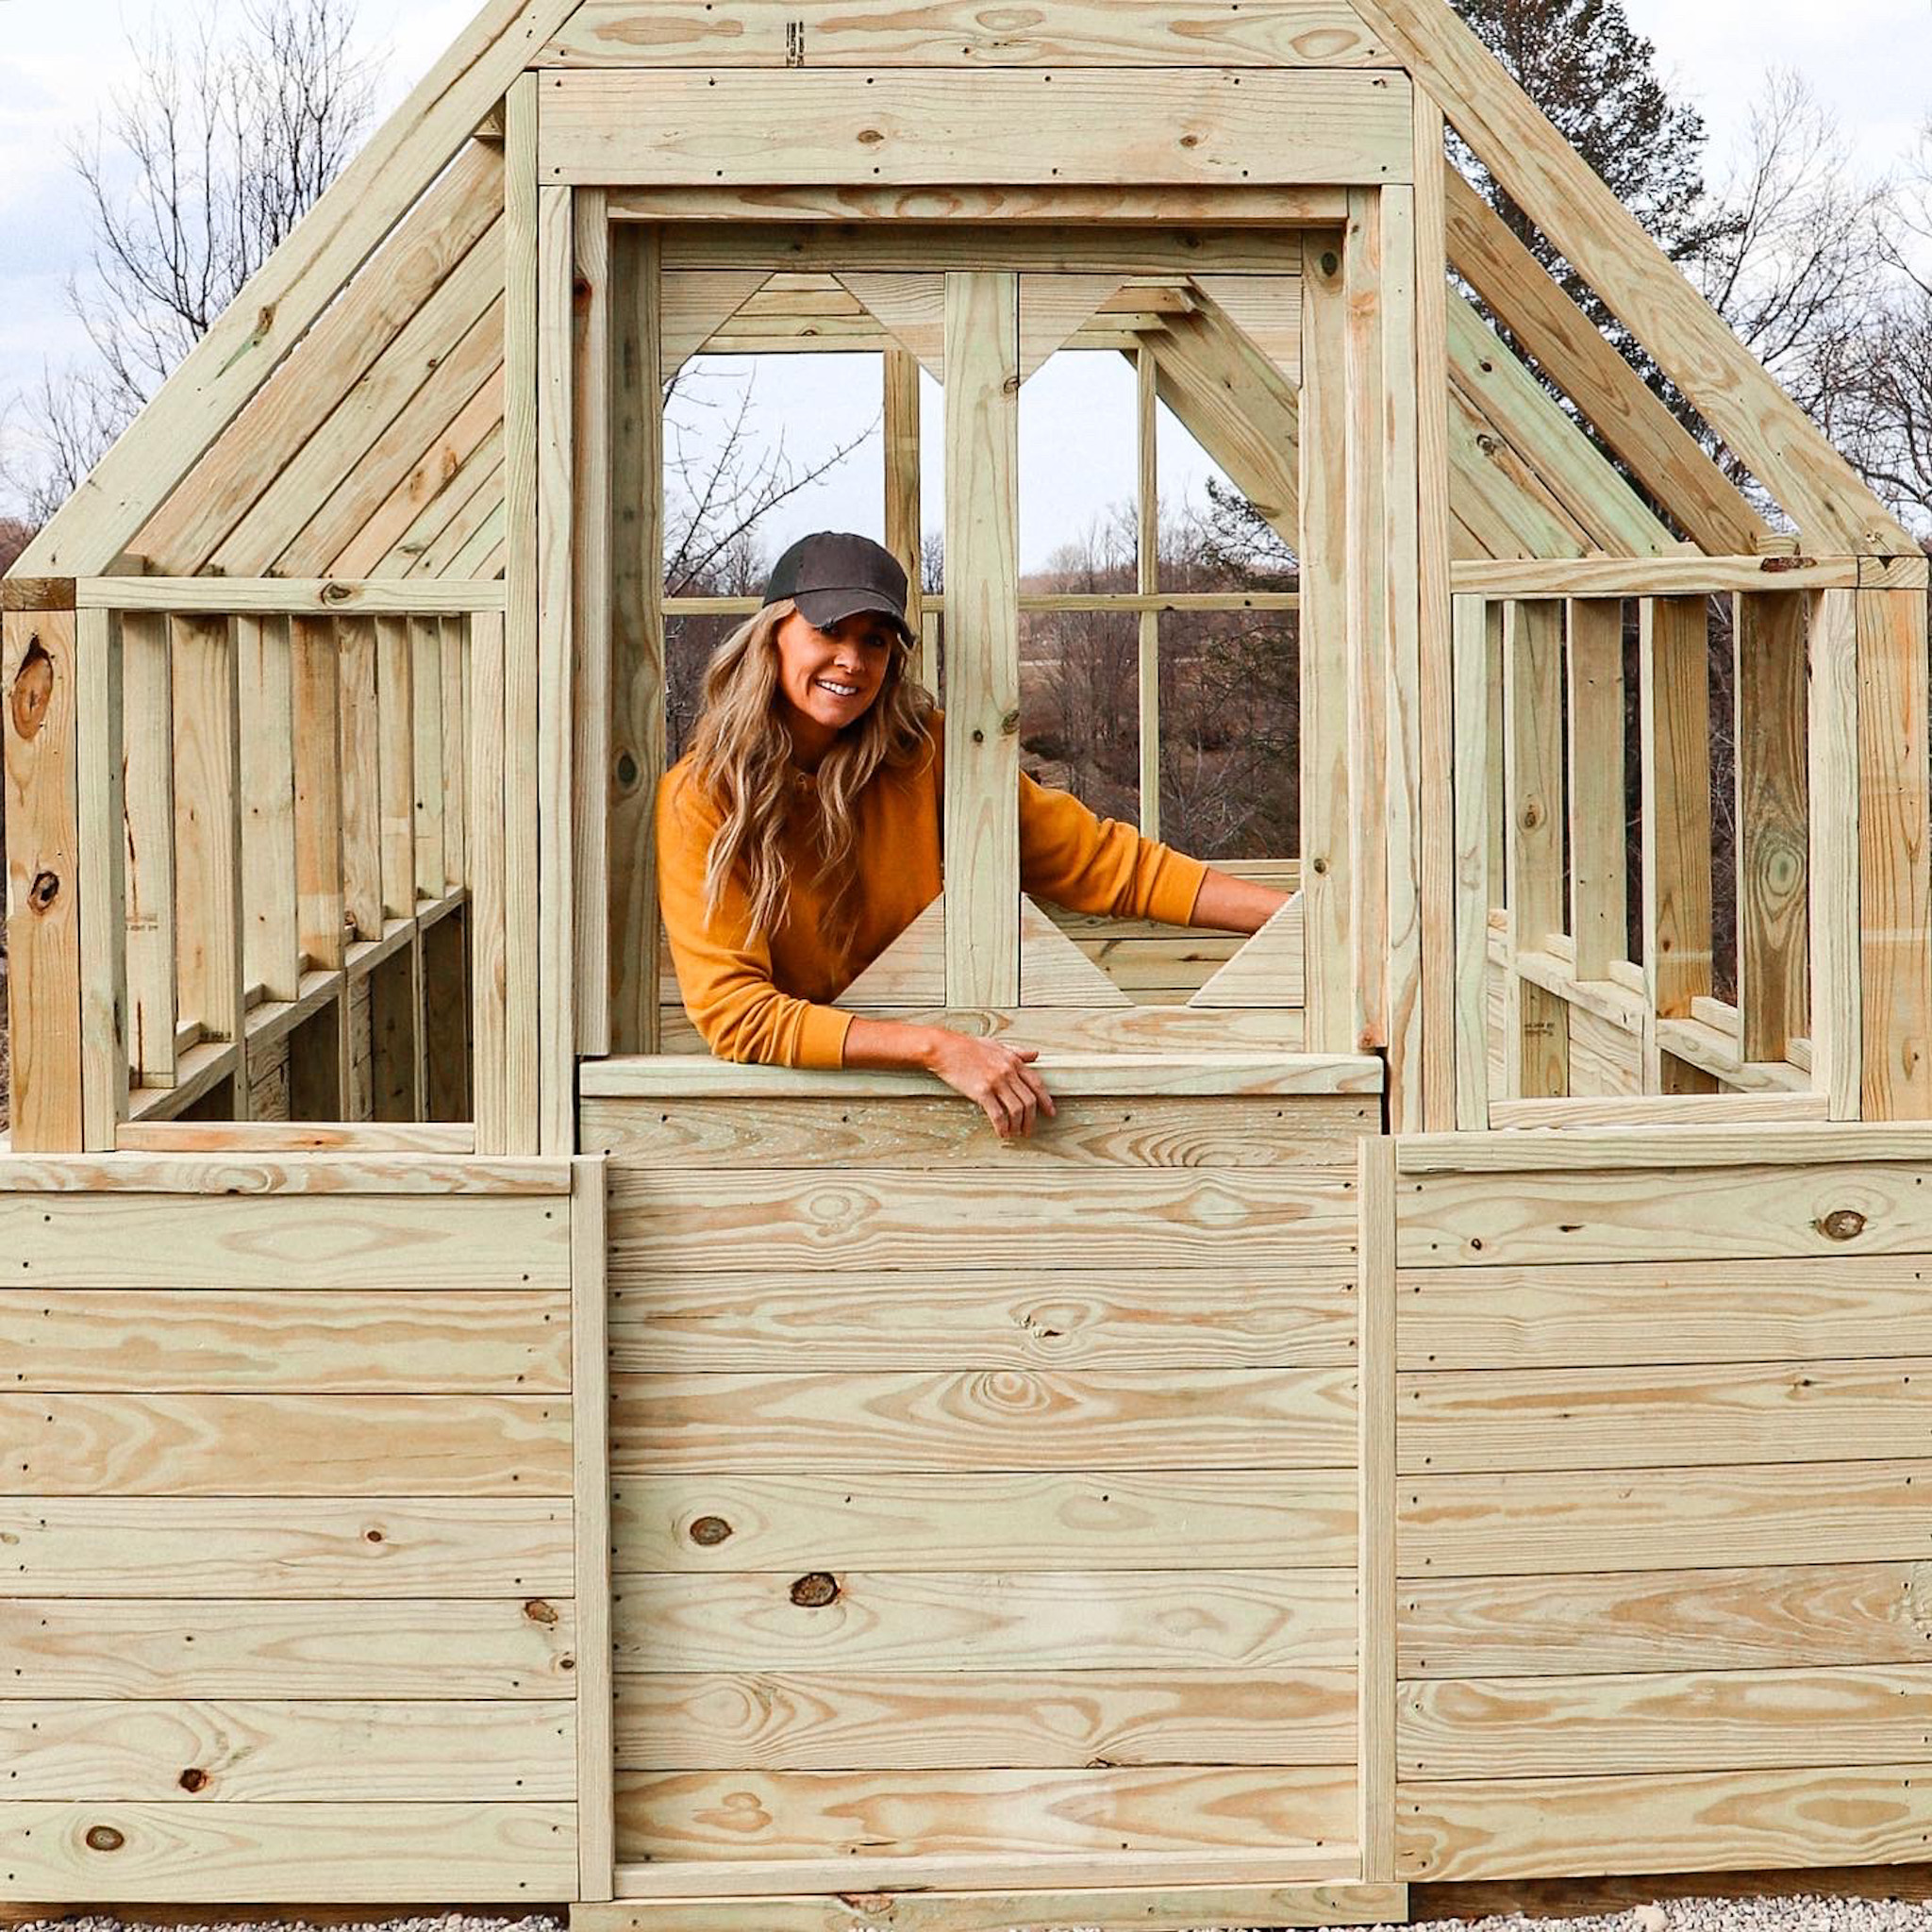
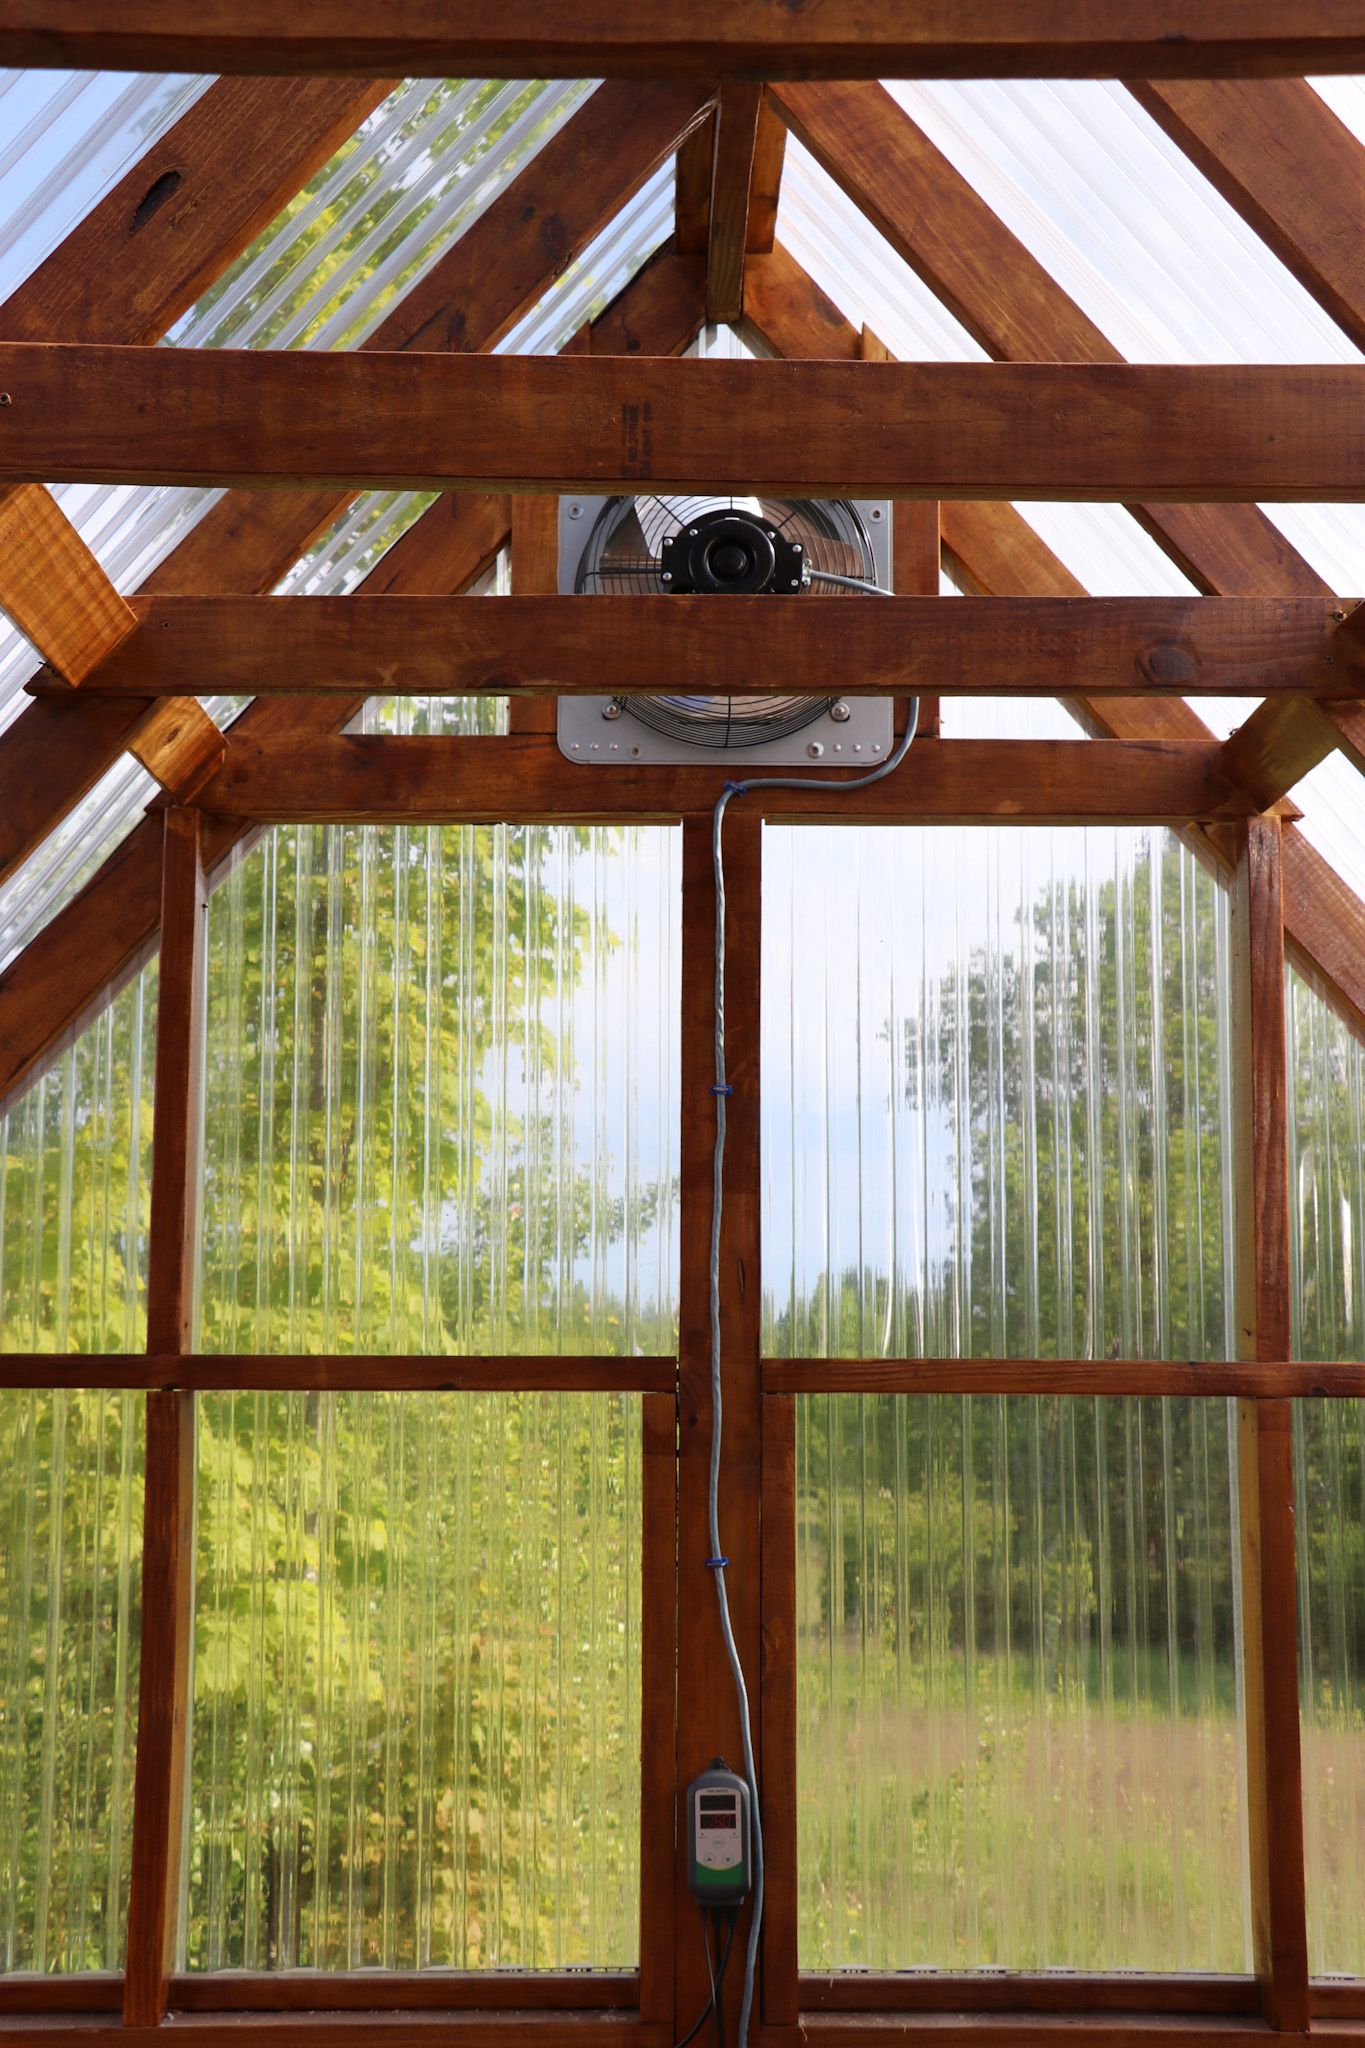
We love using SketchUp for simple build projects and designed the greenhouse in SketchUp as well. The footprint is 8ft wide, by 16ft long. The door is centered on the front and all of the lumber we used is treated lumber. The bottom 1/2 of all four walls are built using tongue and groove treated pine. We added windows in the peak for ventilation.
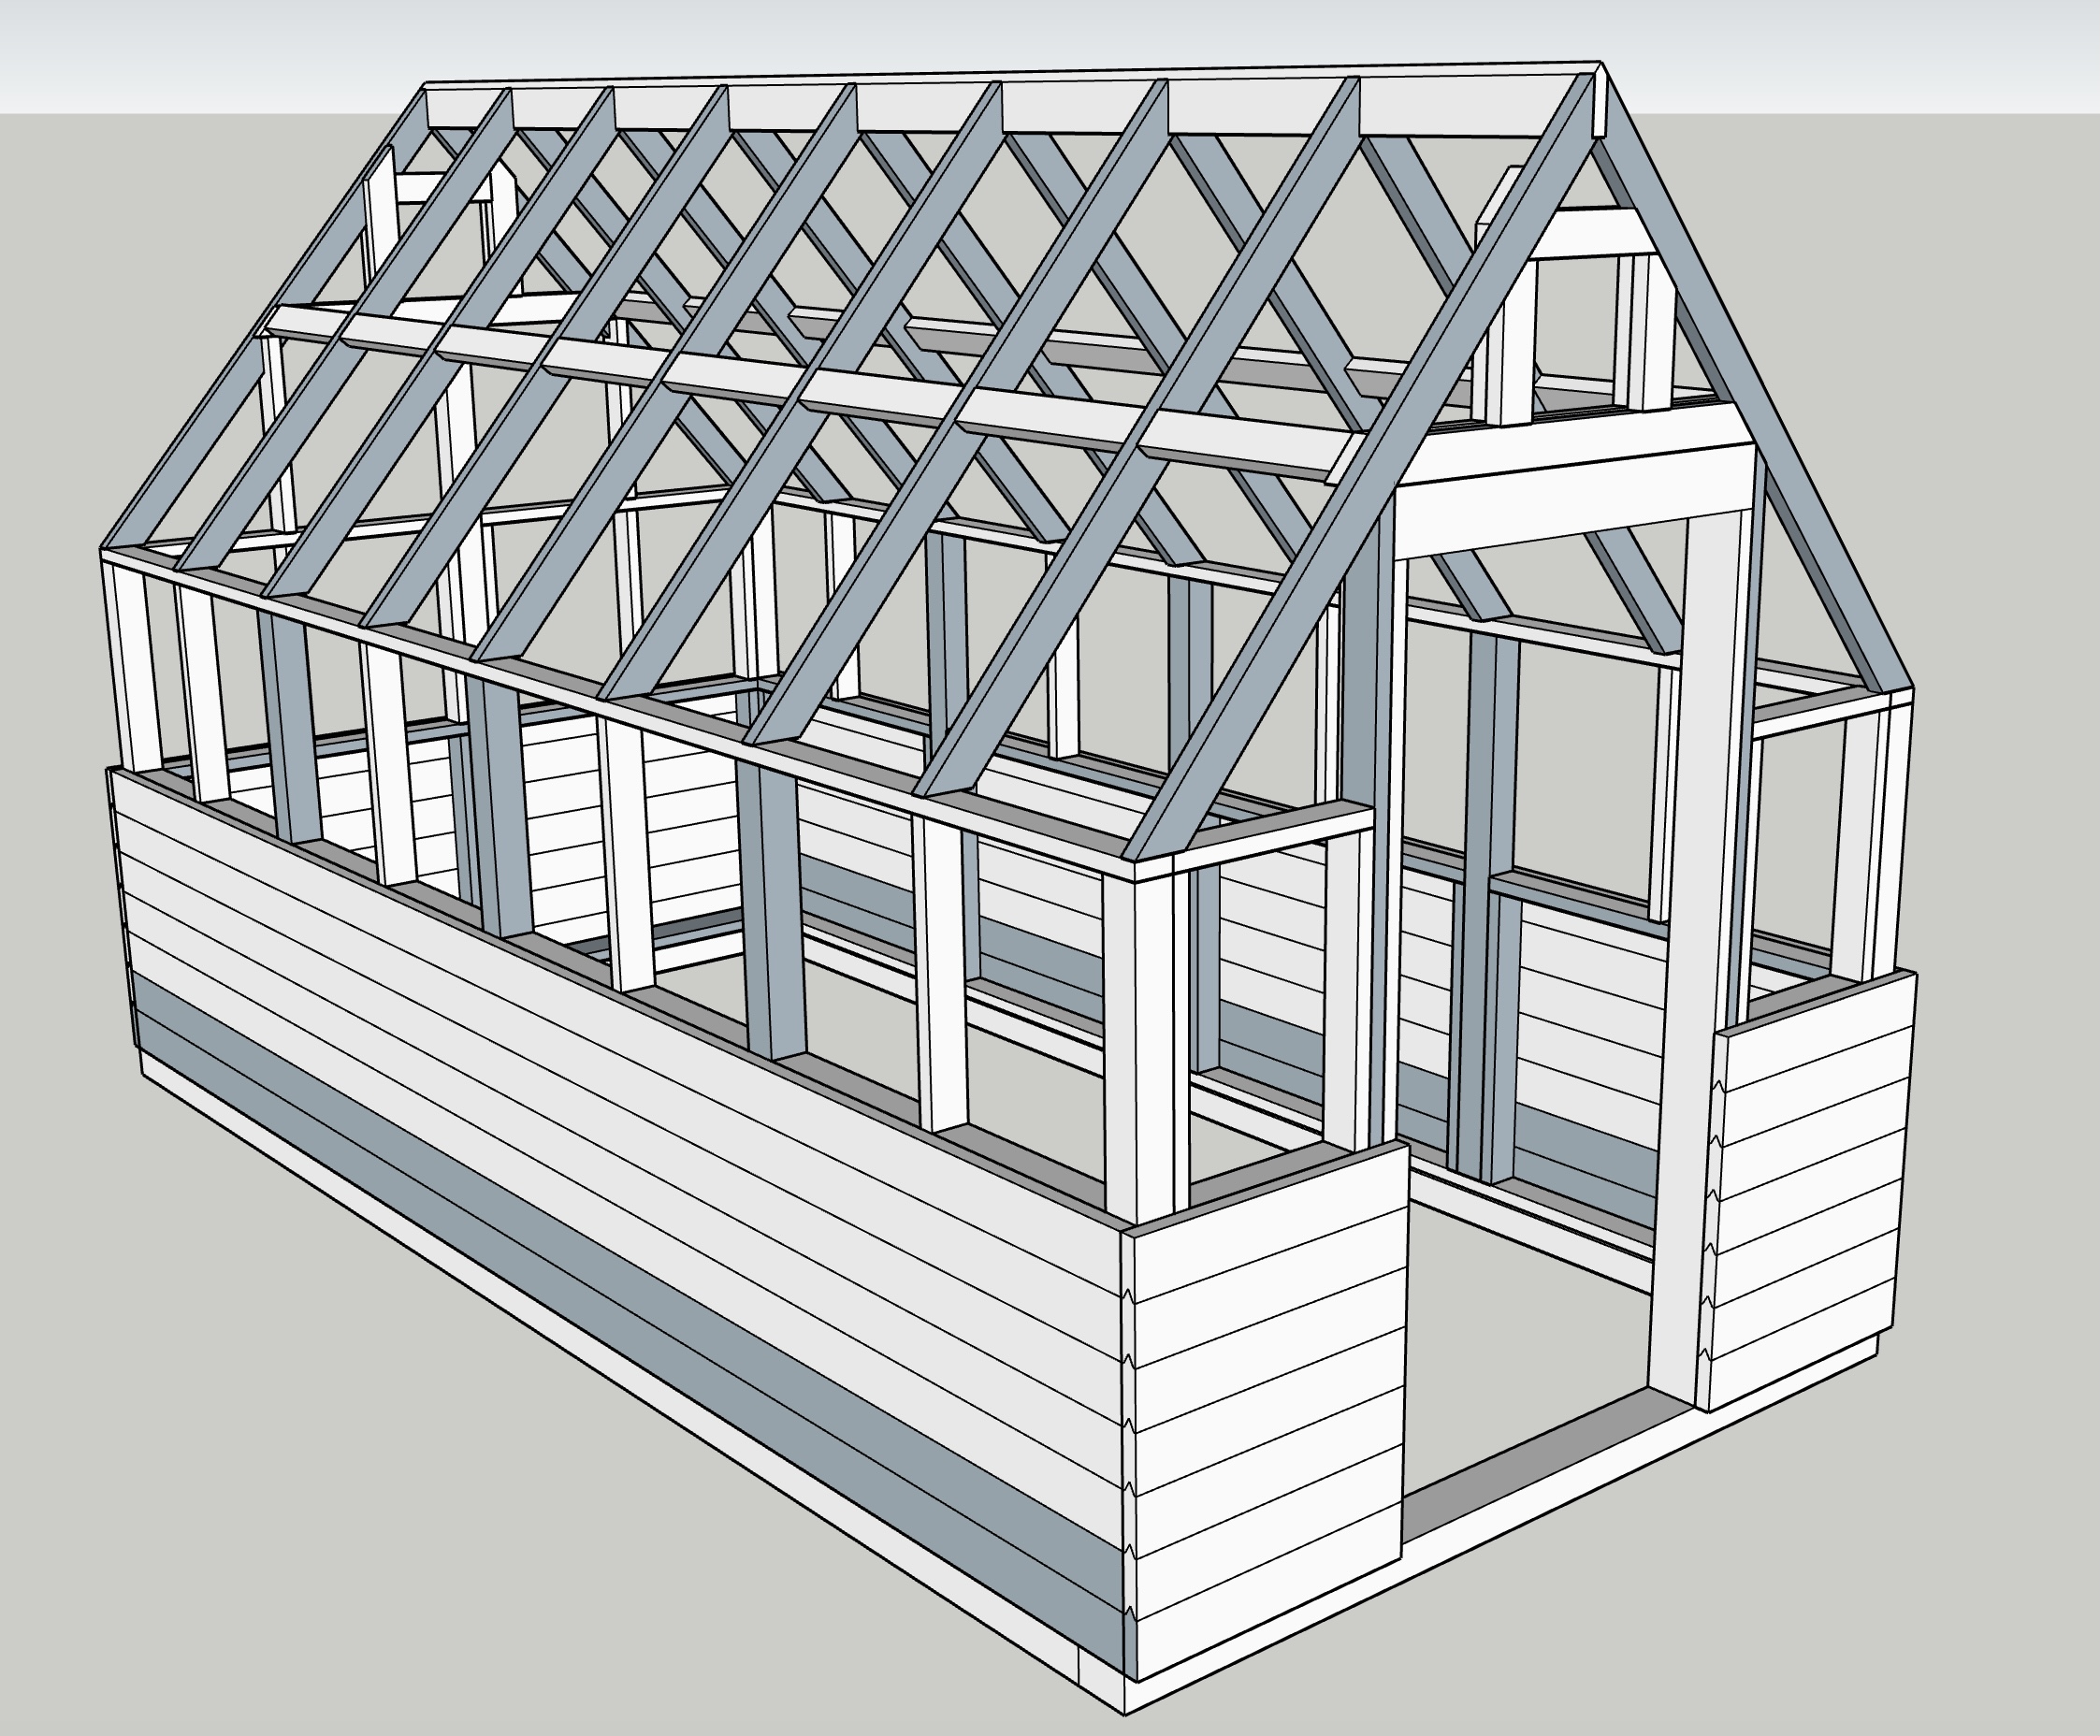

Building Our Greenhouse From Scratch
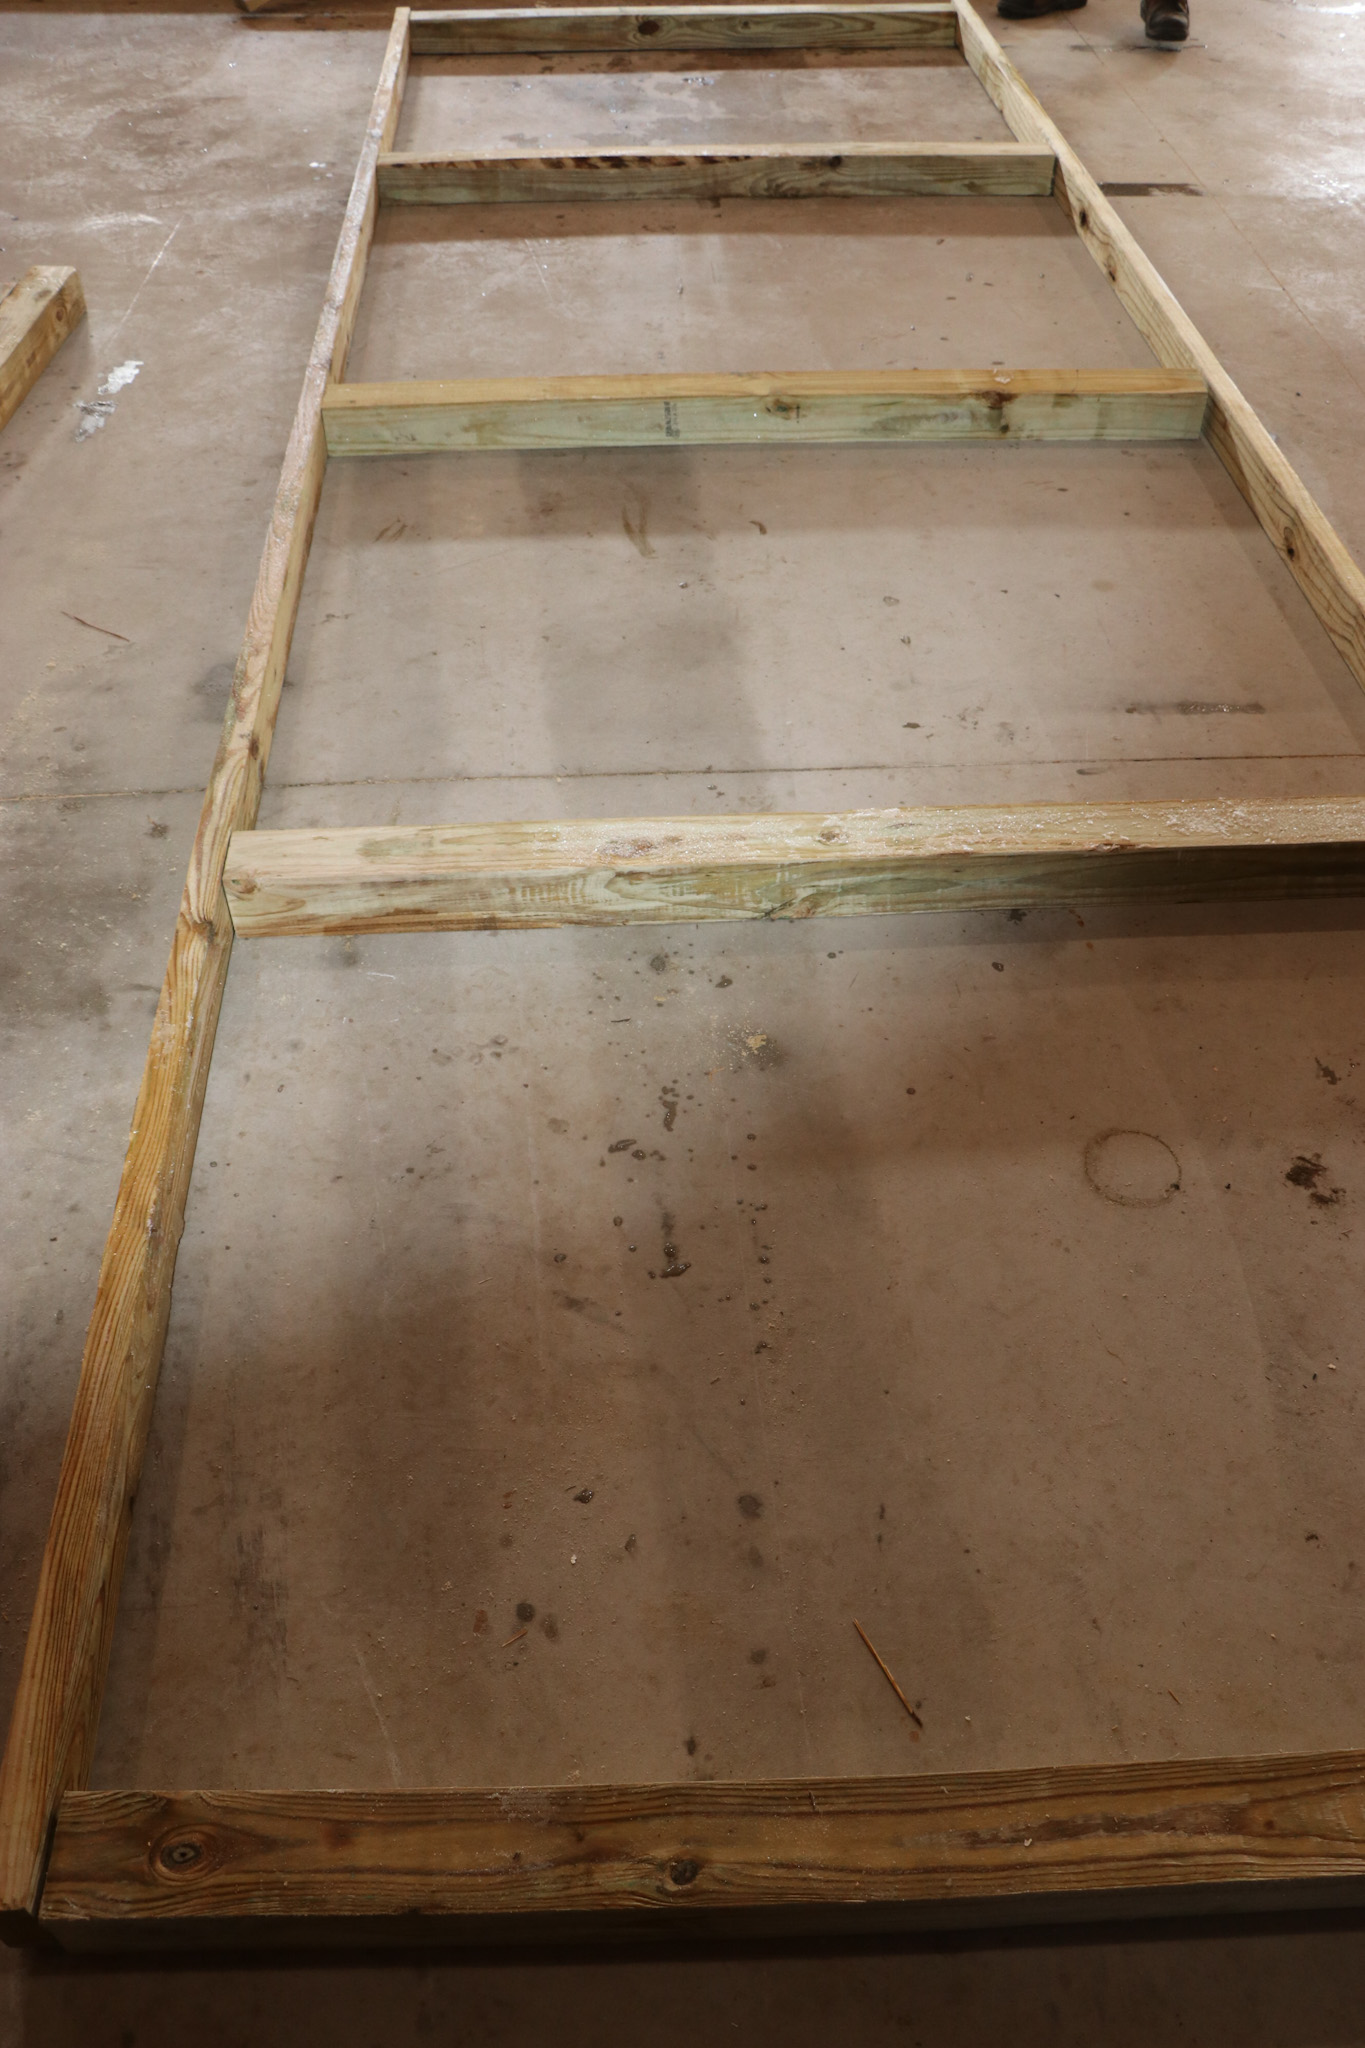
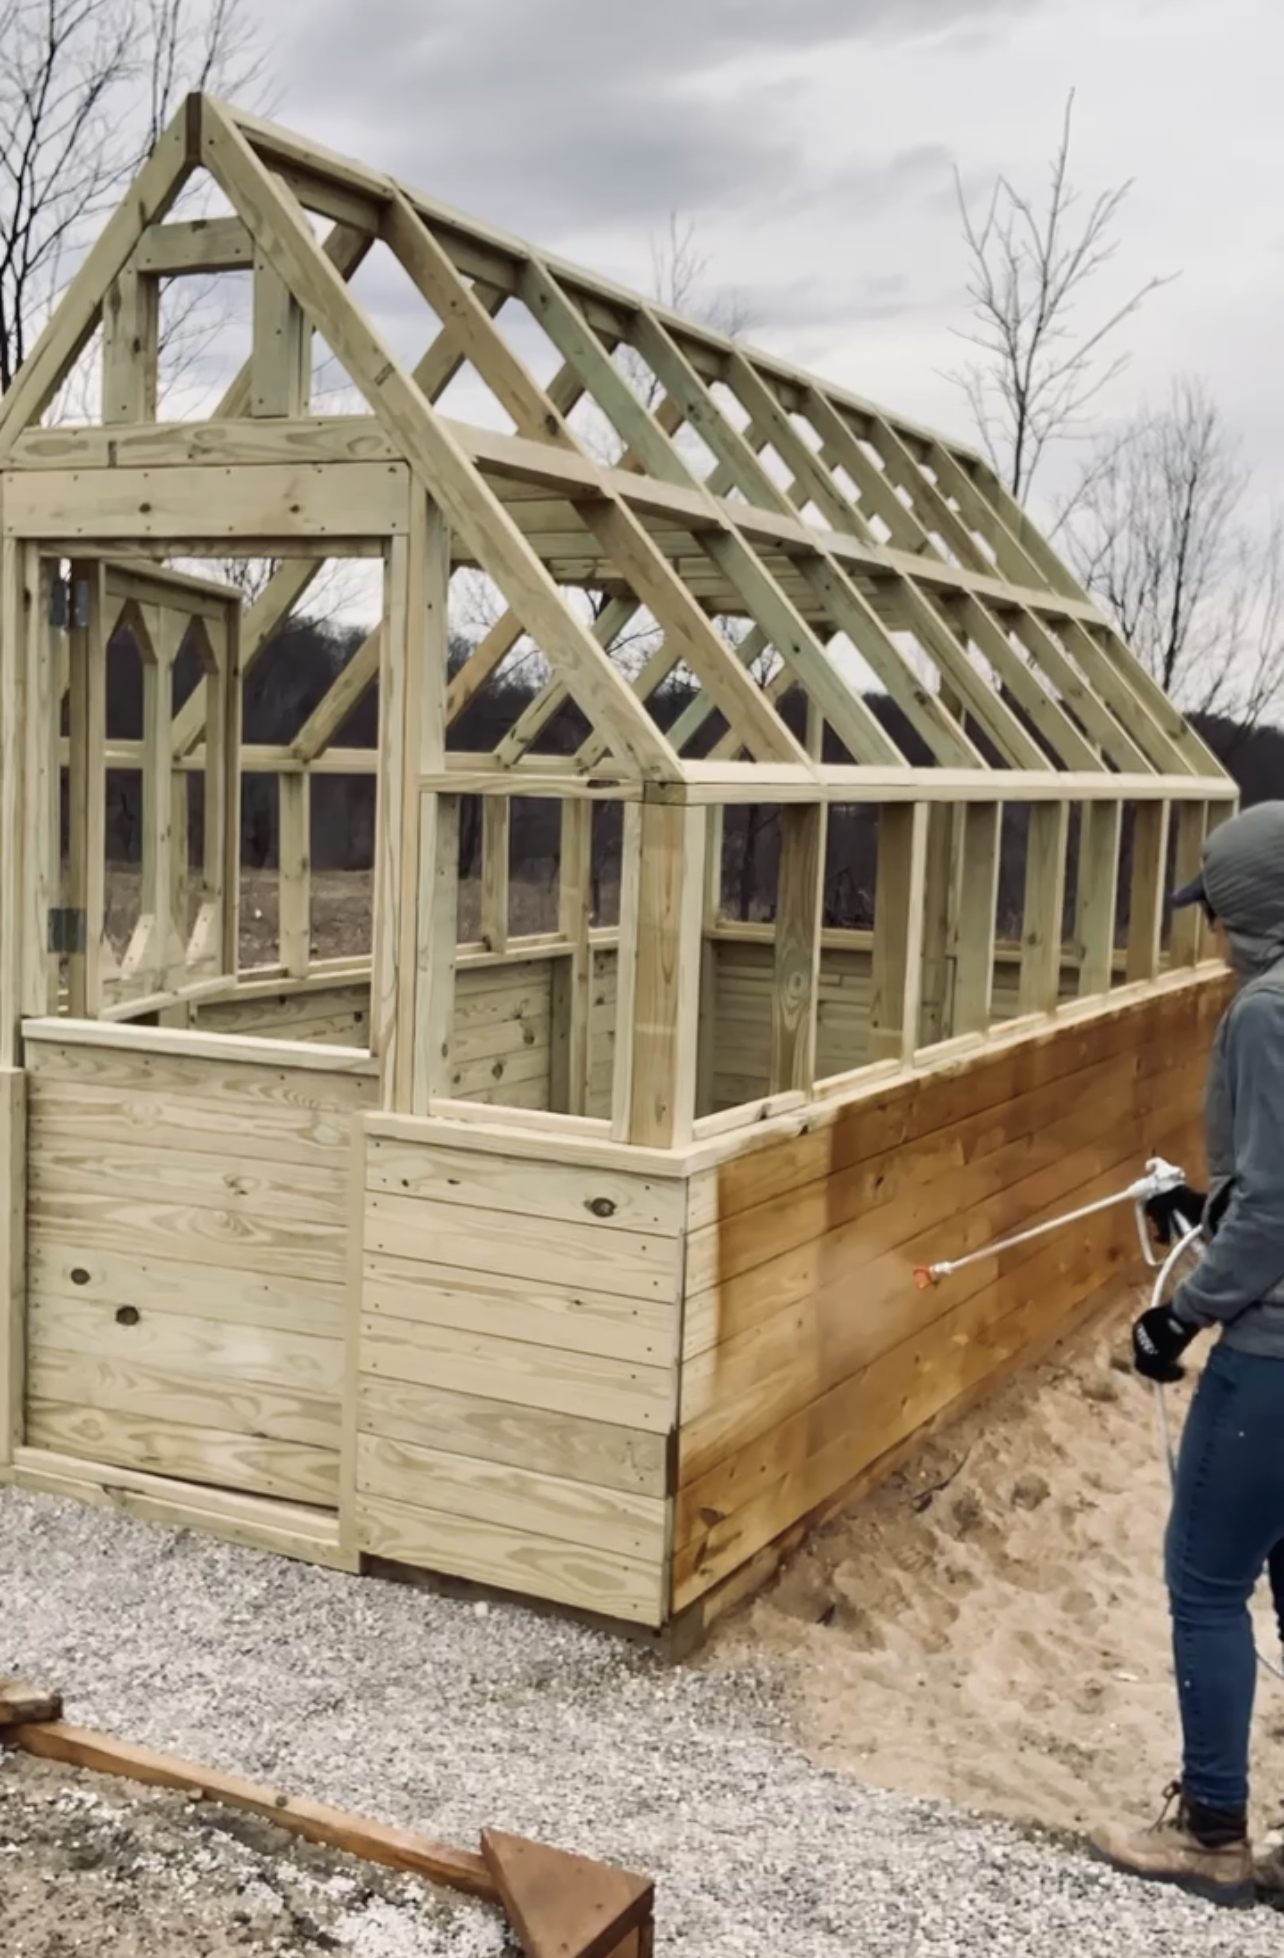
First, we leveled out the area where the greenhouse would go. Then we built a foundation using treated 4×6 pine and laid it out over this weed barrier fabric. We drilled holes in the treated 4×6 frame every few feet and then hammered rebar down into the ground to secure it.
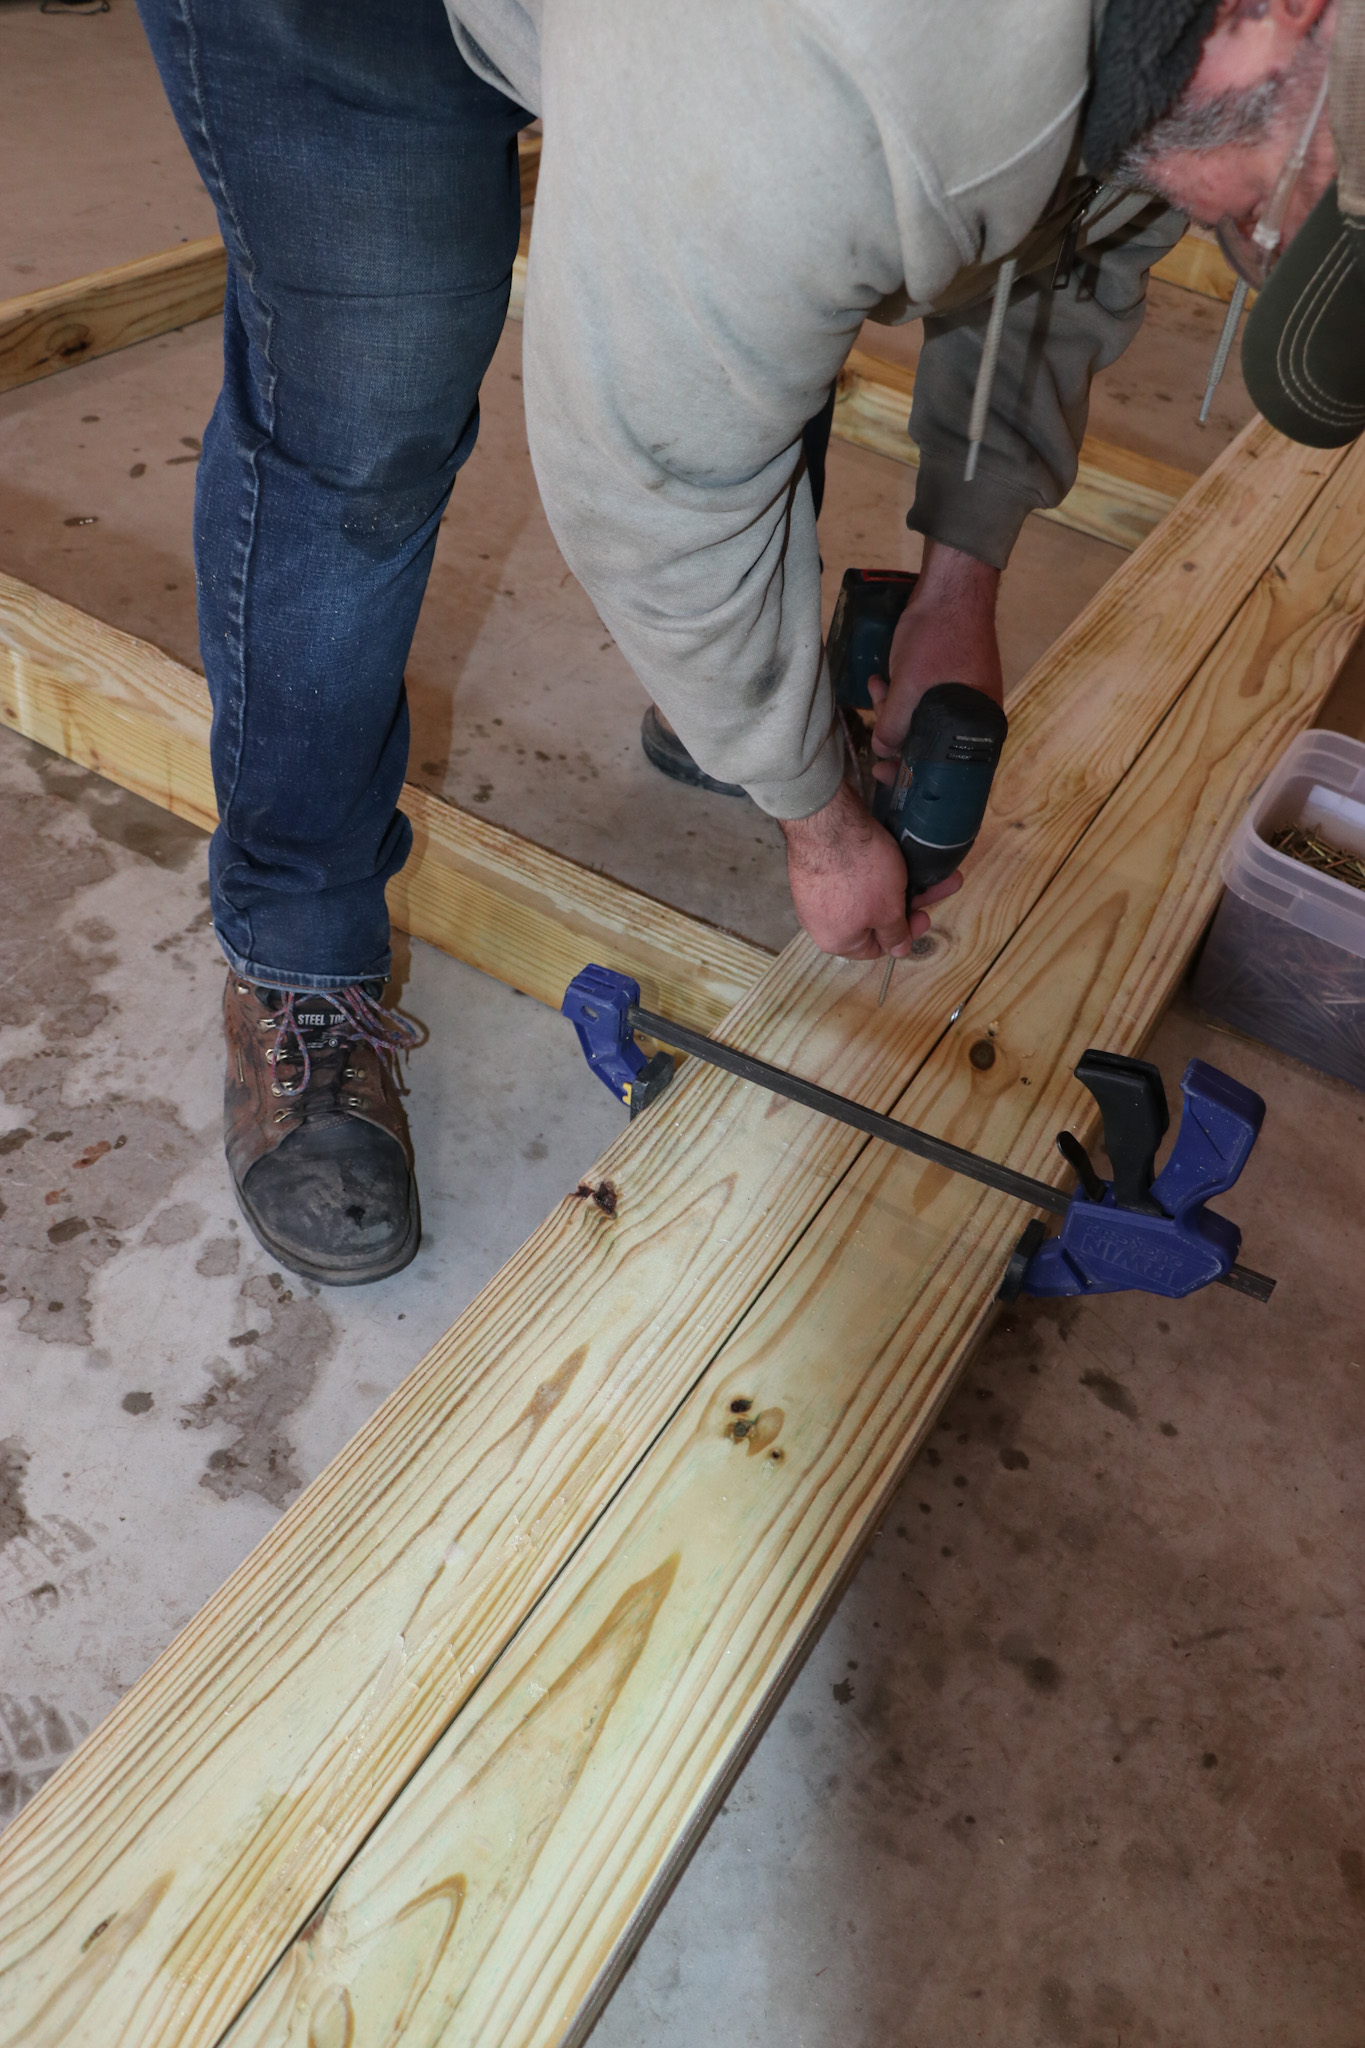
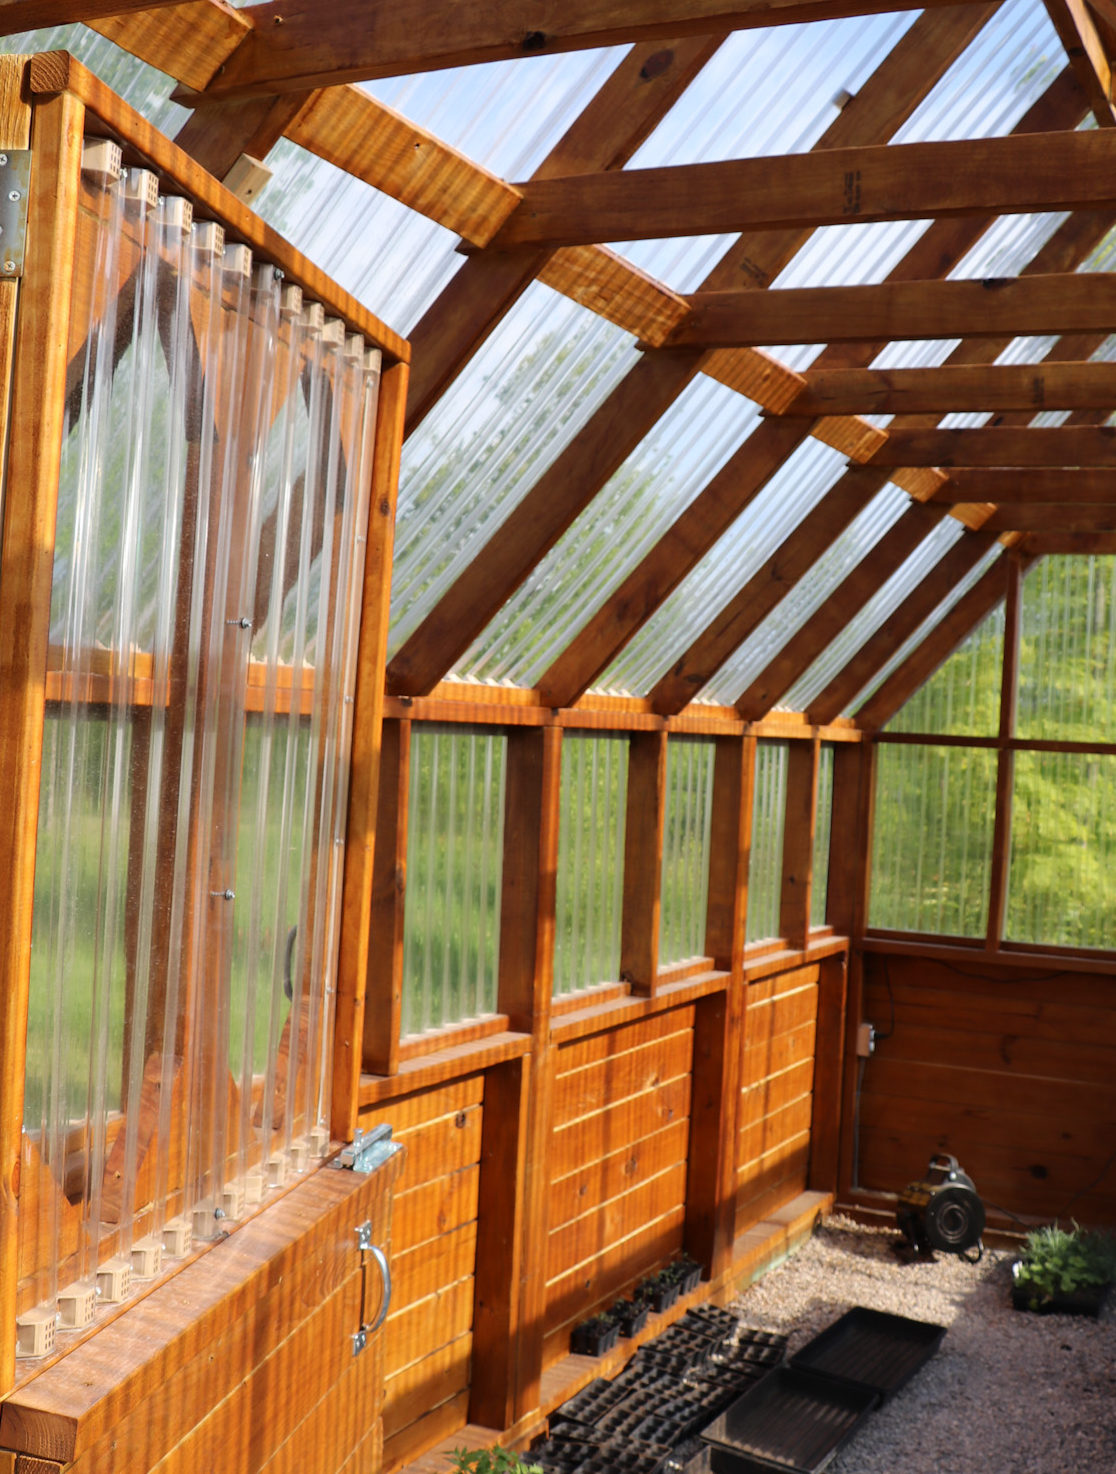
We framed the two, 16ft walls up in the garage and then brought each wall out one at a time and secured it to the foundation. The lower 1/2 is tongue and groove treated pine. The corners are 4x4s and the support studs run every 24inches. We spaced out the 2×4 studs every 24 inches because our greenhouse plastic corrugated sheets came in a width of 26 inches and this allowed us to overlap the sheets before screwing them into the studs.
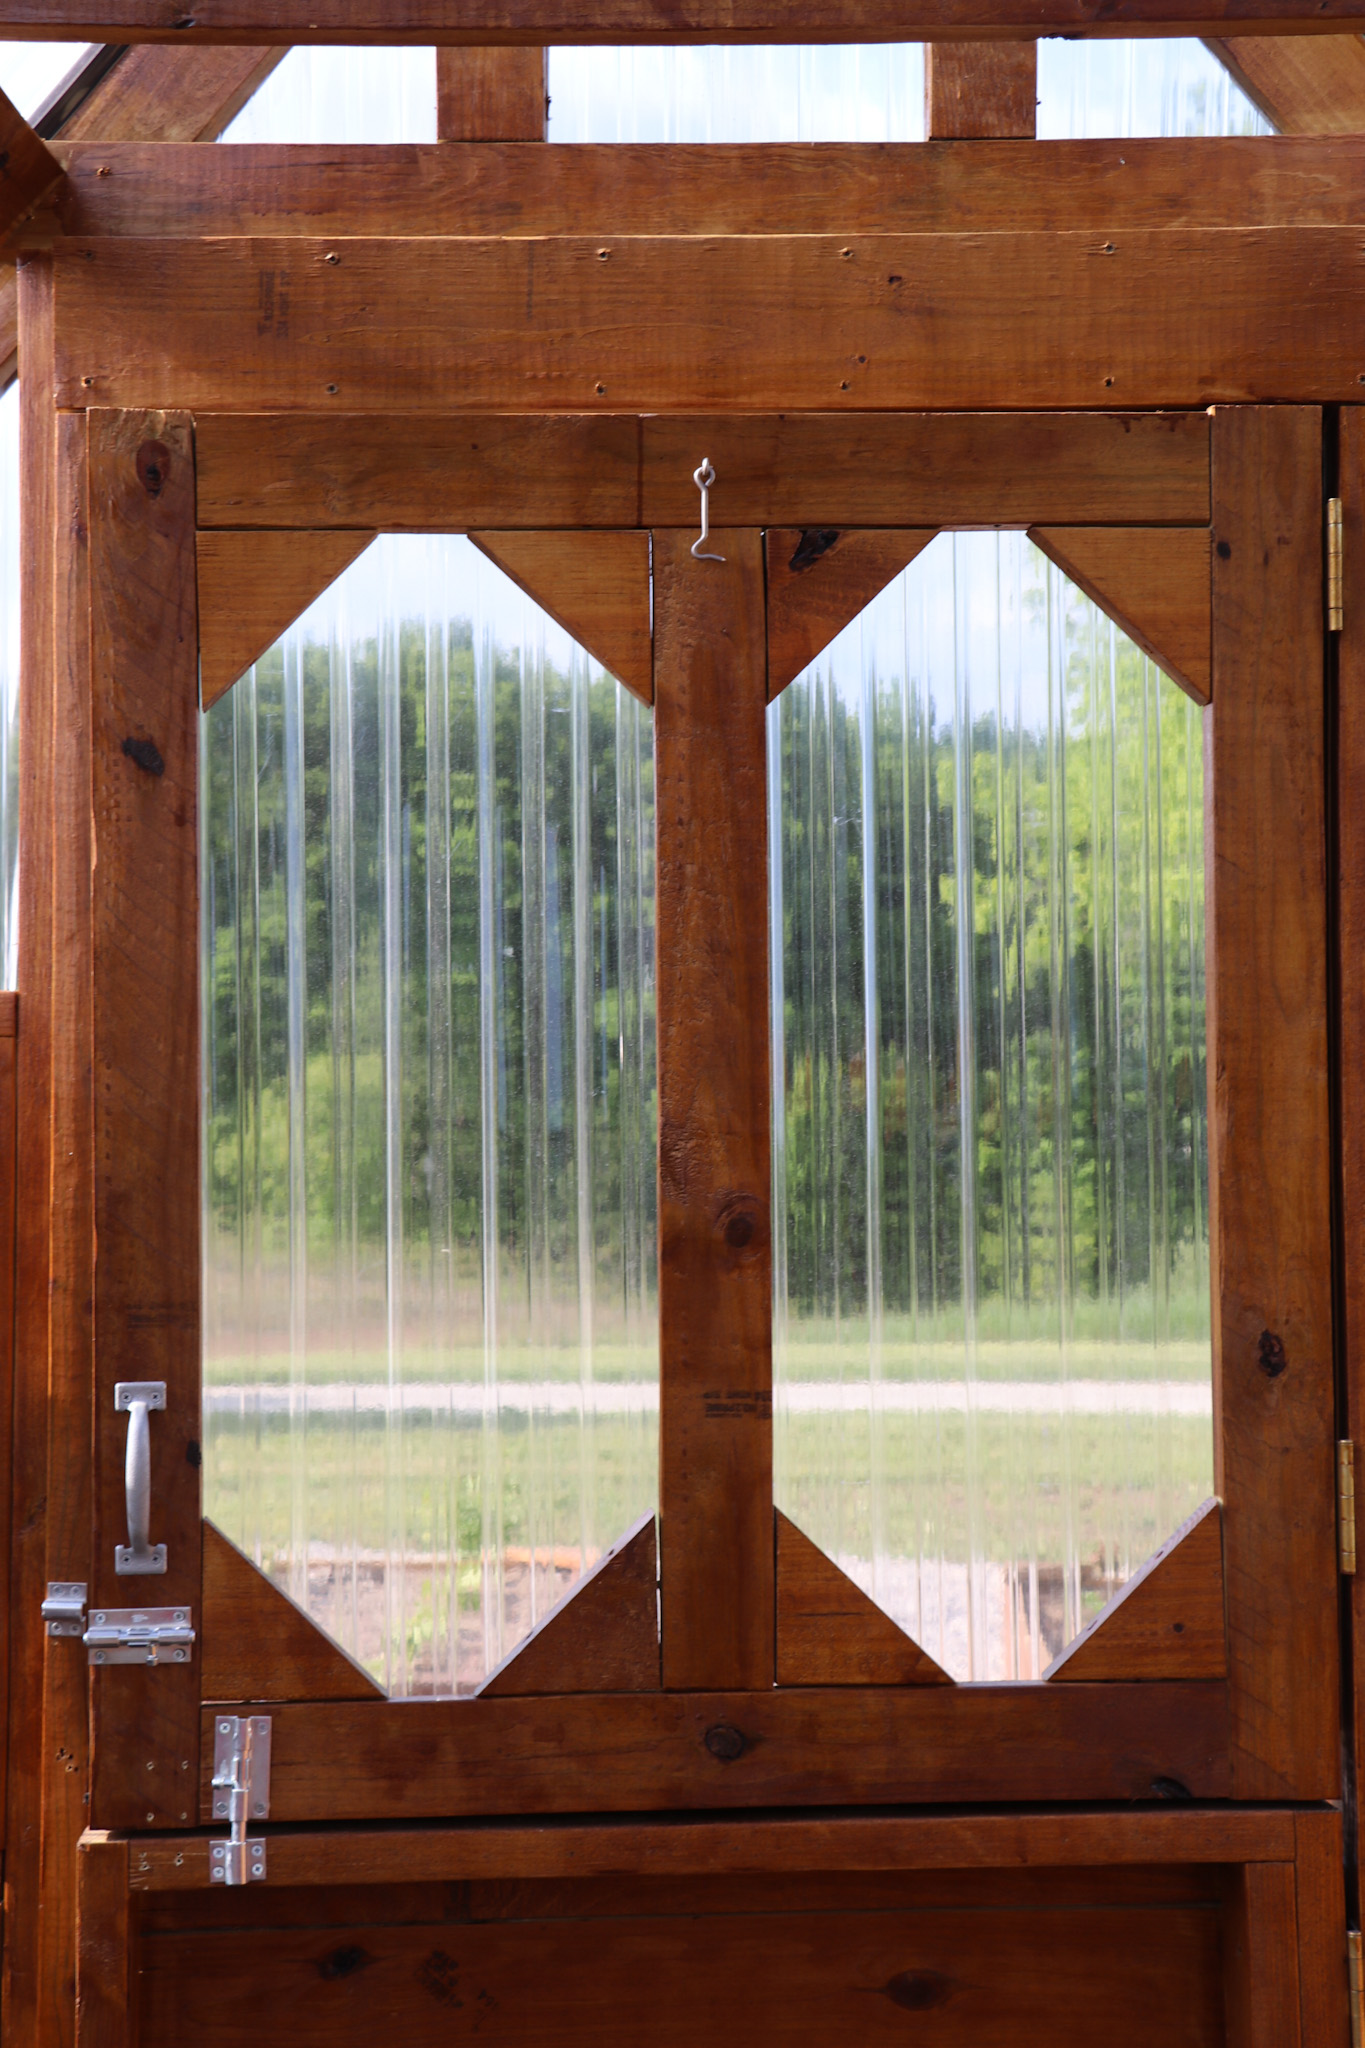
My husband and son built the dutch door for me (one day while I was tiling my kitchen wall) as a surprise using leftover materials after the greenhouse was finished. He used 4 hinges (two on the lower half and two on the upper half of the door) and simple bolt hardware to latch the door.
I decided to stain the greenhouse with the same color as our DIY raised garden beds and my Graco ProX17 Paint Sprayer made the job go really quickly. greenhouse trim.
After the entire greenhouse was framed up, stained, and the first row of steel trim was on we started sheeting the greenhouse using this greenhouse plastic corrugated sheeting. The plastic sheets are 26 inches wide by 8 ft long, so we took that into consideration when we designed the greenhouse upper 4 walls and the roofline. We were able to cut the sheets perfectly in half and only ended up with a little waste on the front and back end where the peaks are.
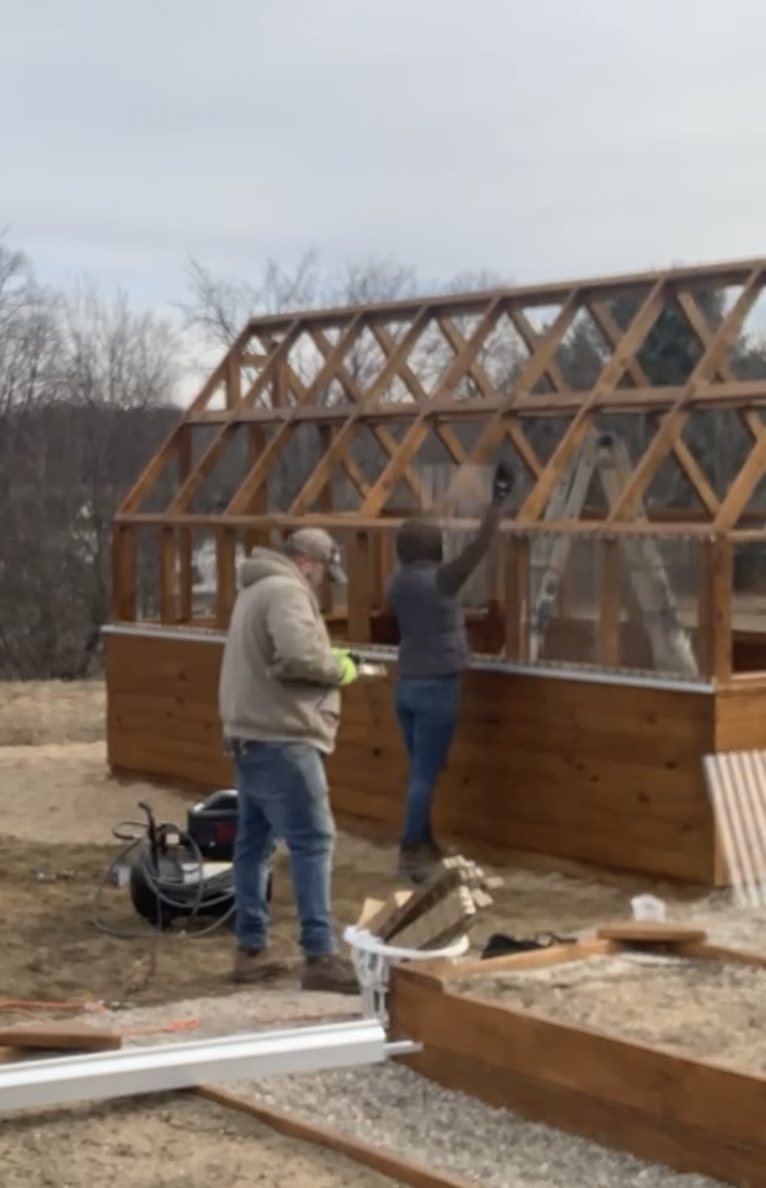
We used Galvalume Steel Hex-Head Roof/Siding screws to secure all the plastic sheets to the greenhouse wall and roof frame and before we screwed down the sheets we used Butyl Tape to seal the space between the edge of the sheet and the wood frame. We only did that on the four corners and top and bottom (not on every sheet). We tried to hide it as best we could. It’s not pretty, but it really did help seal up any areas where we were concerned that air may be able to get through.

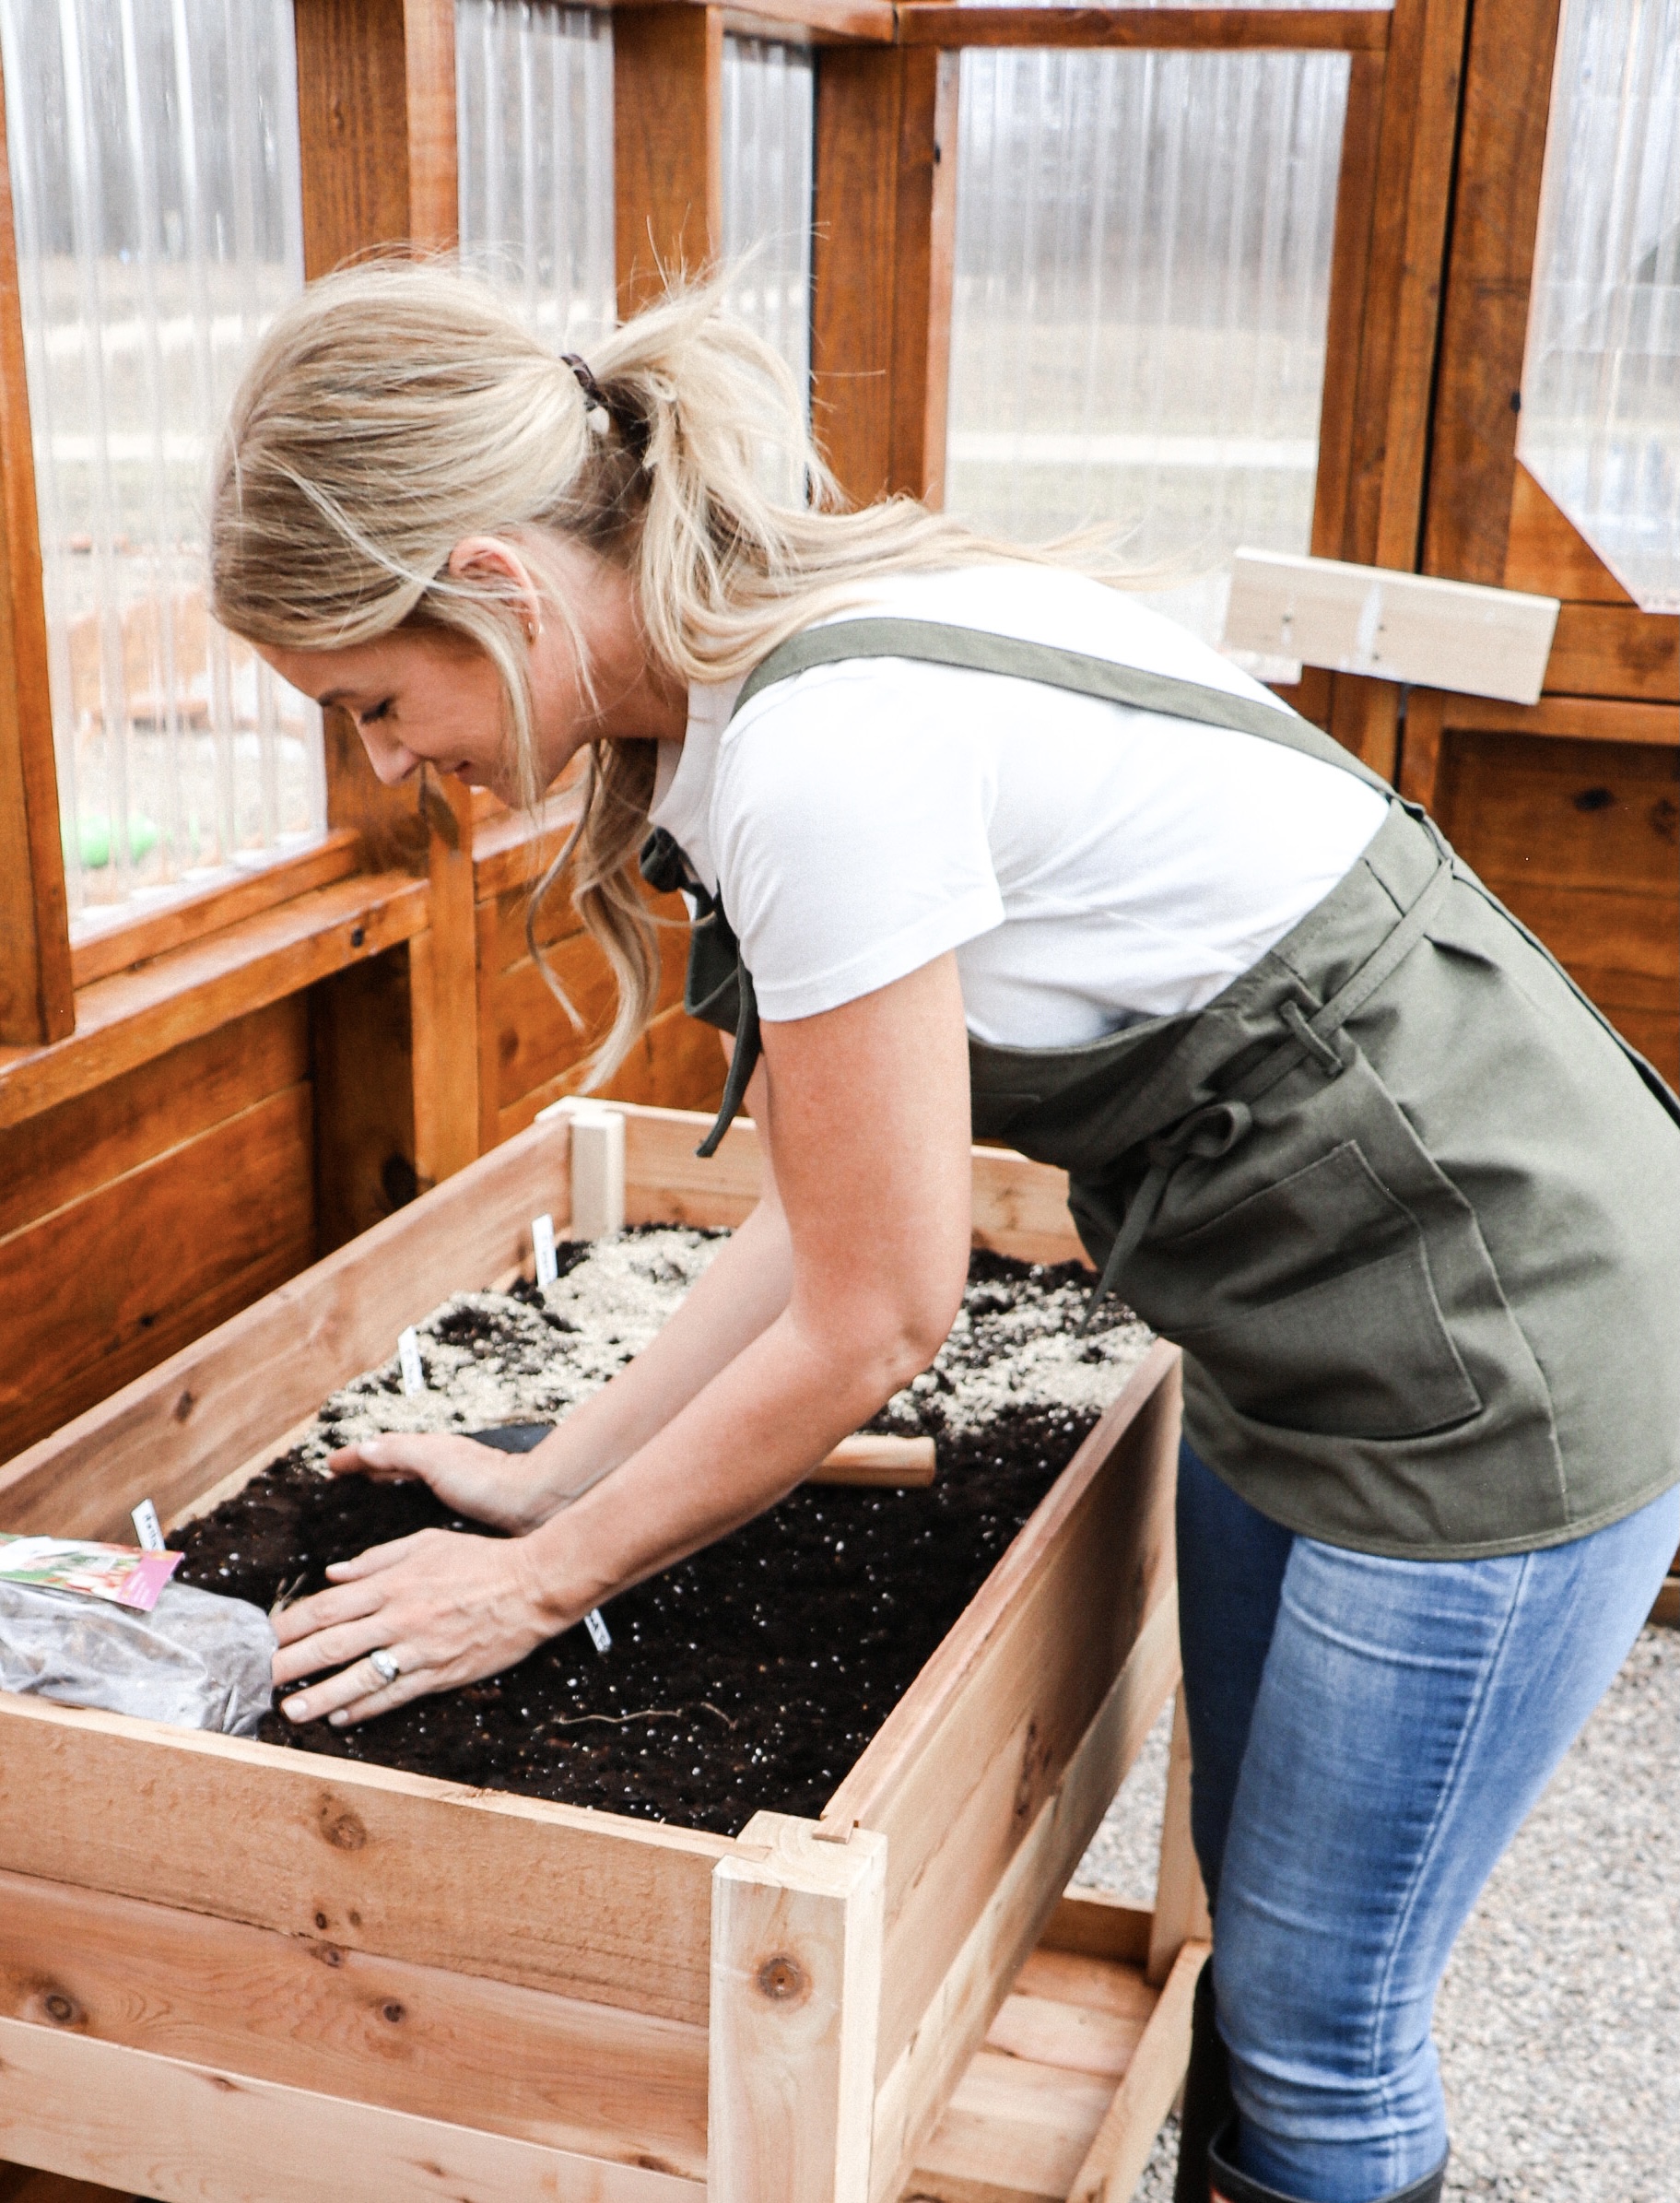
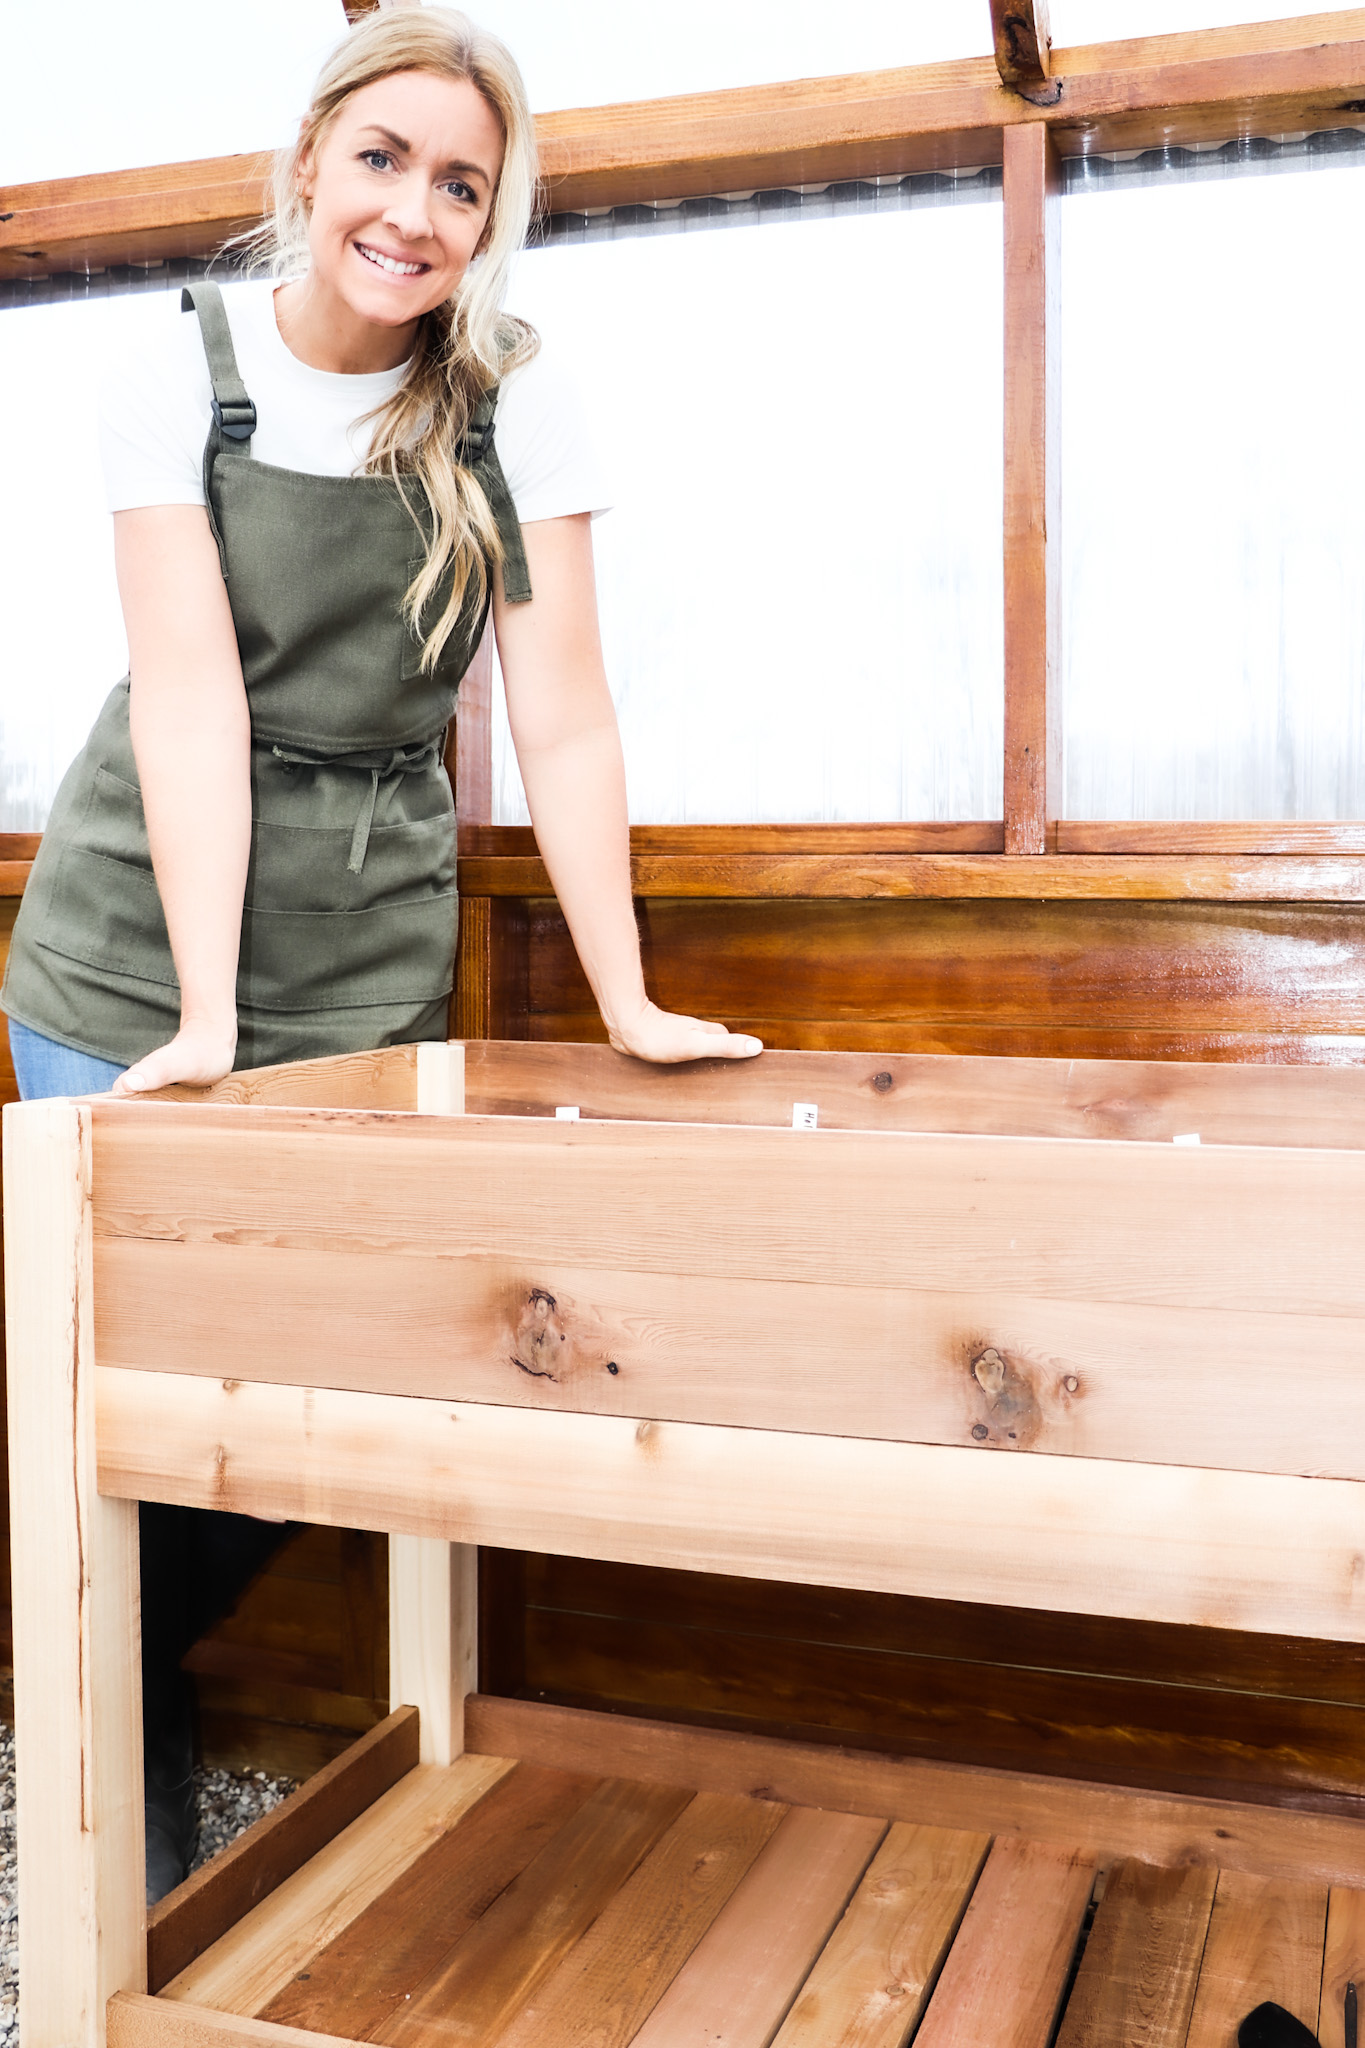
I didn’t have any leftover lumber and by the time I had the greenhouse finished the price of lumber had almost tripled, so I didn’t build any shelves/tables for around the perimeter yet. I decided to use these Vigoro Raised Garden Beds to get me through this spring. They were easy to assemble and I really like how they have a lower shelf for storing all my extra garden tools, gloves, and random pots.
To heat the greenhouse we purchased this IPower Electric Heating Fan with a cooling thermostat controller. We had a few months of freezing temperatures and the heater kept up great. We set it to kick on at 40 degrees and for the fan to turn on when it got too hot (you can set it at whatever temps you want).
If you’re someone who LOVES veggie or flower gardening and you’re considering investing in a greenhouse…I say GO FOR IT! I love spending time in the garden and growing my own food so you can imagine how grateful I am that this greenhouse is extending my growing season so much! It’s a dream come true!
Be sure to check out these posts for more on my DIY raised garden beds and garden updates from last year! I hope you found this helpful and next up, I will be sharing a new garden update and what all I currently have growing in the garden and greenhouse. I’d love to hear what you’re growing this year and whether or not you have a greenhouse or plan to build one?


