I ABSOLUTELY LOVE ALL THINGS DIY!
DIY really is a huge passion of mine! I love learning a new skill and applying it to everyday life! I enjoy everything from decorating wedding cakes to building homes! I love to renovate homes, restore and refinish furniture just as much as I love to garden, farm and preserve our own food. I am also a licensed cosmitologist…so you know I DIY my own (and my families) hair and nails, lol! I guess I just love figuring things out! I enjoy watercolor painting as much as furniture painting! If I had to choose my favorite thing I love to DIY, I have to say design, new construction and home decor/interior design are my favorite! If I end the day with paint or sawdust on me…you know I had a good day! Here are a few of my favorite DIY projects!
Flowers are so fun to paint!

Painting By: Dena @fletchercreekcottage
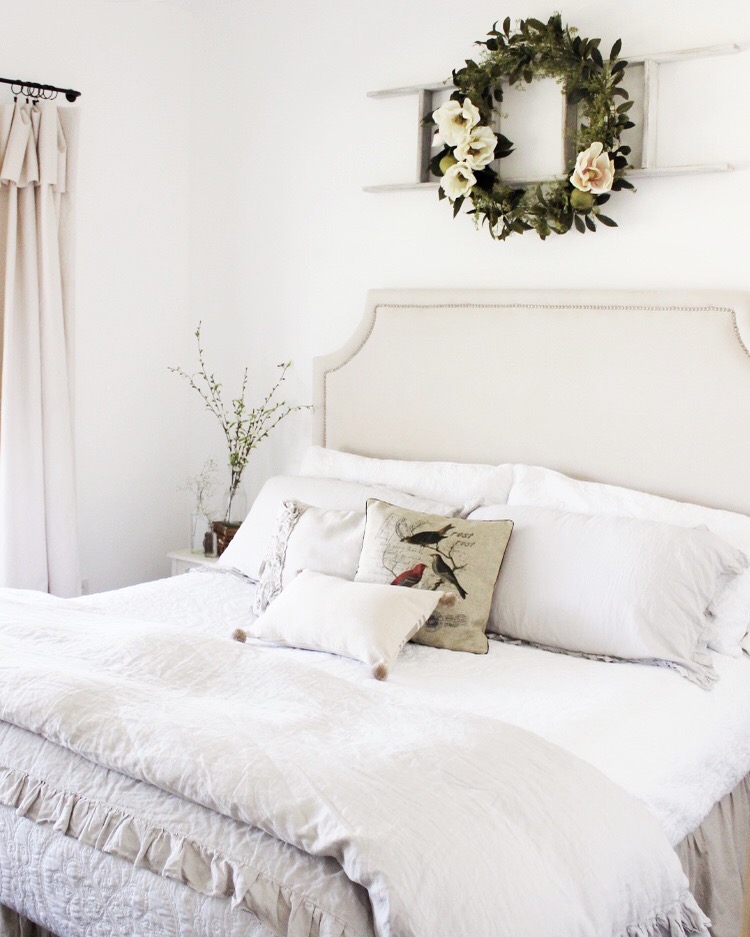
Our master bedroom is full of little DIY projects that I’ve done over the years. I made the ladder years ago using scrap wood I had leftover from a previous home renovation. The wreath was a more recent project. Our land has loads of pear trees and I wanted a wreath that brought the look of our property into the home! I made the curtains, the bed skirt, and the ruffle pillow from dropcloths from the hardware store. I couldn’t even tell you how many things I’ve made out of dropcloths over the years! I may be a little obsessed! And my very FAVORITE piece is the upholstered headboard that I made for under $100! This is a king size bed and the headboard is 4′” thick! I chose a beige upholstery fabric that has almost a velvet feel to it and aged brass nailhead to trim it out! It was so fun to be able to choose the shape, the height, and how plush I wanted it! I would love to make another (maybe one of my sisters will take me up on that)…it was so fun and so easy!!!
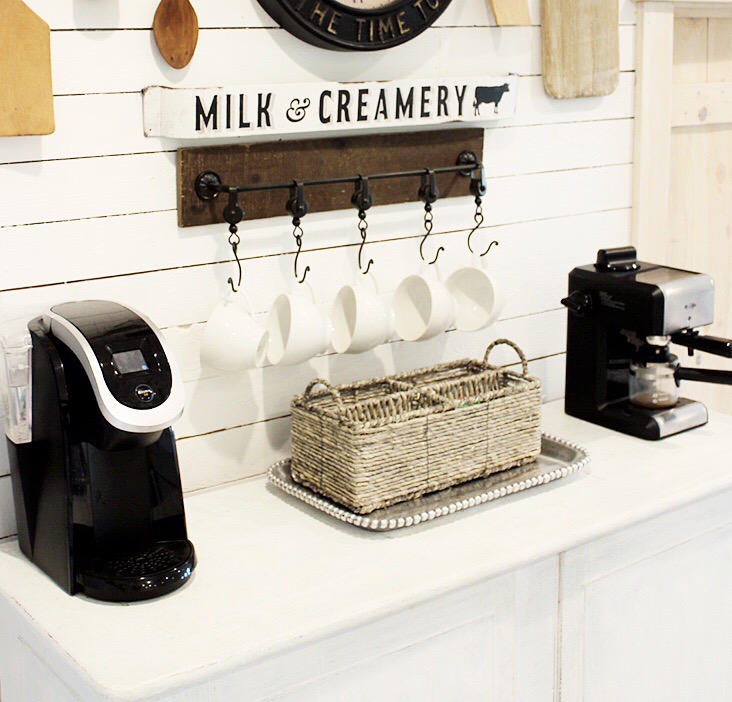
 The linen duvet cover was an Amazon find and you can shop that here if you’re interested!
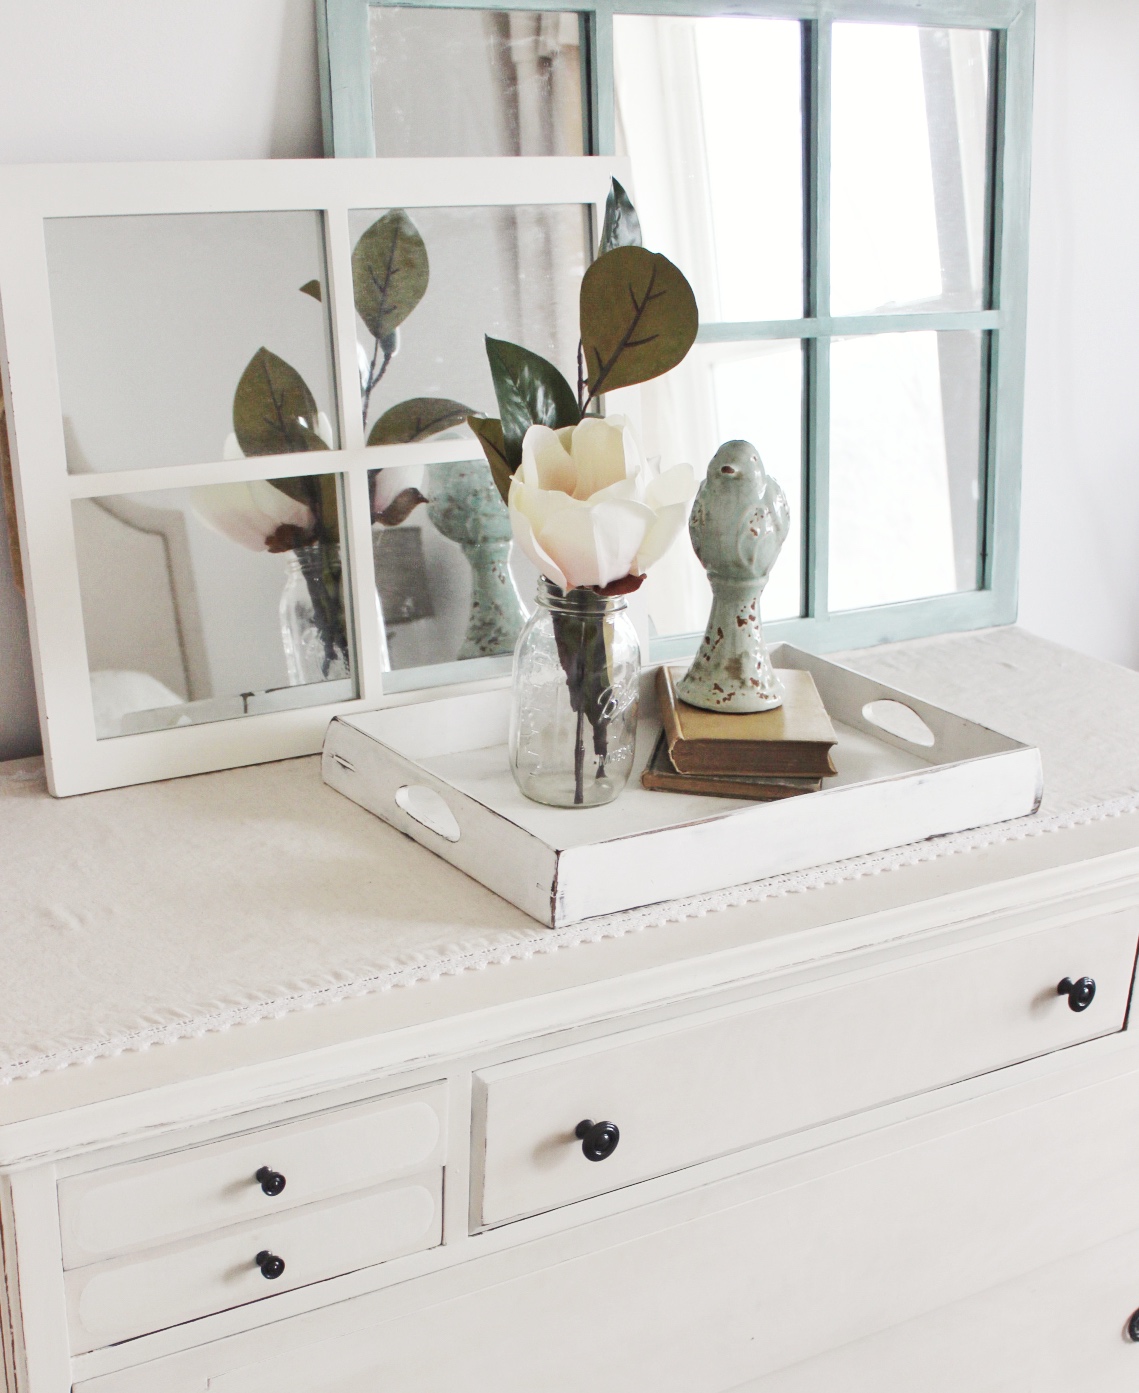 This dresser was given to me by my aunt, who got it from her mother! It is part of a set! The finish on it was in very rough shape so I ended up painting it! I have so many memories of this piece of furniture…seeing it at my aunt’s house as well as at my grandmother’s home! It is a piece I will never part with!
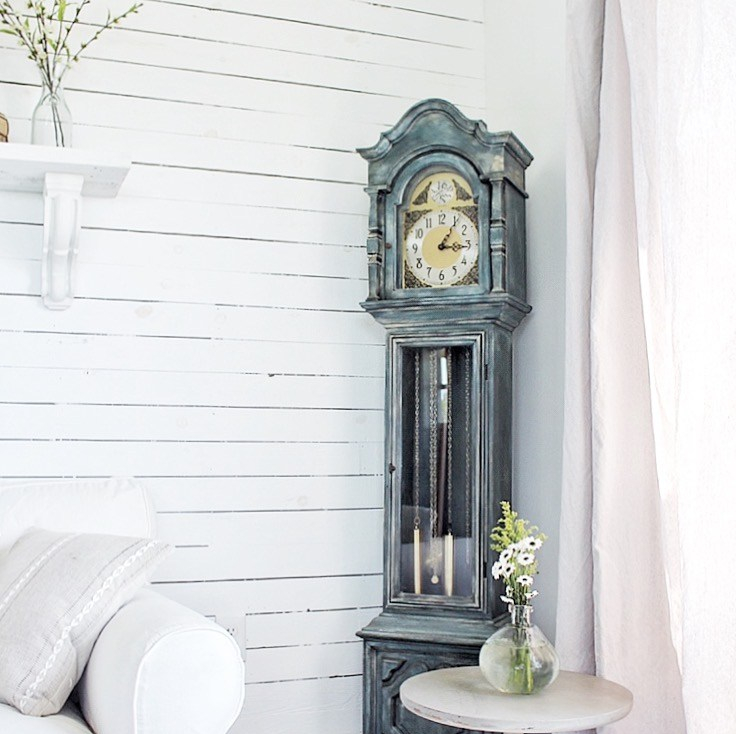 This beautiful clock was given to me by my brother who is a clockmaker http://www.bowerclocks.com/ It was old and very outdated and in pretty rough shape. I loved the shape and I really thought it would be beautiful if refinished. I (of course) went to my ‘go-to’ product, CHALK PAINT!!!! I used a mixture of three Annie Sloan chalk paint colors and finished it off with a dark wax finish!
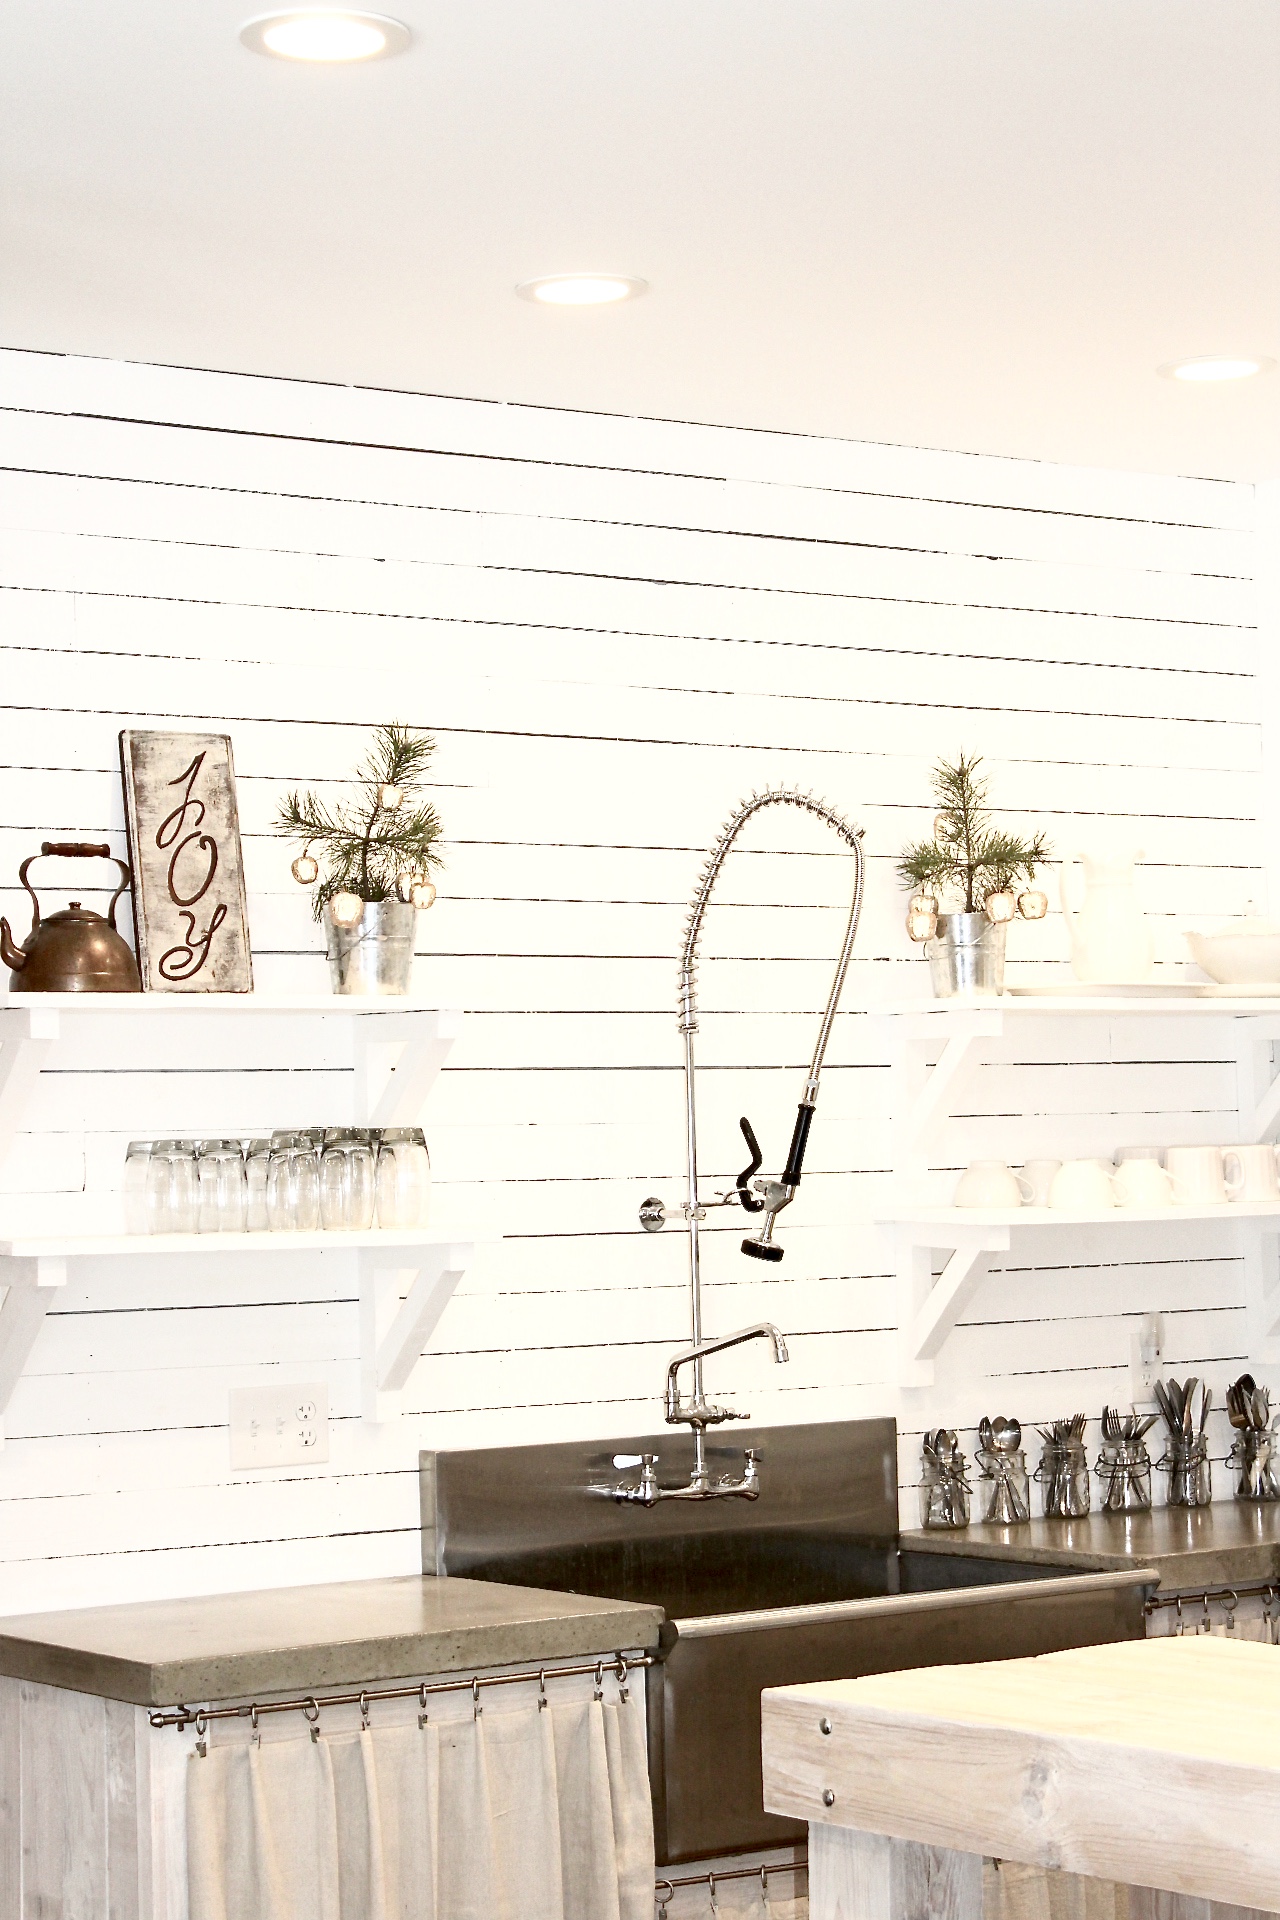
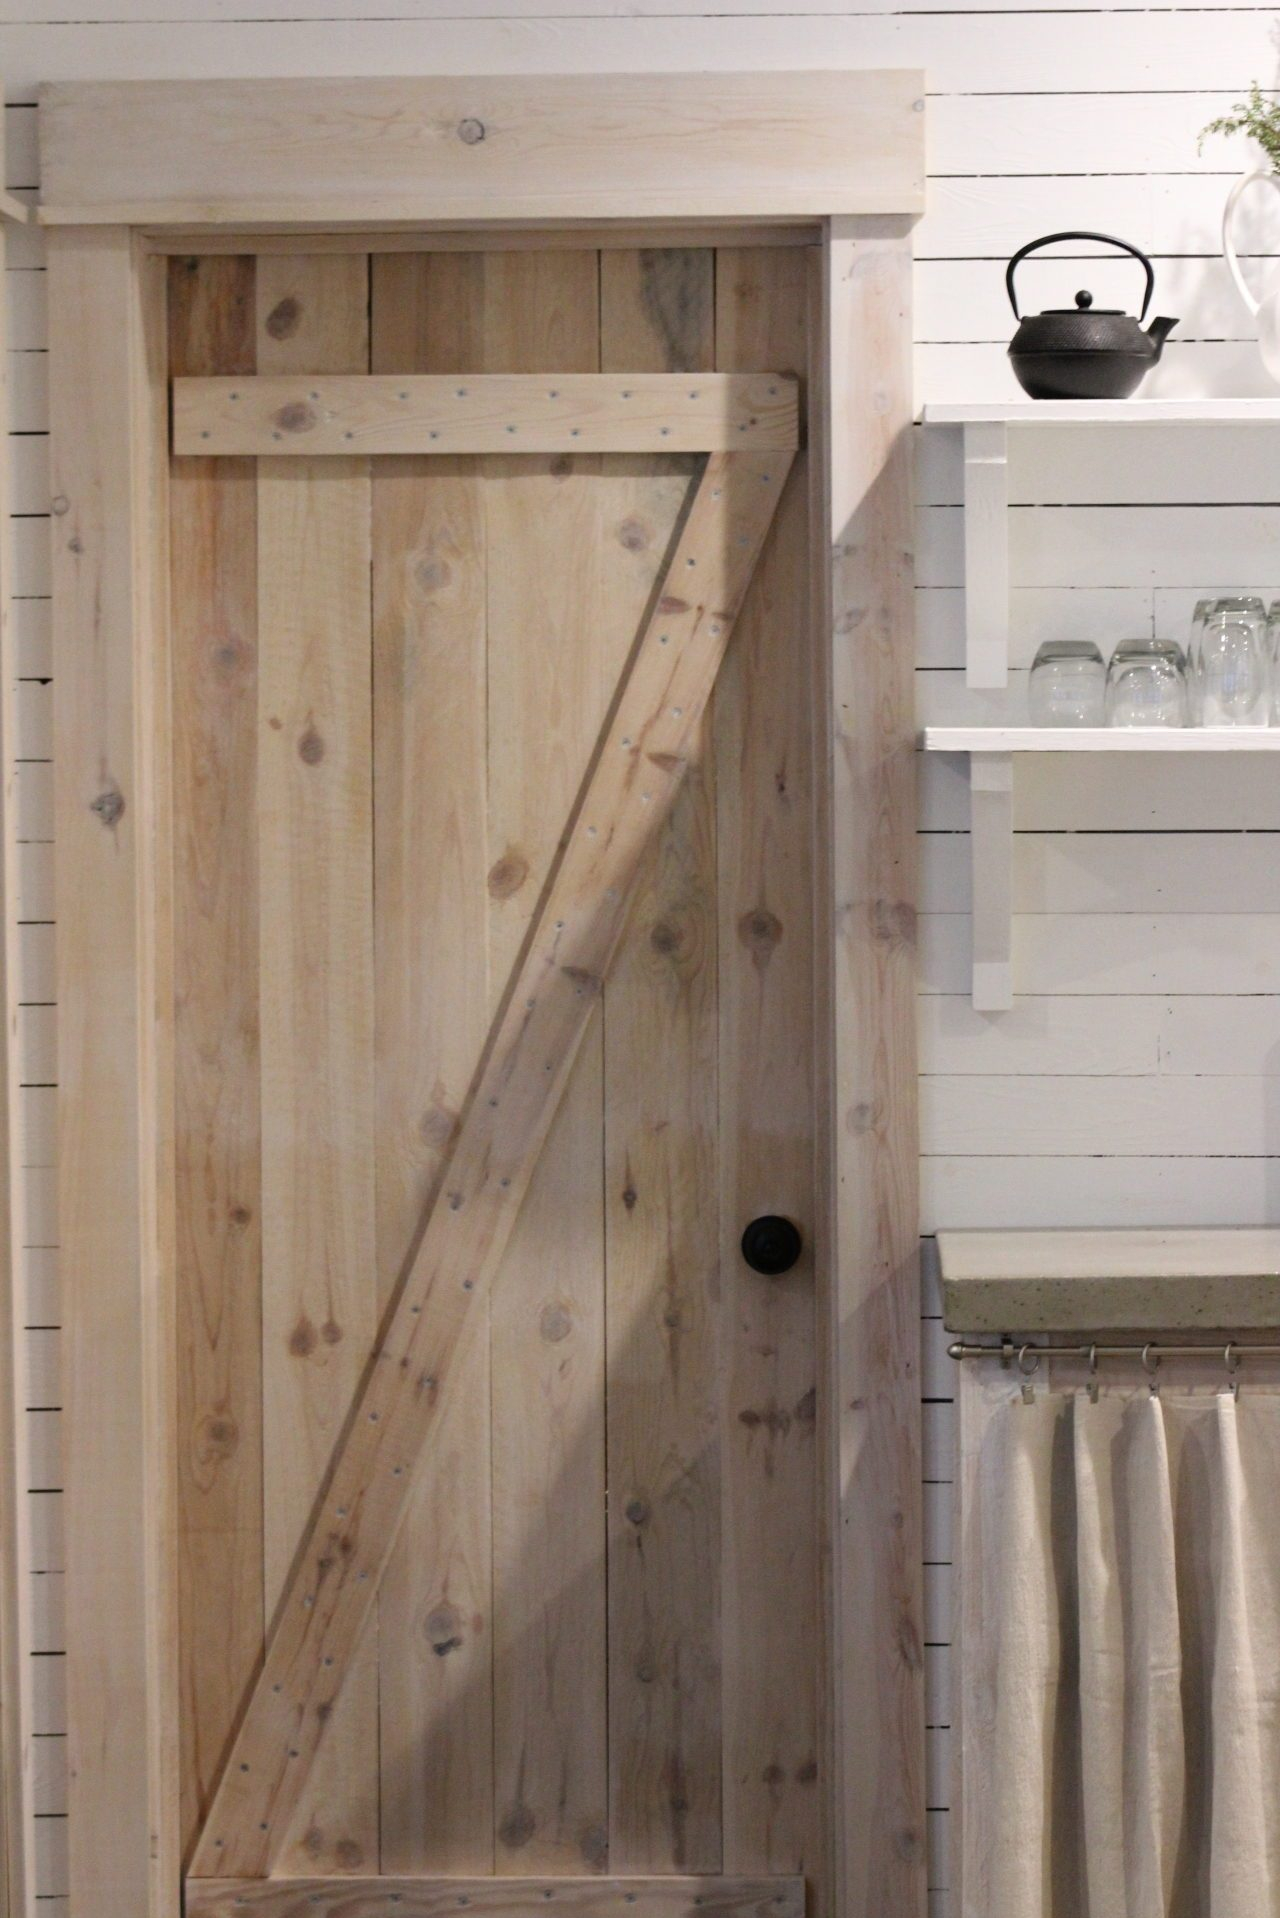 I love this DIY photo so much because it really shows how many different ways my husband and I figured out how to add character AND save money at the same time! We built these barn doors and kitchen cabinets out of a scrap load of lumber. We planked the wall with 1×4 pine and ripped down scrap wood to build the open shelving. We also made the concrete countertops and sewed the drop cloth curtains instead of building doors. The doors and trim work are pine and stained with a Pickling stain that gives it white-washed look!
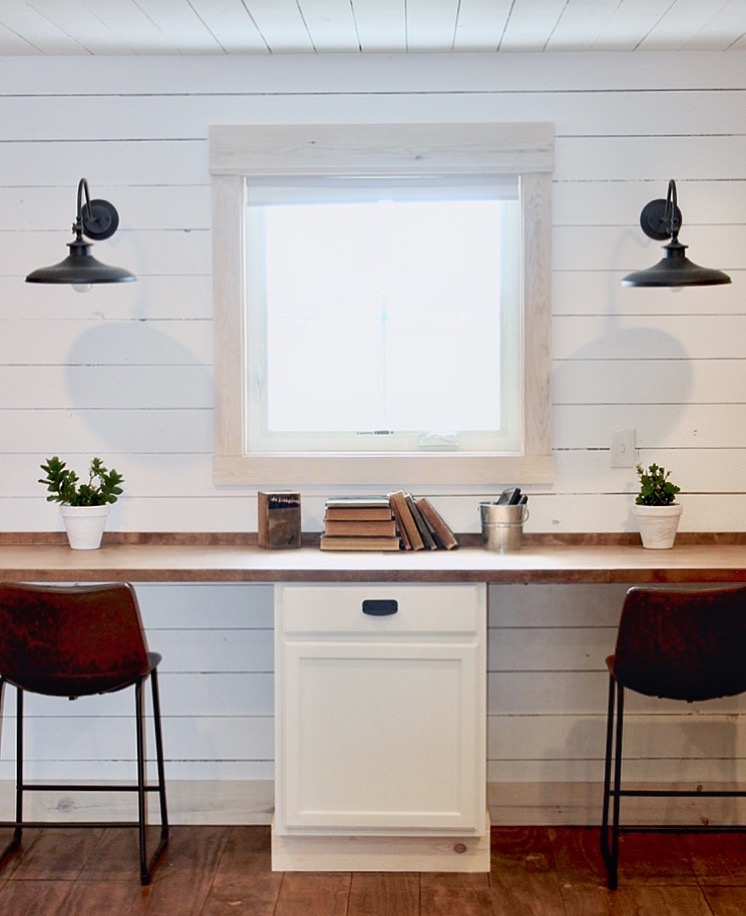 Above is a view of the loft in our cottage. When we finished this space, we decided not to use manufactured flooring. We actually used plywood, ripped it down to 8 in planks, glued, nailed, sanded and stained it to look like wide-plank, old barn flooring! We also built this long desktop wall with plywood! It was such a fun DIY!
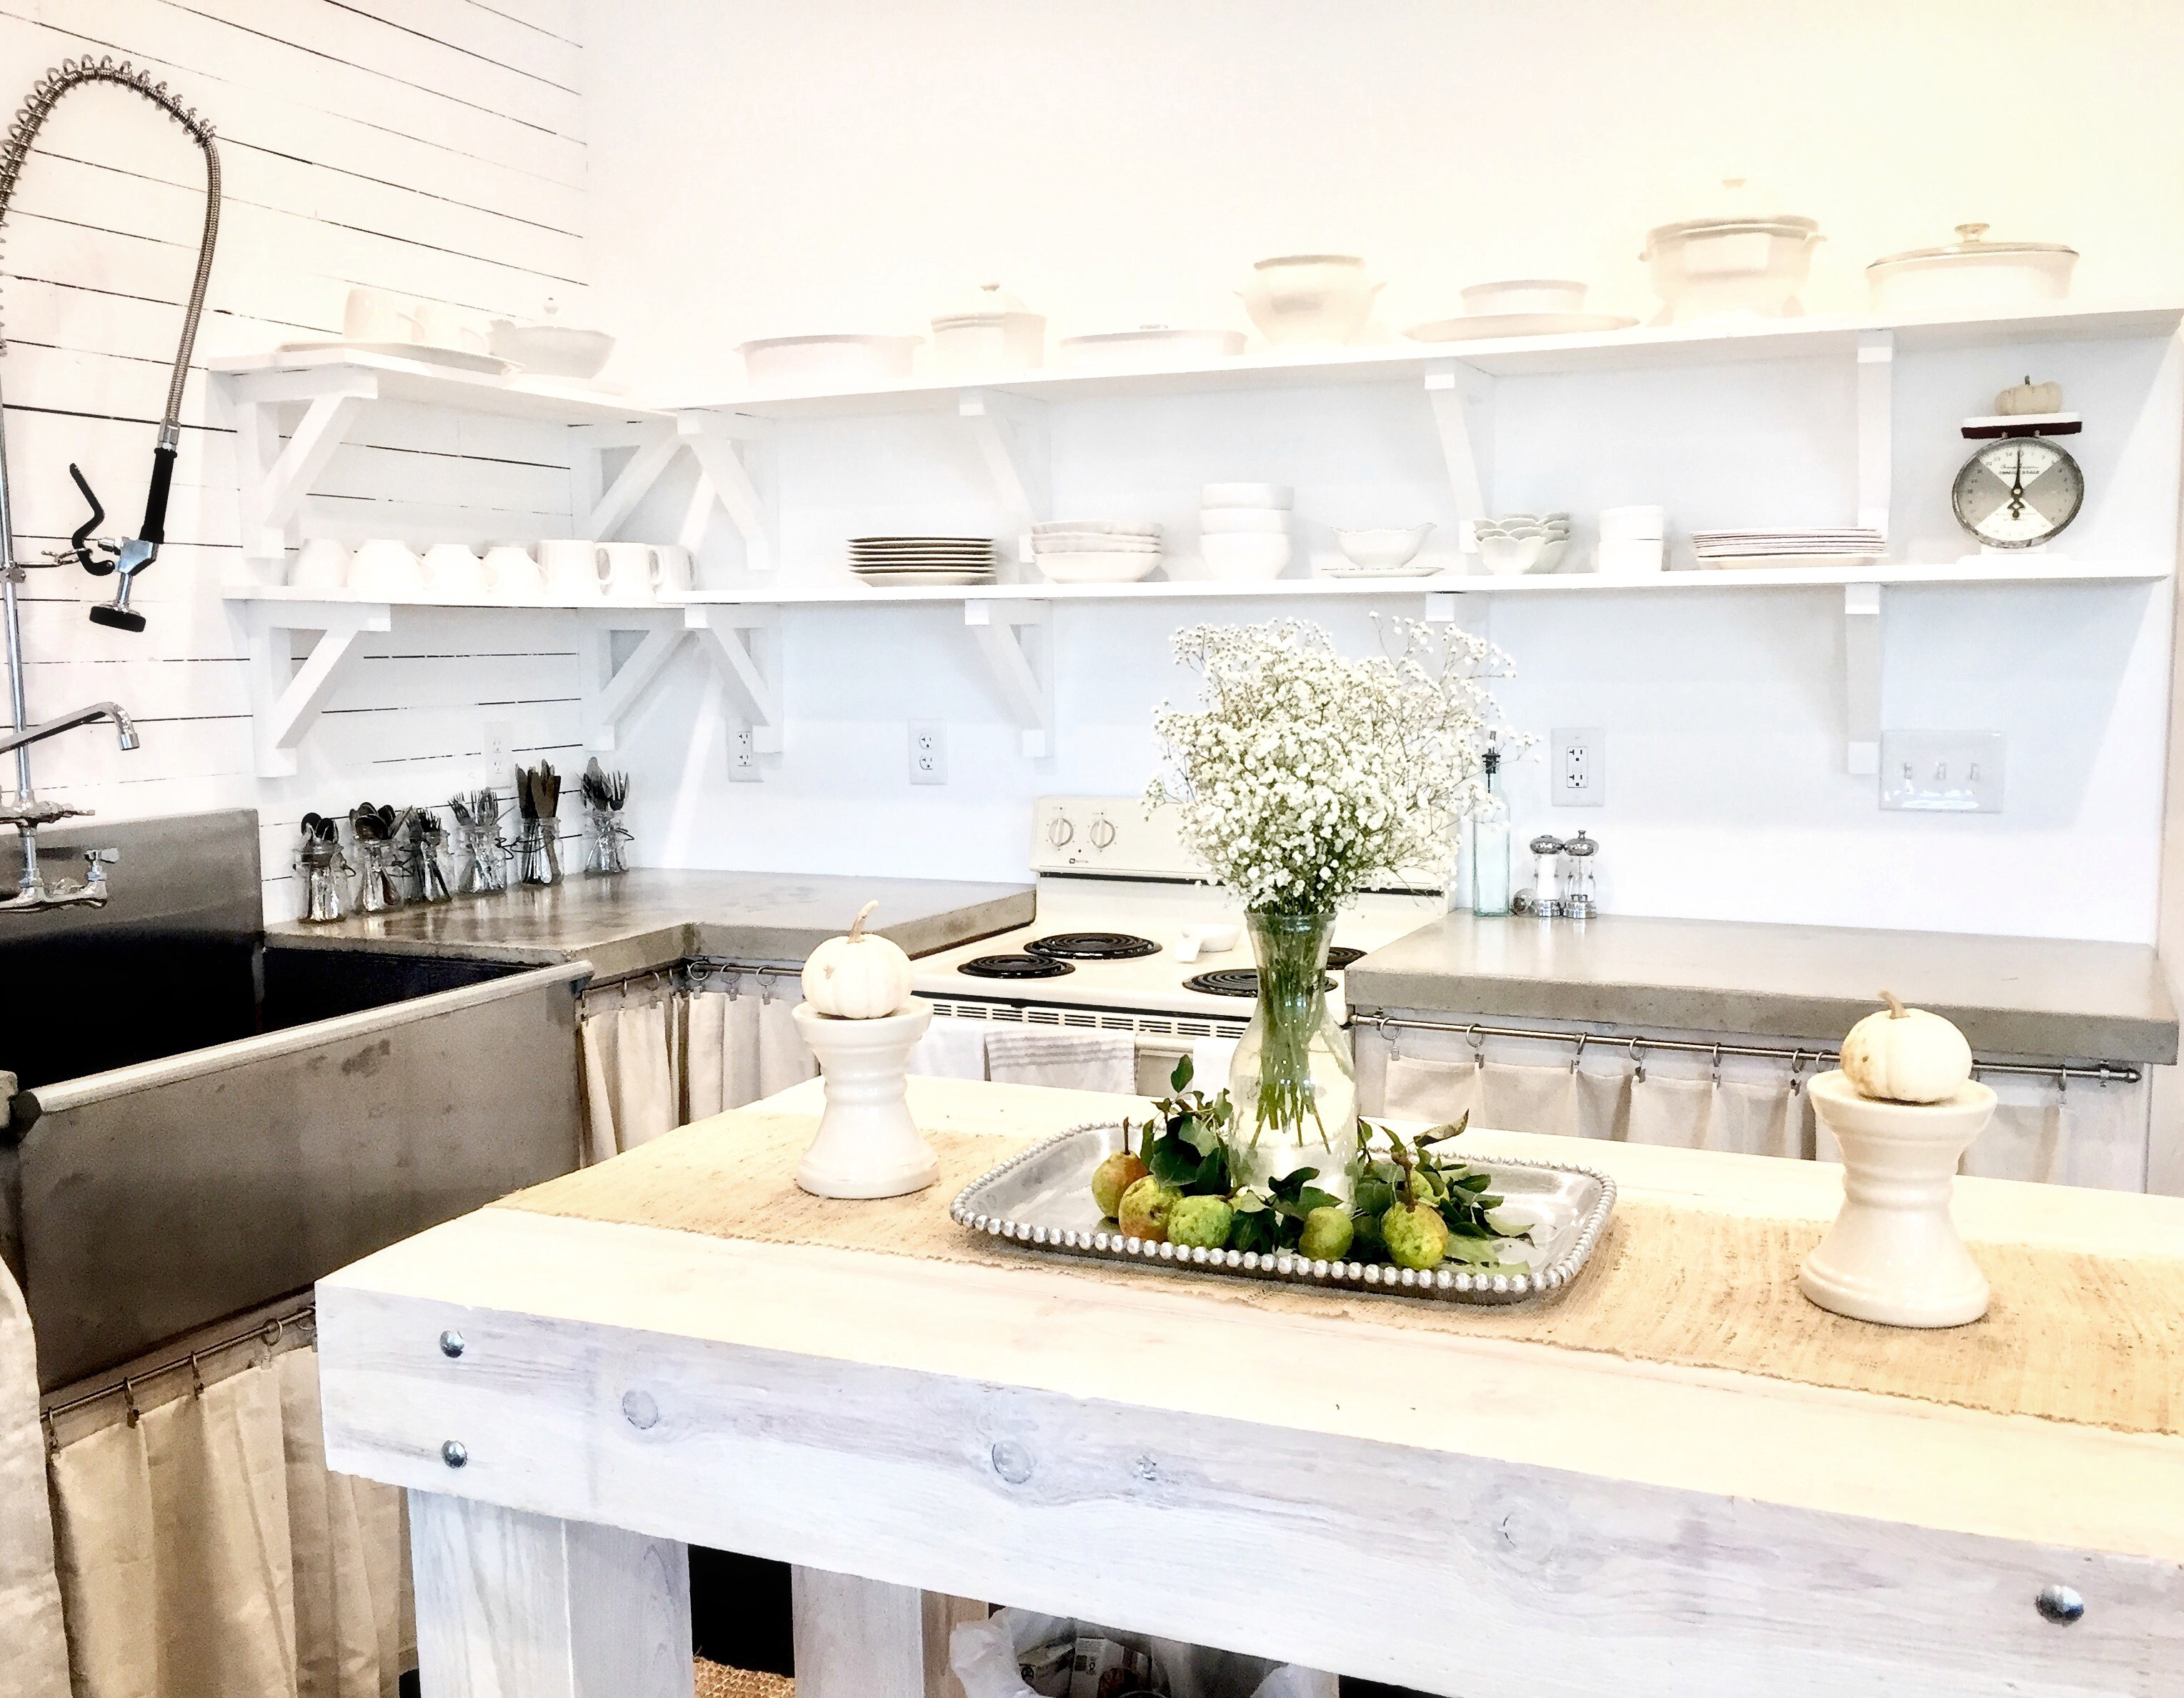
This Kitchen was such a fun DIY project! When we received quotes for the kitchen cabinets that were $4000 (for 4 cabinets) we decided to use some of the lumber we had on hand and just build them for FREE. Next, we built the island with a 6×6 post we had left over from a load we had delivered to make our mailbox post from. The island has casters so we can move it around if we decide to. Each cabinet has one shelf in it and I designed the corner cabinet to hold the larger things, like my blender and all my taller cookie sheets and things! The cabinet to the right holds our griddle and all the pots and pans. To the left of the sink, there is a cabinet that I use for Tupperware containers, napkins and all the table linens. We opted for open shelving and I was able to build them all in a day using plans from Ana Whites website. You can find her INCREADABLE DIY plans here http://www.ana-white.com/ We also made our concrete countertops and they are 2” thick! They are the raw concrete color, with no stain. After sanding we use about 4 coats of food safe, high gloss finish for more of a “wet” look! I’m super proud of the fact that this kitchen cost around $700! Not too shabby!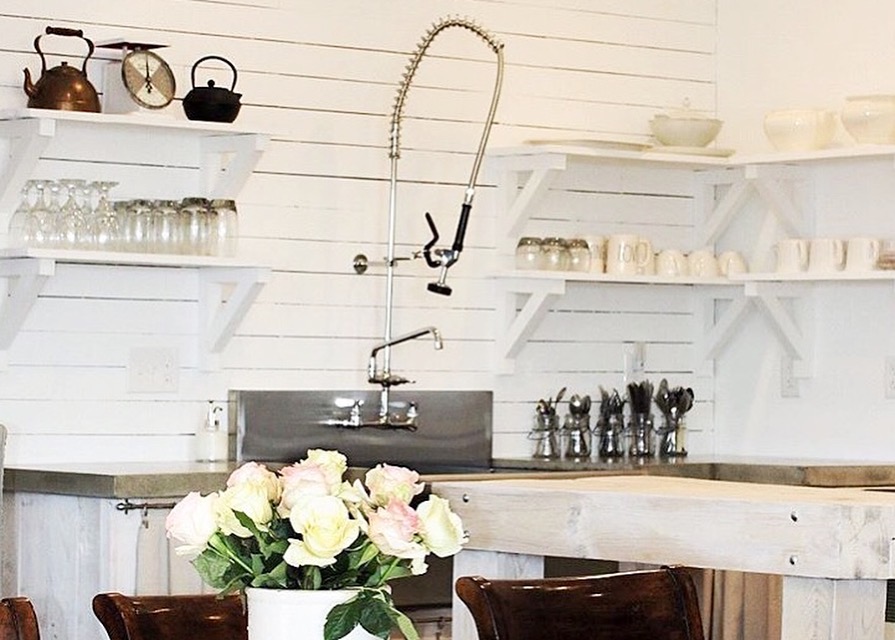
 Thanks for being here and be sure to stick around for more DIY fun!
~Dena

