
Today I’m sharing all about how to build a beautiful covered daybed swing!
Creating a beautiful covered daybed swing can transform your backyard into a serene oasis where you can relax and unwind. Whether you’re looking to enjoy a lazy afternoon nap or entertain guests in style, building your own daybed swing is a rewarding project that will add both functionality and charm to your outdoor space.
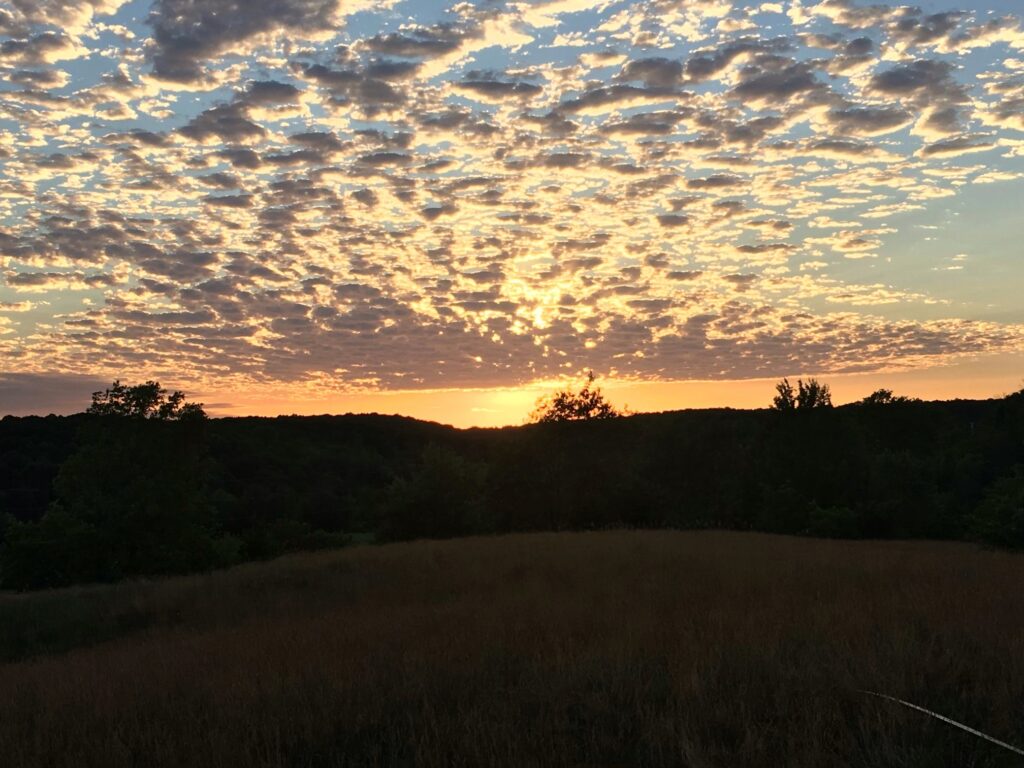
We’ve been working on building our DIY dream house around the clock for over a year 1/2 and we decided to take a long weekend and build a backyard daybed swing in one of our favorite spots in the yard. This hilltop has faces west and the sunset views from there are stunning, which got me thinking…we should build a beautiful covered daybed swing structure there so we can enjoy the sunset views forever:)
Be sure to watch the full YouTube video to see the entire process of this Covered Daybed Swing Project at the end of this posts
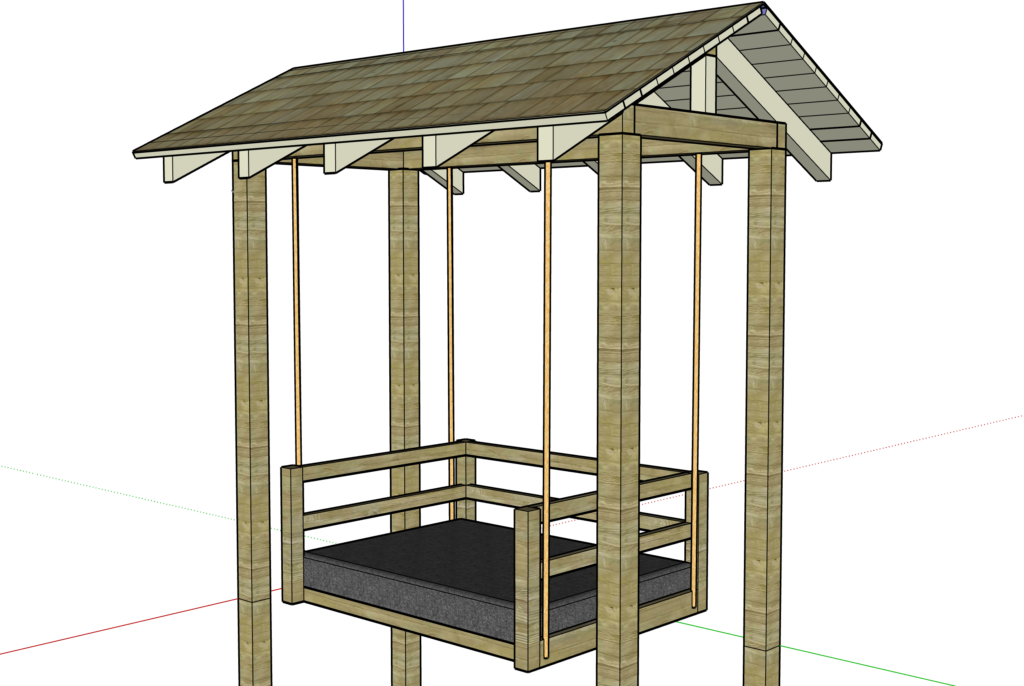
Covered Daybed Swing SketchUp Design
We already had a full size mattress we aren’t using so I wanted to use for the swing. We designed the structure to fit around the dimensions of the mattress.
Next, we gathered all the necessary materials and tools for the construction process. This included lumber, screws, a drill, measuring tape, and other basic carpentry supplies. It’s important to have everything on hand before you start to ensure a smooth building process.
My goal for this project was to create shade, make it structurally sound enough to hold a large bed swing + our body weight….and of course, it had to be cute too!
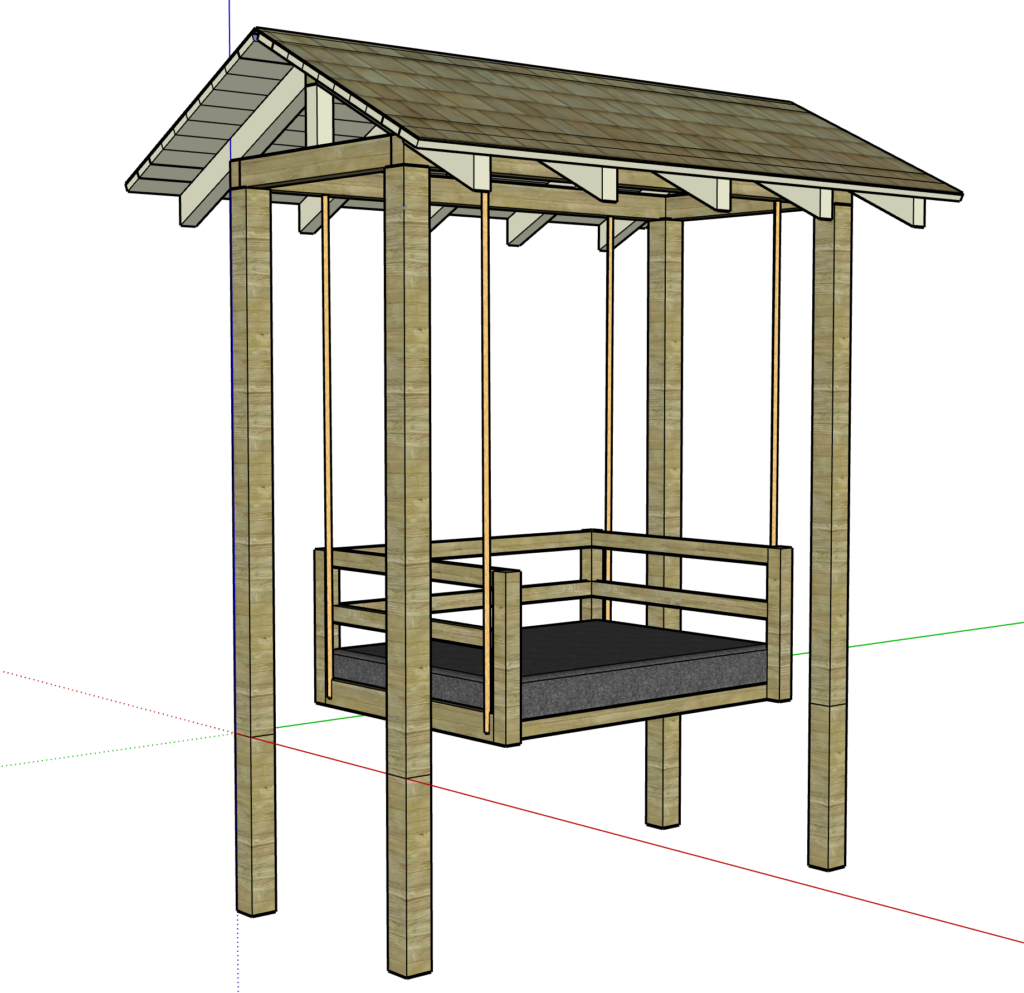
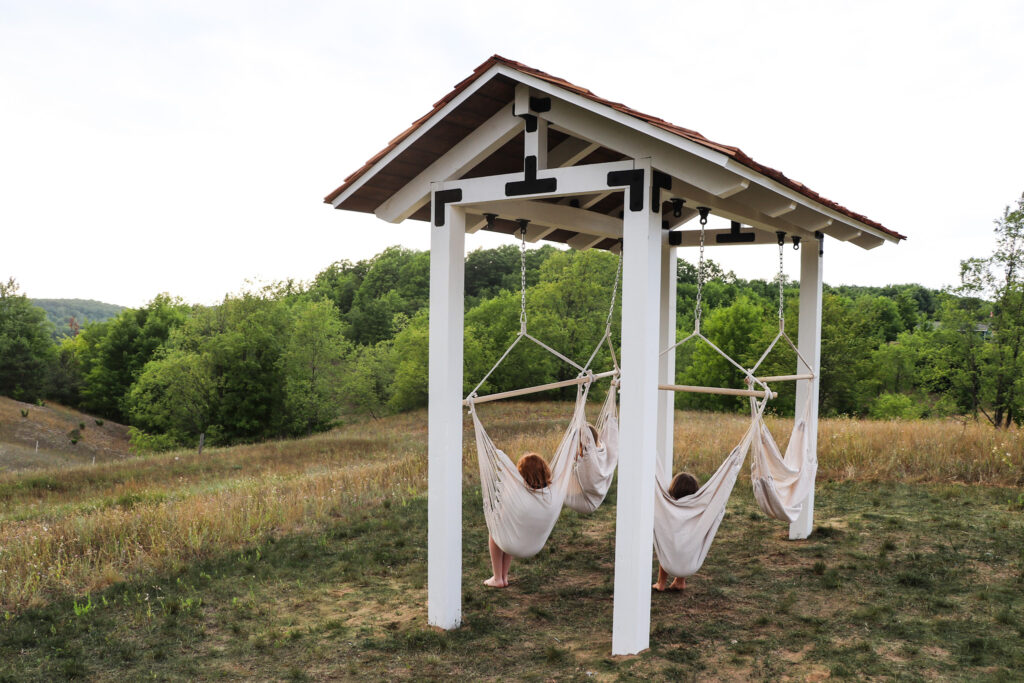
We used SketchUp to design our covered swing project, it’s a great beginner friendly software to draw up any renderings needed. We drew this mock up to give us an idea of what we wanted to build as well as figure out what we needed and make a materials list. I also wanted this structure to be versatile enough to swap out the daybed swing for 4 hammock chair swings anytime we had friends and family over.
Materials We Used To Build This Outdoor Covered Daybed
For materials, we purchased treated 6x6x12 posts for the four corners, 6×6, 4×6, 4×4 posts to build the structure as well as cedar shakes for the roof, tongue and groove for the ceiling. I decided I wanted to paint the entire structure white and leave the ceiling a stained wood so there would be a contrast between the white rafters and the tongue and groove ceiling.
Making Our DIY Tongue and Groove Using A Router Table
The tongue and groove ended up being backordered and impossible to get before fall so we canceled that order and got 2x6s and a router table. Even though we’d never tried making tongue and groove, we decided to give it a try ourselves. It took a few hours and was slow going but it worked!
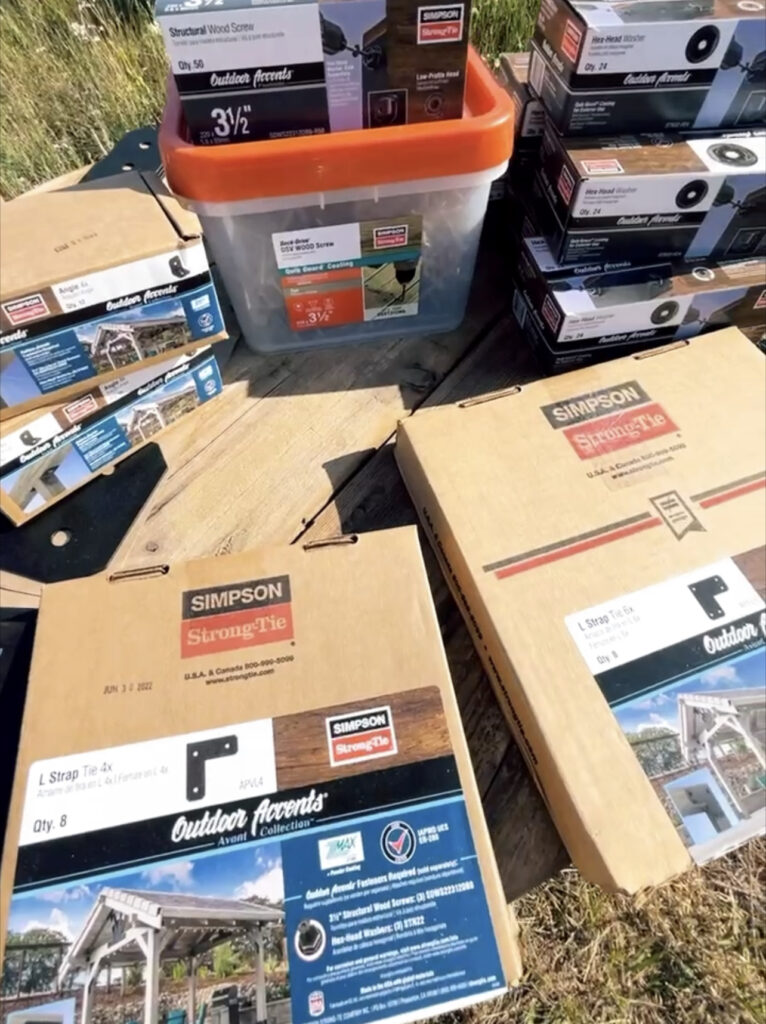
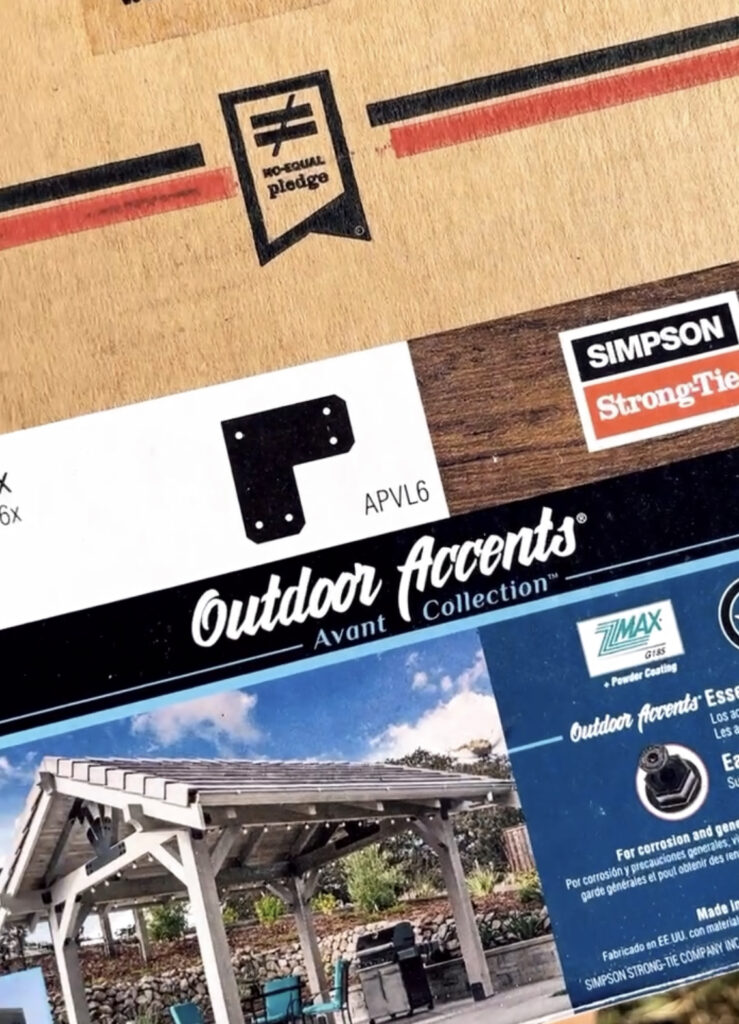
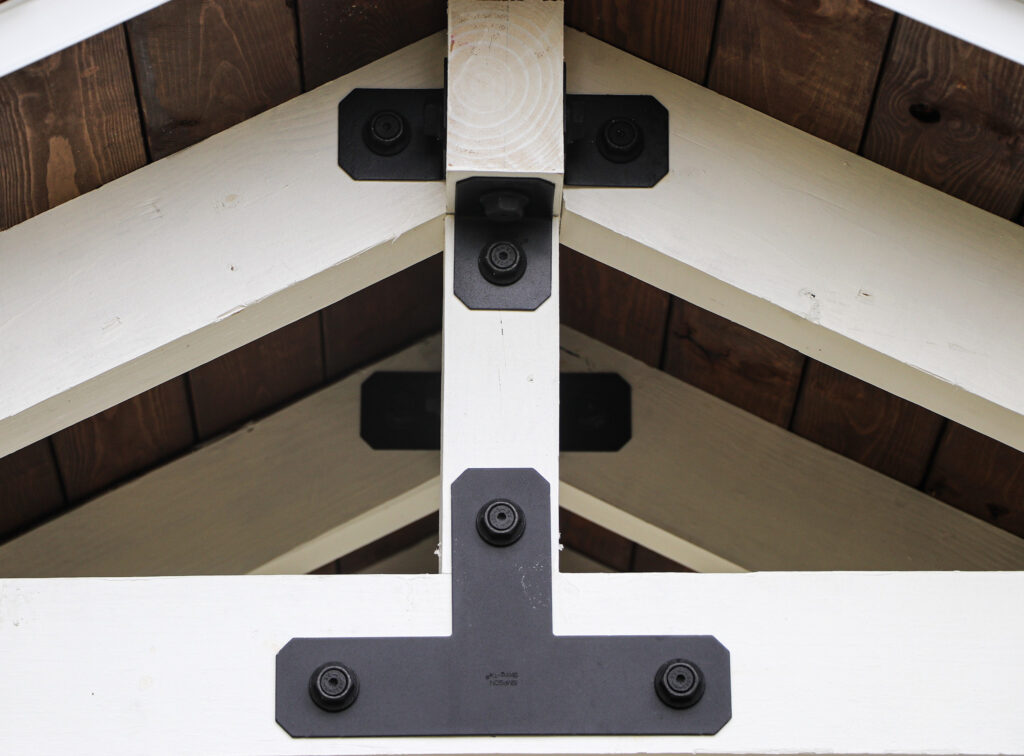
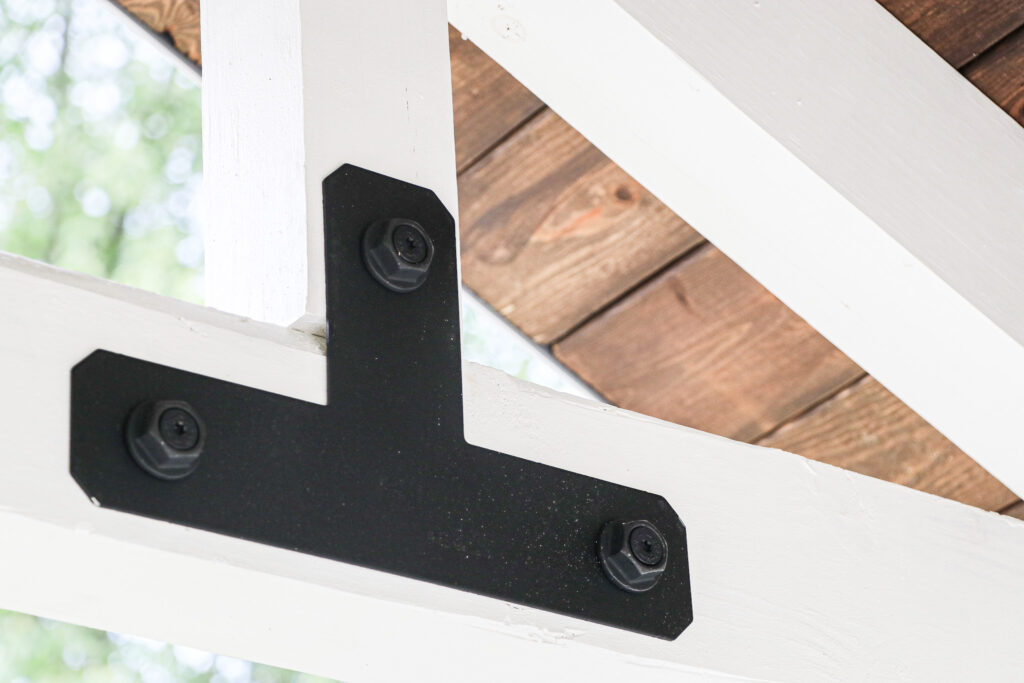
Simpson Strong-Tie Outdoor Accents Avant Collection
I love the look of the Outdoor Accents Avant Collection from Simpson Strong-Tie and we designed it so that we could use the Avant Collection to tie our entire structure together. The brackets beautiful decorative hardware that work with the Outdoor Accents structural wood screw and hex-head washer combination giving the look of a bolt with the installation ease of using a screw! They are powder coated so they have a clean look without any worry of them rusting.
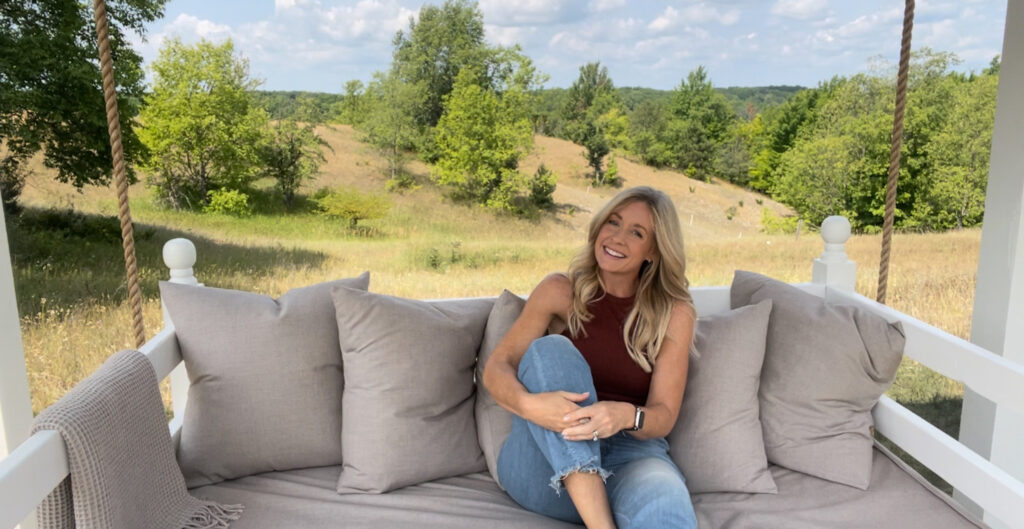
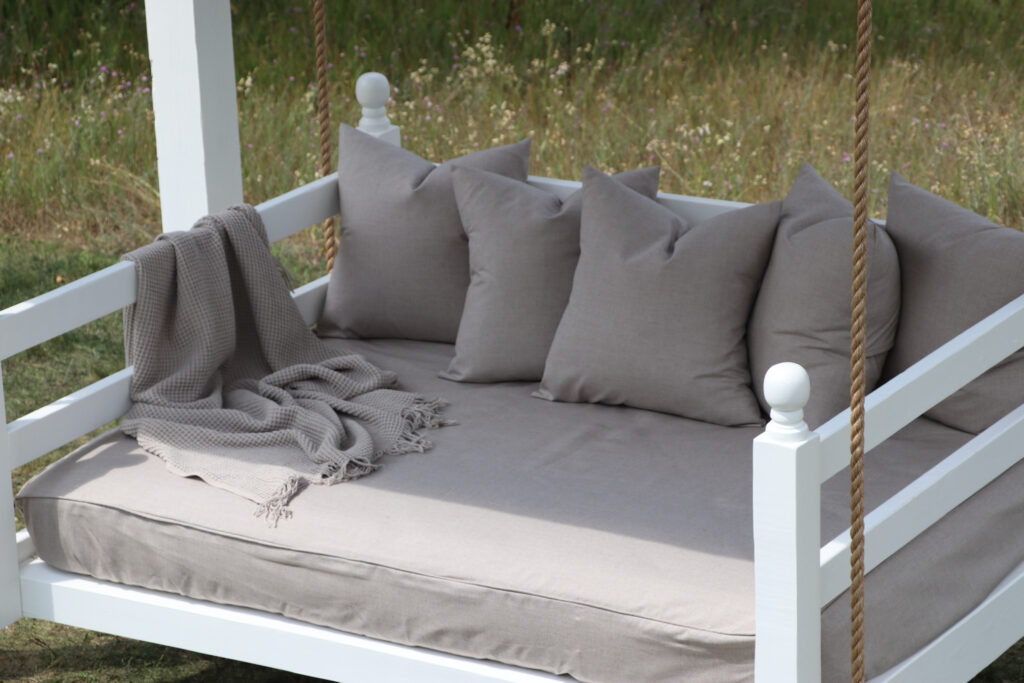
Before we got started on building the structure, I spent a day and a half sewing five pillow covers and a slipcover for the swing mattress using outdoor Sunbrella fabric in the shade “Bliss Sand”. I also ordered an outdoor mattress protector to go under this cover to protect this mattress as best as possible from water, bugs and any weather.
Next, we started on the structure. Aaron dug four, 3-foot holes where they needed to be with by hand using a post-hole digger. We used a few bags of concrete in each hole to set the posts. We used a 2×4 to hold the in place temporarily while we got them all square and level.
I applied a few coats of primer/paint on the posts while Aaron cut the rafters and top beams to length. Once every piece we needed was cut, I went through and gave them all a few coats before assembling the top structure.
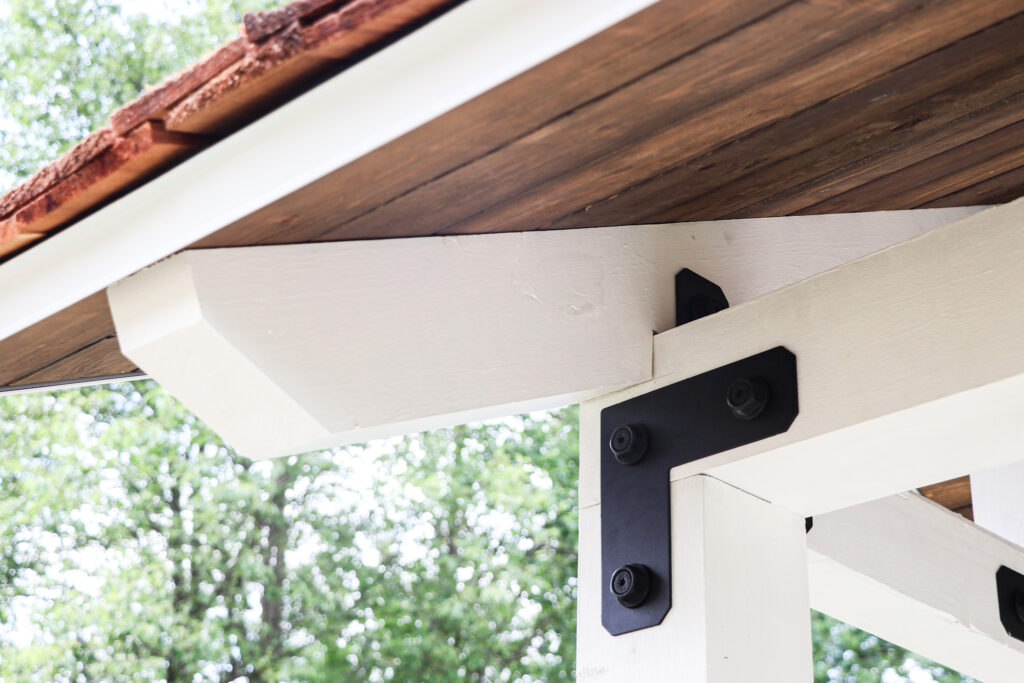
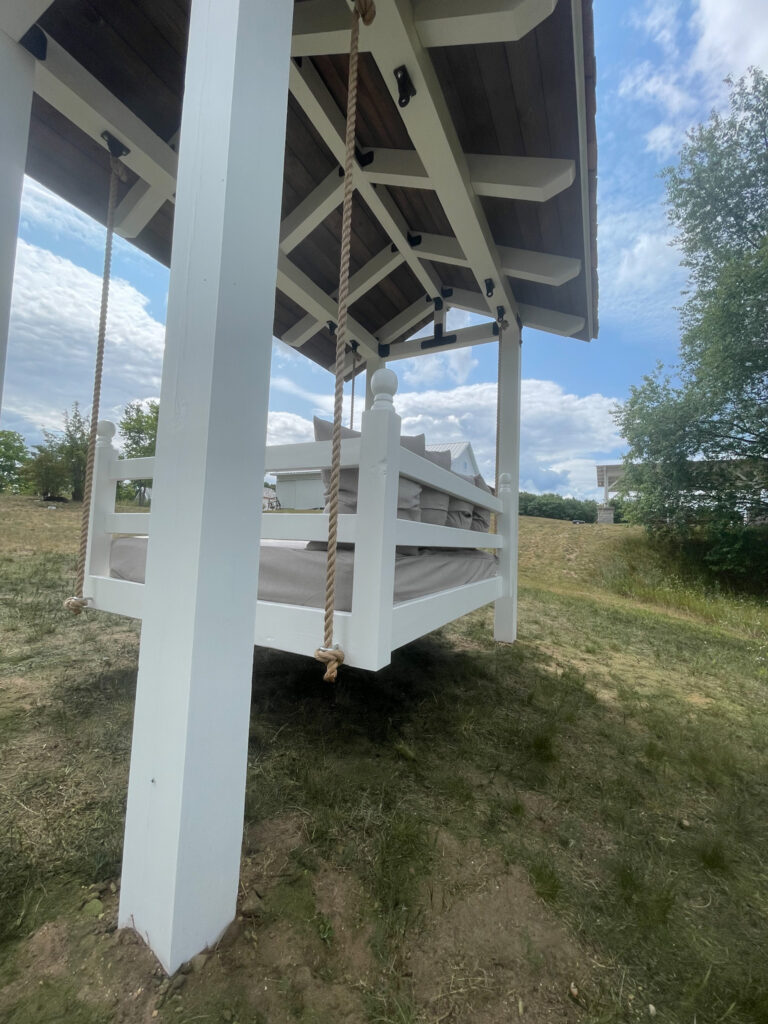
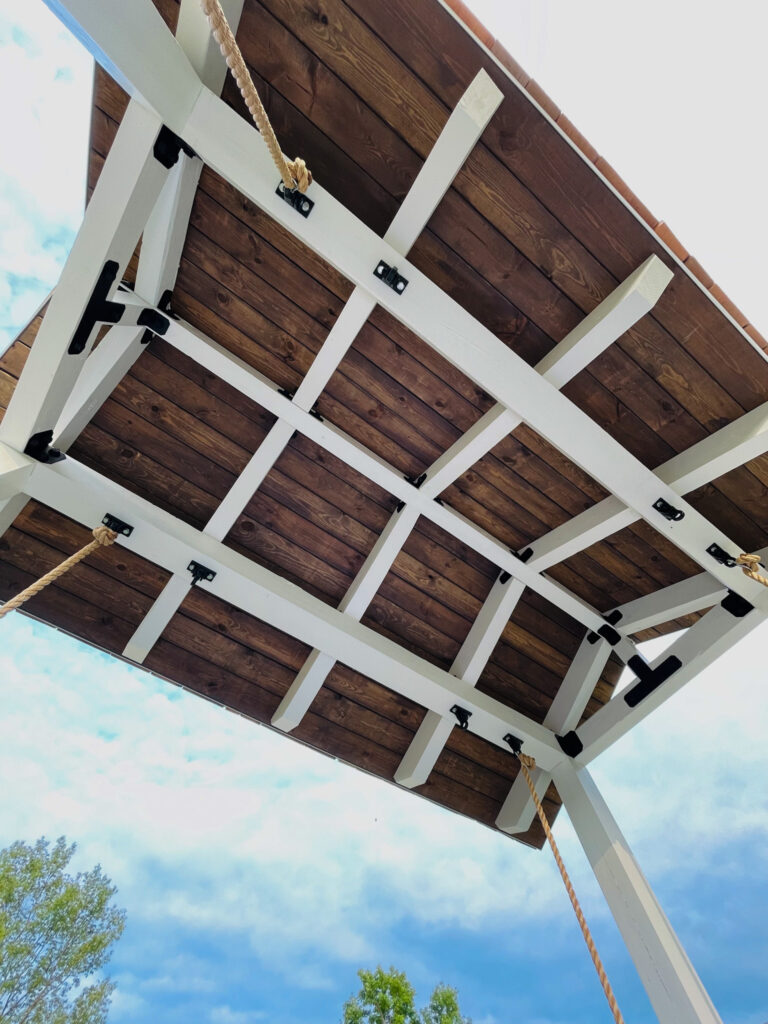
Aaron lifted the cross beams into place and I secured them in place using the Outdoor Accent “L” Brackets and Hex Head bolt/screw system. Everything went together really seamlessly thanks to Aaron’s strength (lifting everything into place) and the Simpson Strong-Tie brackets being so easy to install.
I decided to stain the 2×6’s we had made all the tongue and groove out of instead of painting them white because I thought the contrasting wood and white would look great. I tested a few stain colors and didn’t like any of them, so ended up mixing 3 colors equal parts “Classic Gray”, “Dark Walnut”, and “Weathered Oak”.
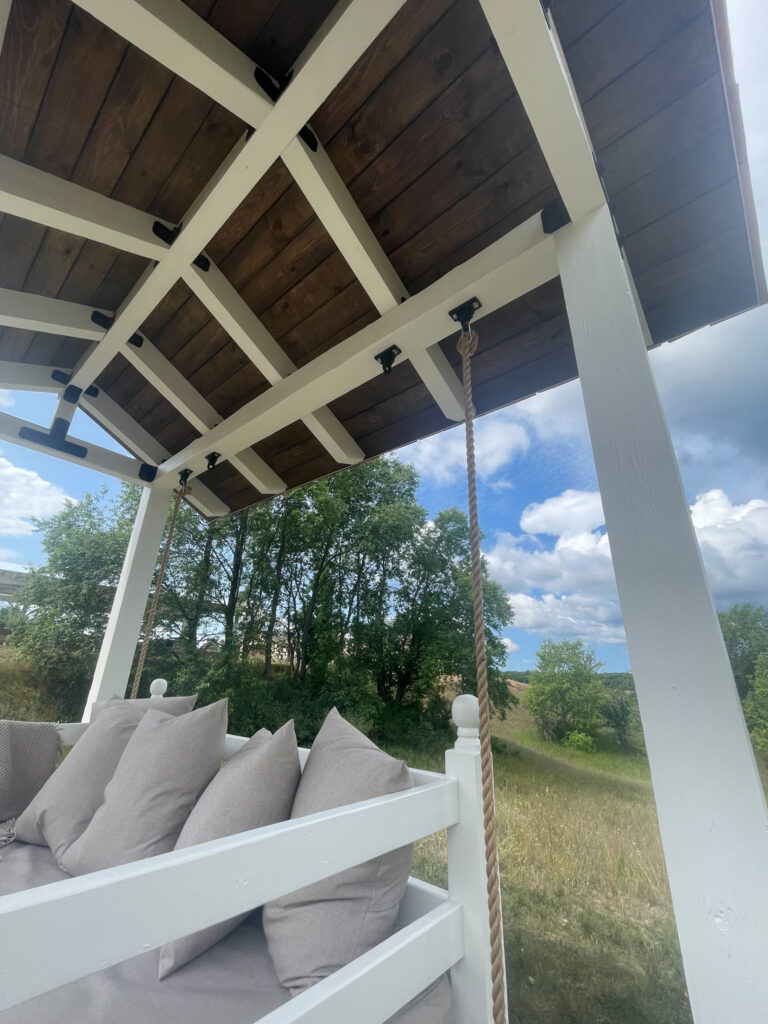
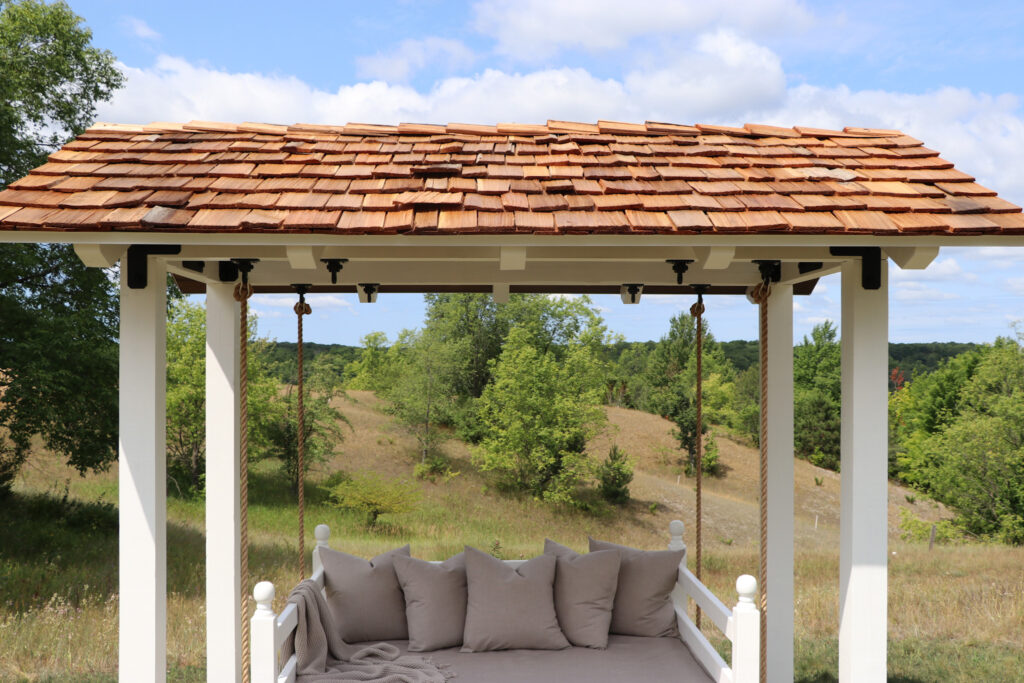
After we had the frame, ridge beam and rafters up, we installed the tongue and groove with the stained side facing down. We used white drip edge around the perimeter of the roof and were ready for the roof.
We installed the roof underlayment/water barrier using a roofing nail gun and then installed my favorite part…nothing beats the look of cedar shake shingles, in my opinion! They age so beautifully and while they are pricy, I love using them on smaller projects like this one because it doesn’t break the bank:)
Building The Daybed Swing
We finished the structure and moved on to building the daybed swing. I had priced out daybeds and couldn’t find any I liked…not to mention they’ll run you into the thousands so I wanted to make ours.

It’s a simple, straight forward design with four,4×4 corner posts, a frame to fit our mattress and 2×4 slats for the supports as well as the back and two sides. I primed/painted all the wood before building it to save time. Then cut everything to length and assembled it. I added a rounded finial to each corner 4×4 to dress it up a bit.
Final Finishing Touches On The Daybed Swing
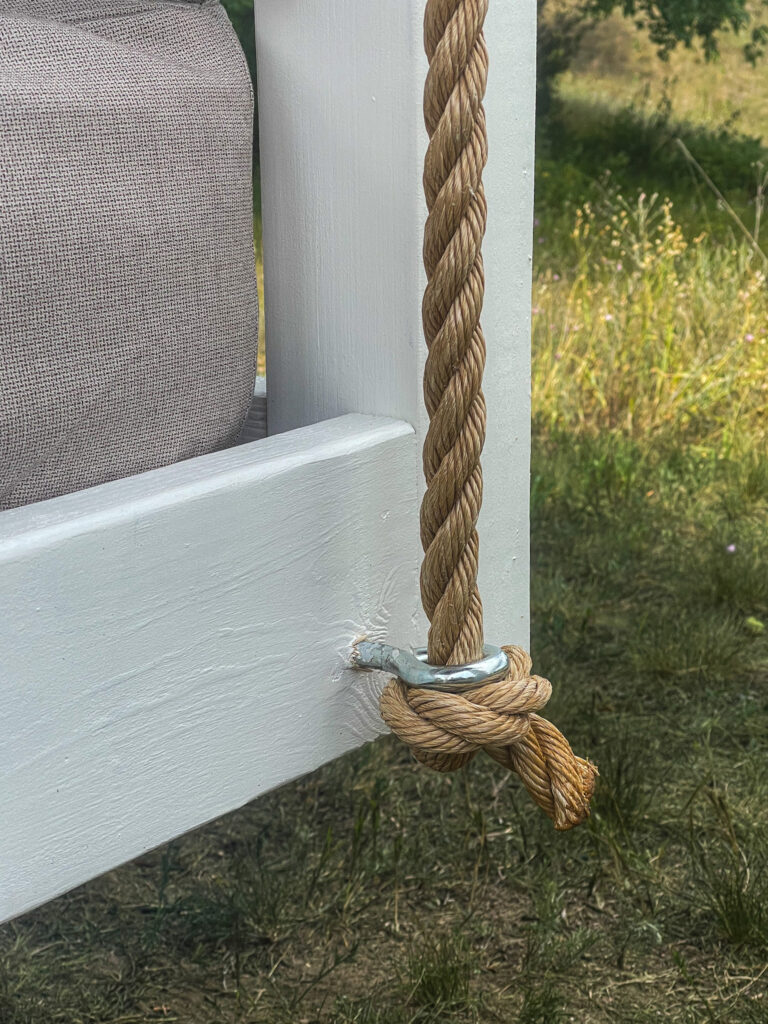
Then I worked on filling the pilot holes where the screws were with a wood dowel rod, sanding and all the touch up paint. Aaron worked on hanging the 4 rope hardware brackets for the daybed swing and added 4 more hardware brackets so we could swap the daybed swing for the four hammock chair swings from time to time.
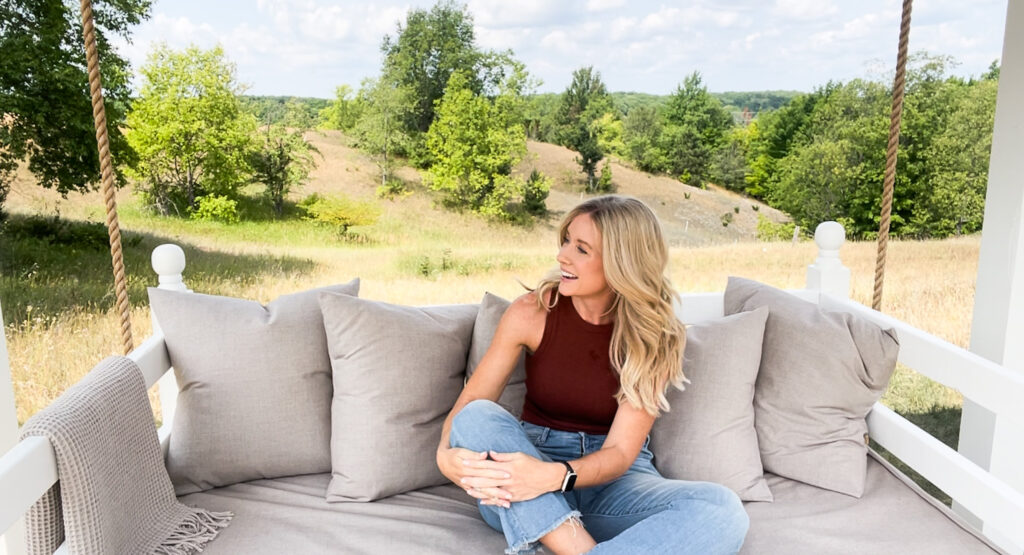
Once the daybed swing was hung, I added the outdoor mattress protector and the handmade cover with outdoor fabric. I opted for high-quality materials that are resistant to fading and mildew while providing comfort for lounging. I also made five pillow covers with the same Sunbrella fabric specifically designed for outdoor use. I only sew occasionally and the cover and pillow covers were really simple to make.
Once everything was dry, we got the swing level, tied the knots and it was DONE!!!! Just in time to enjoy a gorgeous sunset!

Materials:
- Outdoor Sunbrella Fabric: “Bliss Sand”
- Behr Marque Exterior Paint “Whisper White”
- Hammock Chair Swings
- Cedar Shakes
- Roof Underlayment
- White Drip Edge
- Roofing Nail gun
- Rope
- Decorative Finials for Daybed
- Full size mattress
- Outdoor Mattress Protector
- 24×24 Pillow Inserts
- Simpson Strong-Tie Outdoor Accent Avant Collection
- Simple DIY Pergola Planner Software from Simpson Strong-Tie
- Swing Hanging Black Hardware (we used 8)
- Three Stain Colors I mixed equal parts “Classic Gray”, “Weathered Oak”, & “Dark Wallnut”


