
DIY Dream Home
ICF Basement Walls
Who’s ready for an update on our DIY Dream Home?! It’s been a total whirlwind here at Fletcher Creek because we’ve had our ICF Fox Blocks delivered, we’ve stacked AND we’ve poured our DIY dream home ICF basement walls! Talk about an exciting few weeks! WE HAVE WALLS! If you’re building in the future and interested in ICF construction I highly recommend checking out my corresponding YouTube video HERE.
In this post, I’m sharing all the details of our recent experience building our DIY Dream Home ICF basement walls using Fox Blocks. We will be building the main level using ICF construction as well. I will share the details of that when that part of the house is finished…right now, we’re talking all about the basement!

Delivery Of Our ICF
Delivery day is always exciting but this was by far one of the biggest and most exciting deliveries we’ve had! Because we are building our basement AND upper level (all exterior walls) using ICF, our order was pretty massive. We had three separate deliveries and each time the semi-truck was FULL! The Fox Blocks come stacked in rows of three and are four rows wide. Thankfully they are pretty light and we were able to carry them with two people or one person using a dolly. We carried all the 8″ blocks, 8″ “T” blocks, and 8″ Corner blocks down to the job site. Then we stacked all the 6″ blocks, that’ll be used for the upper level, in our 4 car garage/pole barn for the time being.


Stacking ICF Fox Blocks
The Fox Blocks are four feet long by 16 inches tall. We also needed quite a few “Ts” and Corner blocks for our home. The actual interior of the basement block (the part that gets filled with concrete) is 8 inches with an additional 2 and 5/8ths of foam on either side, making the blocks 13 1/4 inches thick. When we poured our footings, we used a chalk line to mark precisely where the perimeter of our house needed to sit on the footings. This made stacking the blocks and keeping them in place SO easy. Fox Blocks are almost like a giant lego blocks.

Stacking these blocks was fairly simple because they are SO light compared to lumber and cinder block! We ran into a few places where the block’s interior webbing (stud) was hitting on a piece of vertical rebar from our footings so we just bent them out of the way. Once the bottom row was stacked we clipped them all together using HV Clips and added the horizontal rebar. They have an internal webbing that makes up the wall studs and one thing I love is that these studs are every 8 inches instead of 16 on center (like a stick-built home). The Fox Blocks also have a reversible interlocking system so they can be stacked in any direction and the webbing (stud) will line up perfectly!


Installing Horizontal Rebar
Our home required a mixture of #3, #4, #5 rebar throughout the entire project. Our architect and Fox Blocks representative gave us the specs for what our project required. Ours required a lot of horizontal and vertical rebar due to the fact that we are building a basement and main level out of concrete AND have 14-foot walls on the upper level as well as 9-foot walls in the basement. We also used rebar to cut and bend Lintel reinforcements for the door and window openings. I spent a LOT of hours cutting rebar…but I was happy to do it! The Cut-Off Wheel made it pretty easy on me!

Adding Common Seams
We started stacking blocks with two corners and worked our way towards the center of each wall. Because the blocks are 4 ft, any wall that is not divisible by 4 needs to have a cut. That cut is called a common seam and you want to keep the cut in the same place all the way up the wall. Later that seam will be filled with spray foam and braced with 2x4s making it very strong and sealed.


Cutting ICF Blocks With Ease
Cutting the ICF Focks Blocks was one of the easiest things about this job! We literally just use a 10″ serrated knife! The Fox Blocks are lined as you can see in the picture below. They are also interchangeable so they can be flipped and used on either side. Everywhere you see the words “FOX BLOCKS” there is a stud attached to an inner webbing that holds the rebar and allows you to clip blocks together vertically and horizontally. I was able to cut through the foam with no effort at all and make super straight cuts with this knife. It took some elbow grease to cut through the plastic studs but I’d still say it wasn’t hard to do whatsoever.

Fox Blocks Bucks

Above and below you can see how we framed out the doors and windows using Fox Blocks Bucks. Lots of people use lumber to frame out their windows and doors but decided to use the Fox Bucks instead for a couple of reasons. The Bucks come in 4 ft lengths just like the blocks and they can be easily cut to length. They allow for fully integrated continuous insulation windows and doors…something that wood doesn’t provide. When you frame out your doors and windows using wood you will have some energy loss through that wood because wood just isn’t a good insulator. The Fox Buck provides a solid barrier against drafts and moisture. You can find all kinds of helpful resources on the Fox Blocks website in regards to using the Fox Bucks for framing out doors and windows.
To install the Fox Bucks, we ran insulated foam down the inside edges and taped the Bucks in place with house wrap tape. We later braced the door and window openings with lumber (before the concrete pour).
Bracing Door and Window Openings
As we all know, concrete is SUPER heavy! Some of our windows had hundreds of pounds of concrete over them after we poured. To support all that weight we needed to frame out each window and door using 2x4s and 2x6s. We followed the manufacturer’s recommendations and the 2×6 bracing held up well in most places. We had a little bowing in a couple of spots and had to add more 2x6s as we were pouring…so next time I plan to brace them a little more than I did this time. Our window openings are quite large and were holding a lot of weight. This was my husband’s first time running a concrete pump/hose so he thinks he may have overfilled those two areas a little too fast (possibly causing the bucks to bow). Either way, lesson learned, and for the second floor, we will make sure to brace it accordingly.

Bracing Walls/ Scaffolding
Bracing your ICF walls is a must. We rented our bracing from a friend of a friend. The bracing is screwed directly into a stud every 4-6 ft and then the extended leg is staked into the ground with shorter rebar pieces. The bracing is adjustable and it serves as scaffolding after you run 2×8 or 2×10 planks down them. We screwed all our planks together as well as to the bracing. Most bracing you rent comes with side rails for safety, ours did not (so we were extra careful). The bracing has a turnbuckle or a hex screw that can be let out or in before you pour to make your walls plumb. It also can be adjusted as you pour if a wall is leaning in or out a bit. Ours had the hex screw adjustment so it was really easy to adjust as needed.

Adding Vertical Rebar
Our home called for vertical rebar to be placed every 19 inches everywhere except the frost wall in the walkout portion of the basement. Because the walkout area will not have soil pushing up against it like everywhere else in the basement, that area needed vertical rebar every 2ft.

Prepping for Pour
Once everything was in place we had to prep a little more. We ran Great Stuff insulating foam under the interior and exterior of the bottom row of blocks (between the blocks and concrete footing) and made sure every common seam was sealed up with Great Stuff Foam. The blocks have “lego” type nubs on them so they sit up off the footer a little way allowing you to seal it up with the foam. You don’t want too much of the great stuff foam to go under or past the foam block into the wall portion (where the concrete goes) because that will create a potential weak spot in the wall. Sometimes that foam is hard to control…so I just removed any extra that came out and tried to keep it out of the walls as best I could. In this case, more is NOT better…it just needs to fill the gap and hold the concrete in the wall.
How We Prepared for the Next Level (main level above ground) before we poured our concrete walls for the basement
Because we have another story that we’re going to be building out of Fox Blocks above this, we did a few things to prepare for the next level. One thing we did was tape the top of the ICF blocks so that when we poured the concrete, they wouldn’t get all filthy. We need the next row of blocks to go on seamlessly and cover it with tape to keep it clean.
Something we HAD to do was extend 3 feet of vertical rebar above the top row of basement blocks. The rebar has to overlap 3 ft so when we lay the first row of the upper level we will add more vertical rebar that overlaps these. We had some longer pieces and they worked great, but in some spots, I had to drop down 4 footers “wet sets” after we poured our last course of concrete and that worked fine.
You can see the hanger brackets below. They are inset into the block, supported with a 2×4 underneath, and then wired in on the inside to the ICF block webbing, AND then rebar is threaded through it before the concrete pour. These are what hold the floor trusses for the next level. This was something that had to be done before pouring as well.
If you follow me on Instagram then you’ve probably heard that we were robbed just before our concrete pour was scheduled. The Watkins Hanger basement ceiling/floor truss joist brackets we had purchased were sadly stolen from our yard. They were back-ordered and super hard to replace…but my incredible husband drove all night to pick up replacements so we could keep our pour date! We were very relieved to have found replacements before winter!
Pouring The DIY Dream Home ICF Basement Walls
We scheduled 83 yards of concrete and a pump truck for Friday and noon and by 4:30 we had finished the job! We had a crew made up of family members and everyone worked their tails off for 4.5 hours!
The walls cannot be poured all at once, they have to be poured in courses of no more than 4ft tall at a time. We started with the walls that had windows and doors to allow them the most time to cure before adding more weight.

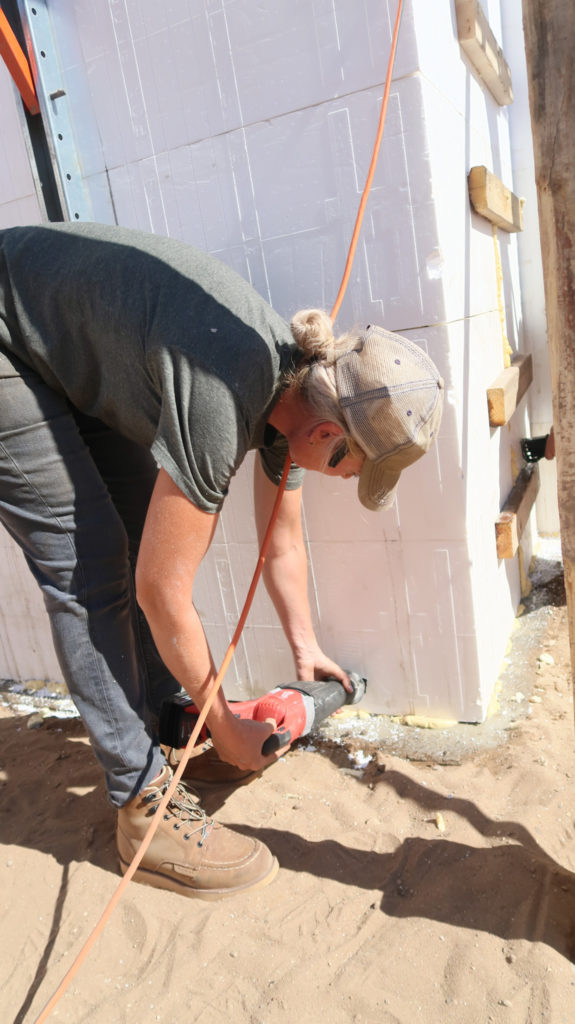
Eliminating Air Pockets or Weak Spots in the ICF Basement Walls (how to make sure concrete settles)
My husband ran the pump and my brother-in-law kept all the walls plumb by adjusting the bracing if needed. My son and brother ran the power concrete vibrator and down on the ground, I ran a bladeless Sawzall across the walls to help the concrete settle. The more you work the concrete down by vibrating the walls, the less chance that you will have air pockets and weak spots in your wall. We had 5 other family members pitch in wherever they were needed and together we got the job done!


I’m so happy we decided to build using Fox Blocks ICFs. I’m beyond overjoyed that we now have basement WALLS!

*Disclaimer: This post is in partnership with Fox Blocks and contains sponsored products. The compensation received will never influence the content promoted on this website. All opinions and views expressed in this post are solely mine (Dena/owner/writer) and mine alone and have not been swayed in any way by this sponsorship. I (Dena) am a DIYer, NOT a licensed contractor or builder and all opinions are my own. I recommend hiring a licensed contractor or professional for any and all construction projects. I have pulled all required permits. I recommend that you always pull the required permits.


[…] DIY Dream Home ICF Basement Walls […]
[…] We’re Building Our DIY Dream Home DIY Dream Home ICF Basement Walls […]