DIY Radiant Heat and Pouring Our Concrete Floor
We have spent the past few months working on our DIY Dream Home! We’ve gotten so much done and I’m way overdue on giving you an update so today I’m sharing all about installing our DIY radiant heat and pouring our concrete floors in the basement.
Designing The DIY Radiant Heat Zones and Layout
We have radiant heat in our current home and we installed it ourselves before pouring the concrete slab. We absolutely LOVE in-floor heat and chose to heat our basement the same way.
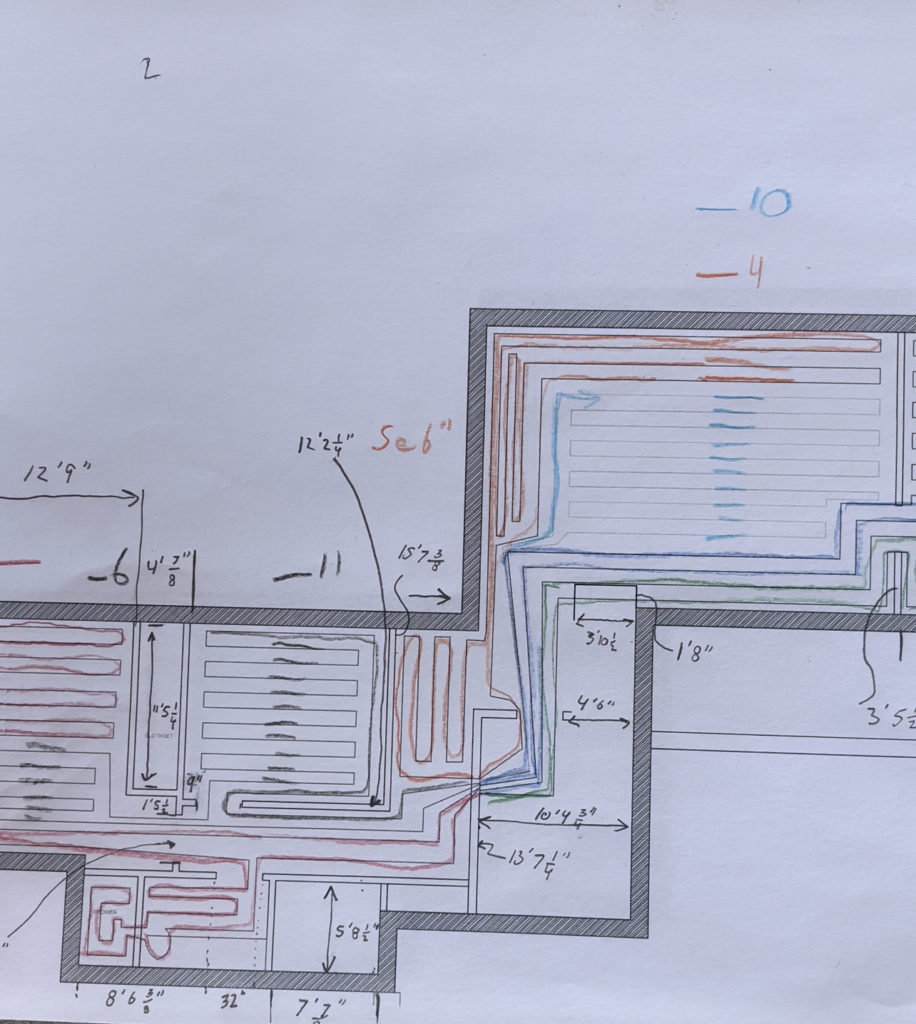
I can’t take any credit whatsoever for designing the radiant heat zones. Aaron did all the research and designed our layout in AutoCAD. My husband, Aaron is an Engineer and he’s brilliant at this sort of thing!
Our basement is just over 2,000 sq ft. It’s a walkout, with one full bathroom, two bedrooms, a family room, a gym room, a mechanical room, and a large cold storage area. The radiant heat will only be in the finished living space, not the cold storage area (under the front and side porches).
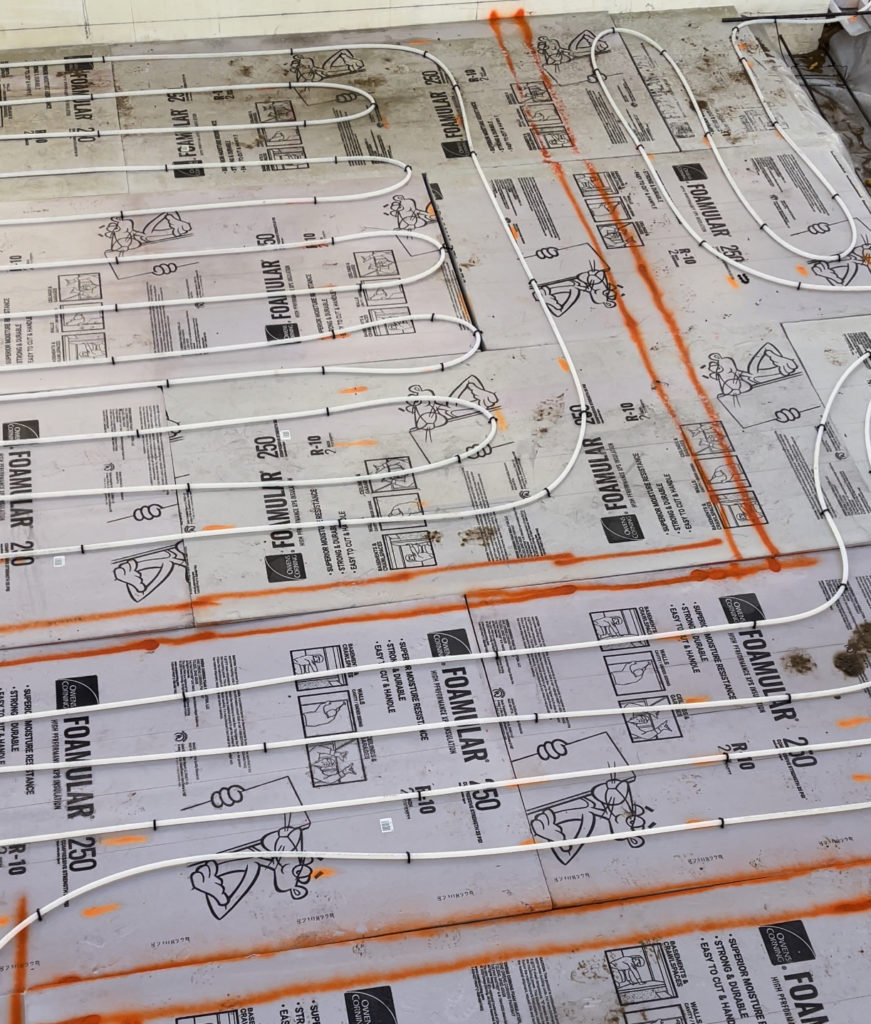
Aaron printed a copy of the CAD design and color-coded each zone to make it a lot easier to read. Everything starts and ends at the manifold (that will eventually go on a wall in the mechanical room).
Prepping the Basement Foundation for Radiant Heat/Vaper Barrier
Before we could lay the Vaper Barrier down, we had some prep work to do. The wind blew a lot of sand into the basement over the winter months and the basement ground wasn’t level or at grade anymore. We shoveled sand into wheelbarrows and wheeled it all out.
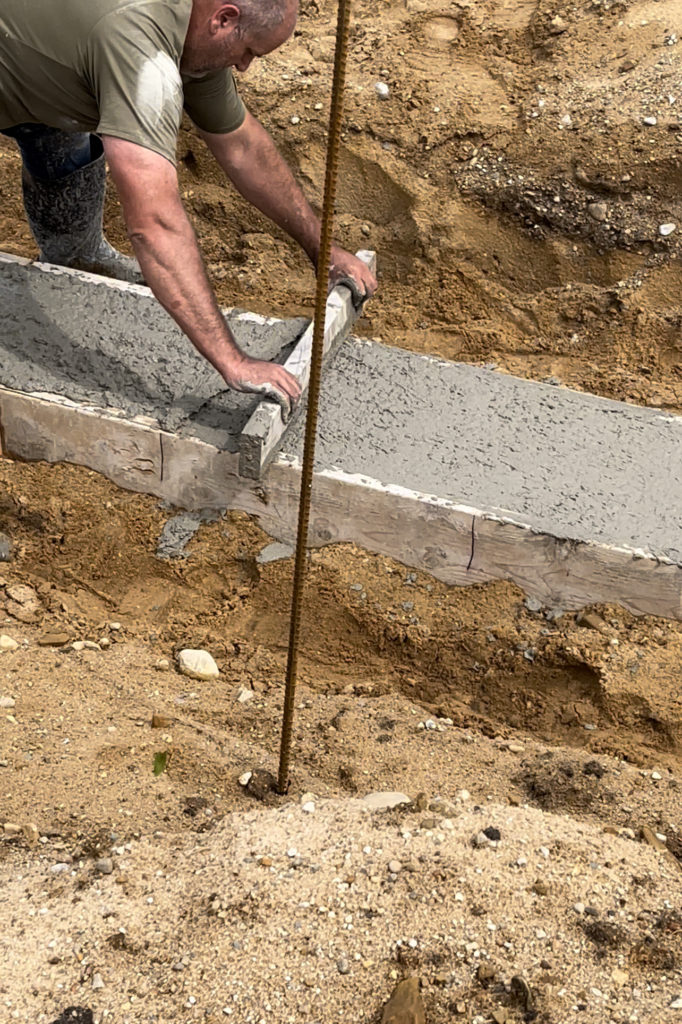
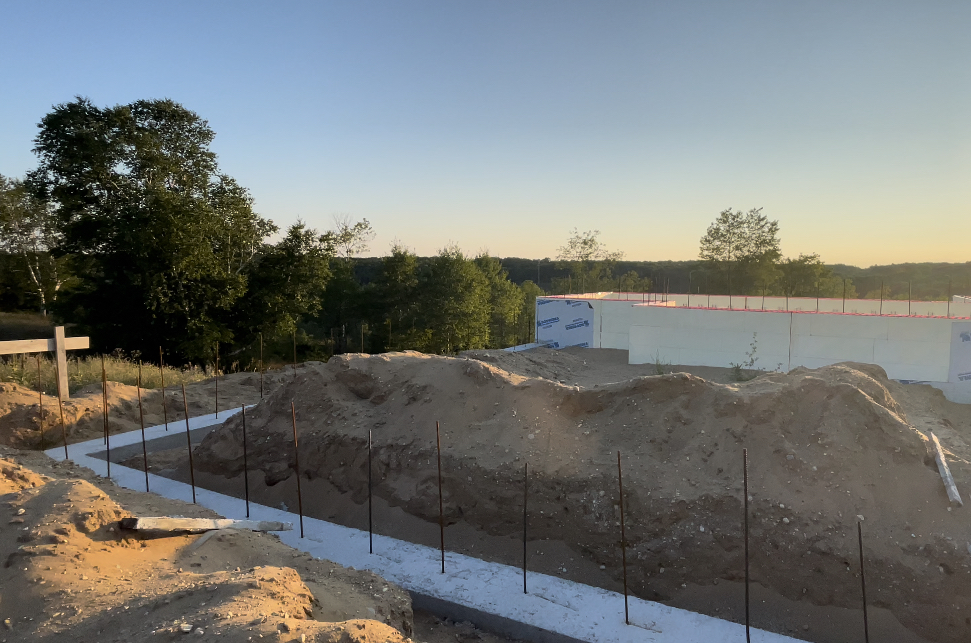
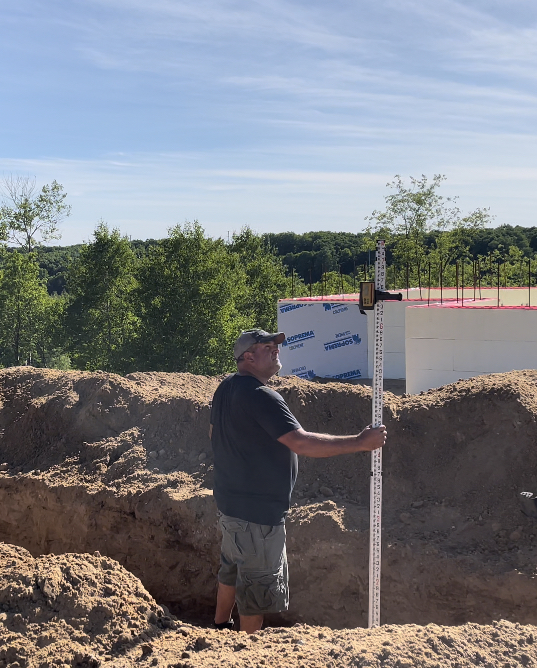
Then we used a laser level to check the grade and we raked it out as we went along the basement floor. We also dug out the footings for the garage and used the laser level to get the correct grade before forming the footings with 2x10s.
Our basement has two supporting interior walls, so we had to dig out the footings for those two walls. We added rebar to those before the concrete pour.
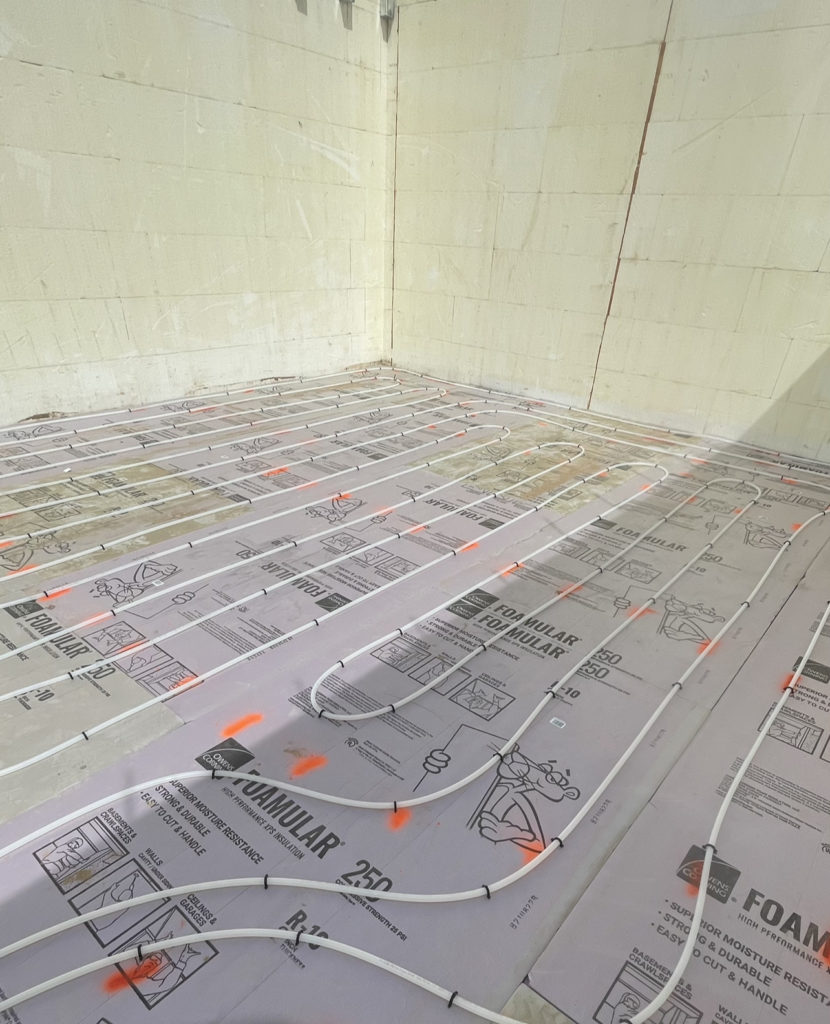
Insulating The Floor and Installing DIY Radiant Heat
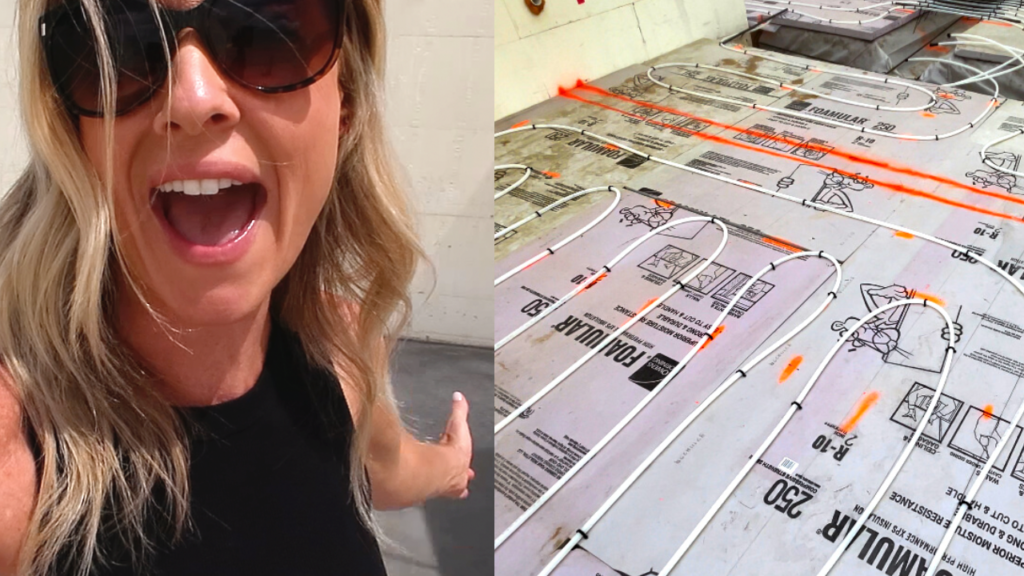
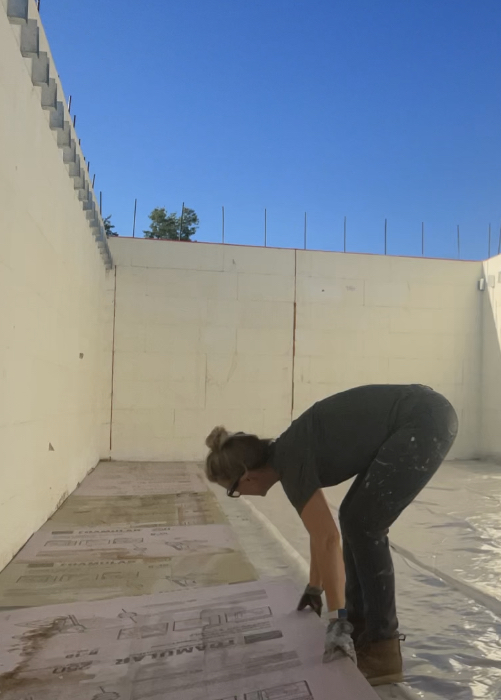
Once we had the entire basement floor up to grade and the vaper barrier down, we covered the entire floor with 2″, 4×8 sheets of insulated foam board. This didn’t take long at all. The foam is really light and simple to cut. I just used a 4 ft level to mark a line and scored it with a utility knife before snapping it apart.
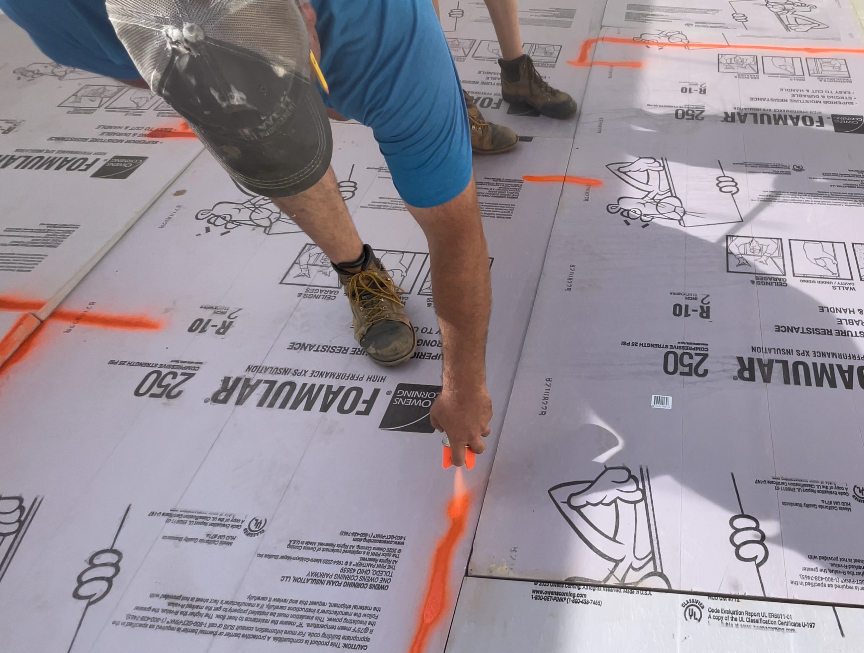
We used marking spray paint to mark where all the interior walls and staircase will be. Then we marked out all six zones.
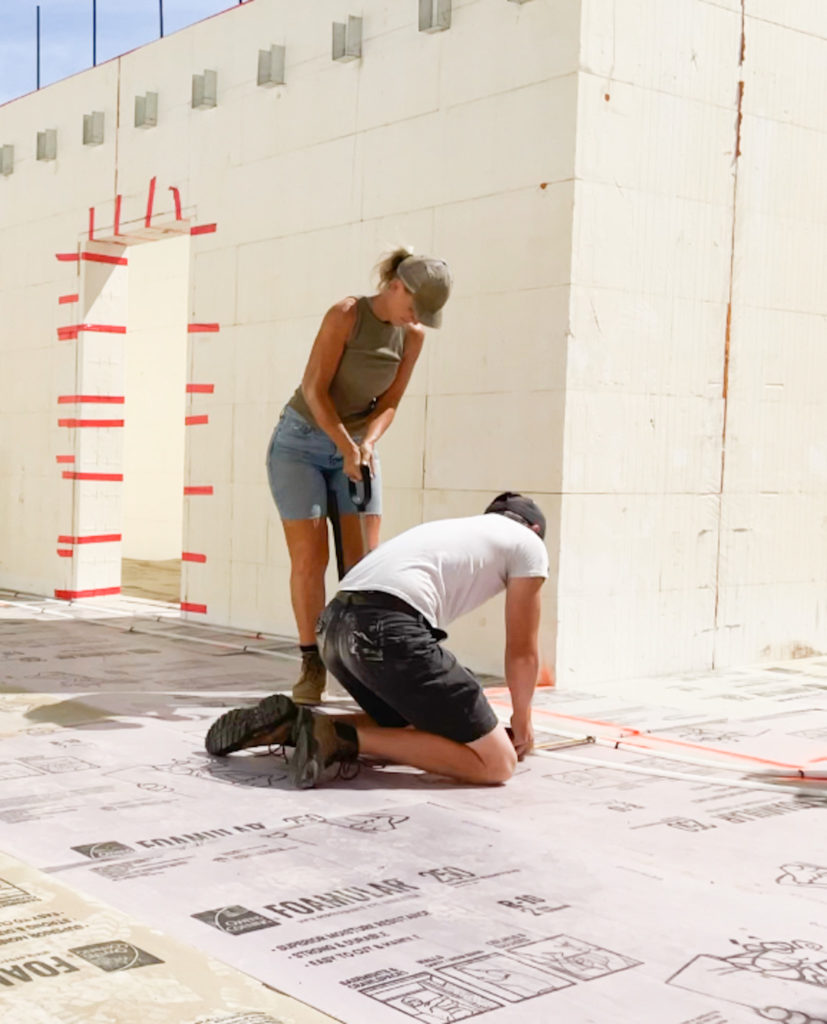
To install the DIY radiant heat tube we rented a Foamboard Stapler for $30 instead of buying one for $300. The stapler worked really well. Aaron handled the huge roll of tubing, our son followed our layout, making sure the tubing was in place and I used the stapler to secure it about every 12inches (and every 6″ on the corners).
Building the Manifold/ Passing Our Inspection
Aaron built our manifold where a supporting wall will eventually go and mounted it to a scrap sheet of plywood we had laying around. We called for our inspection and passed, with no problems at all! Woohoo!
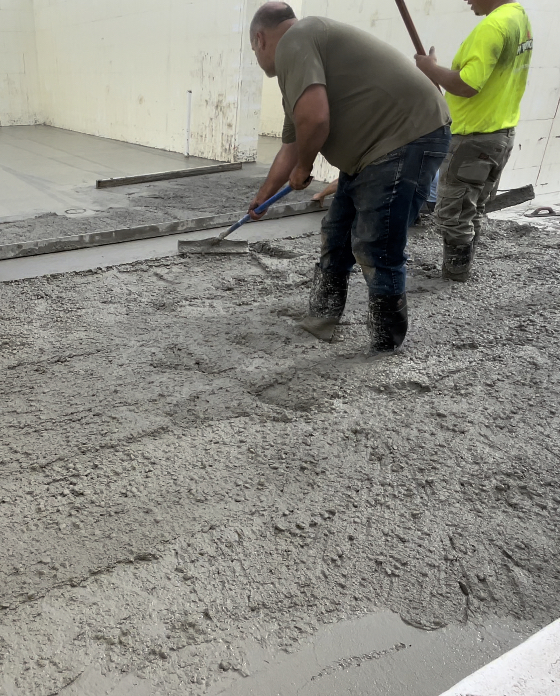
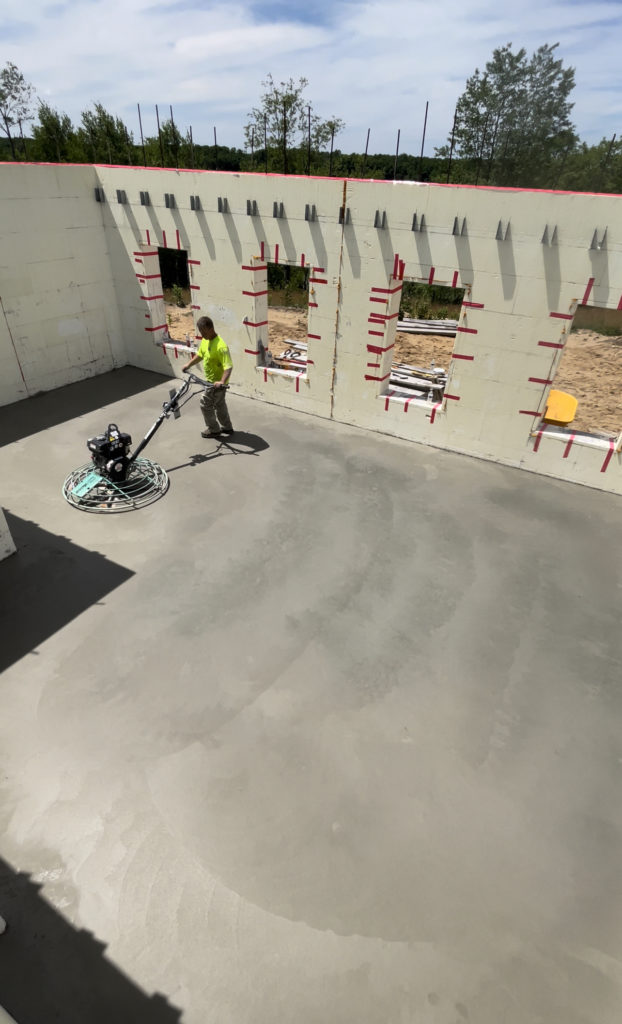
Pouring Our Concrete Floor
We hired Sprik Concrete Construction to come out and do the basement floor finishing and the guys did an outstanding job! We purchased our concrete from Elmer’s concrete service. We always hire out concrete finish work when we’re pouring 80+ yards of concrete.
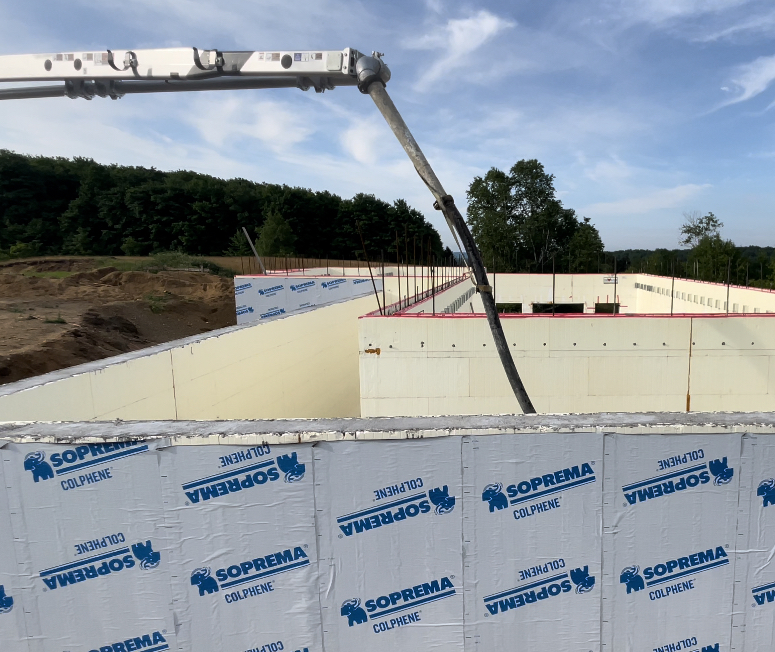
Concrete work takes a lot of skill and years of practice. I’m more than happy to DIY a small sidewalk, footings, or even a larger slab…but this job was way too big to DIY.
![]()
We are thrilled with how the DIY
Radiant Heat and Concrete Floor
turned out!
Why We Chose To DIY Everything On Our Dream Home EXCEPT The Concrete Finish Work
You guys know, when it comes to projects and construction, we almost always do the work ourselves and this entire home is a DIY project, but when it comes to finishing concrete…that is the one thing we wanted to hire professionals for.
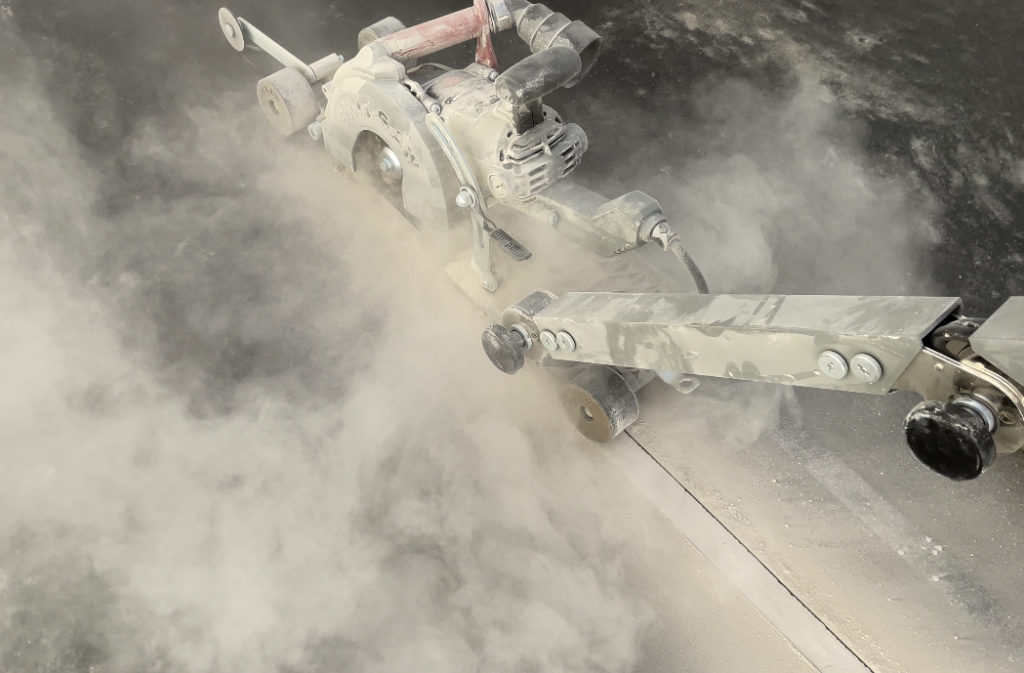
We borrowed a concrete Walk Behind Skilsaw and Aaron scored the concrete the next day.
Because we were pouring our garage footings and the cold storage and the basement all at once, we needed the extra help. That would’ve been impossible for Aaron and me to do on our own. Next up: setting our floor trusses and installing all the OSB subfloor!