
DIY Attic Conversion
How we turned our unused attic space into a family room, home office, classroom, gym and media room for the whole family to enjoy!
In my first few blog posts, I shared how my husband and I built our home all DIY.
After living in the Cottage for a few months, we wanted a bit more space and decided to use our attic space as a bonus room…which we now refer to as “the loft”!

The main floor of the cottage is less than 1000 sq ft. and with the 4 of us, it’s fairly tight! I really wanted to finish off the attic and turn it into a bonus room giving us an extra 400 sq ft.
We needed the extra living space and wanted to transform this attic the most budget-friendly way possible!
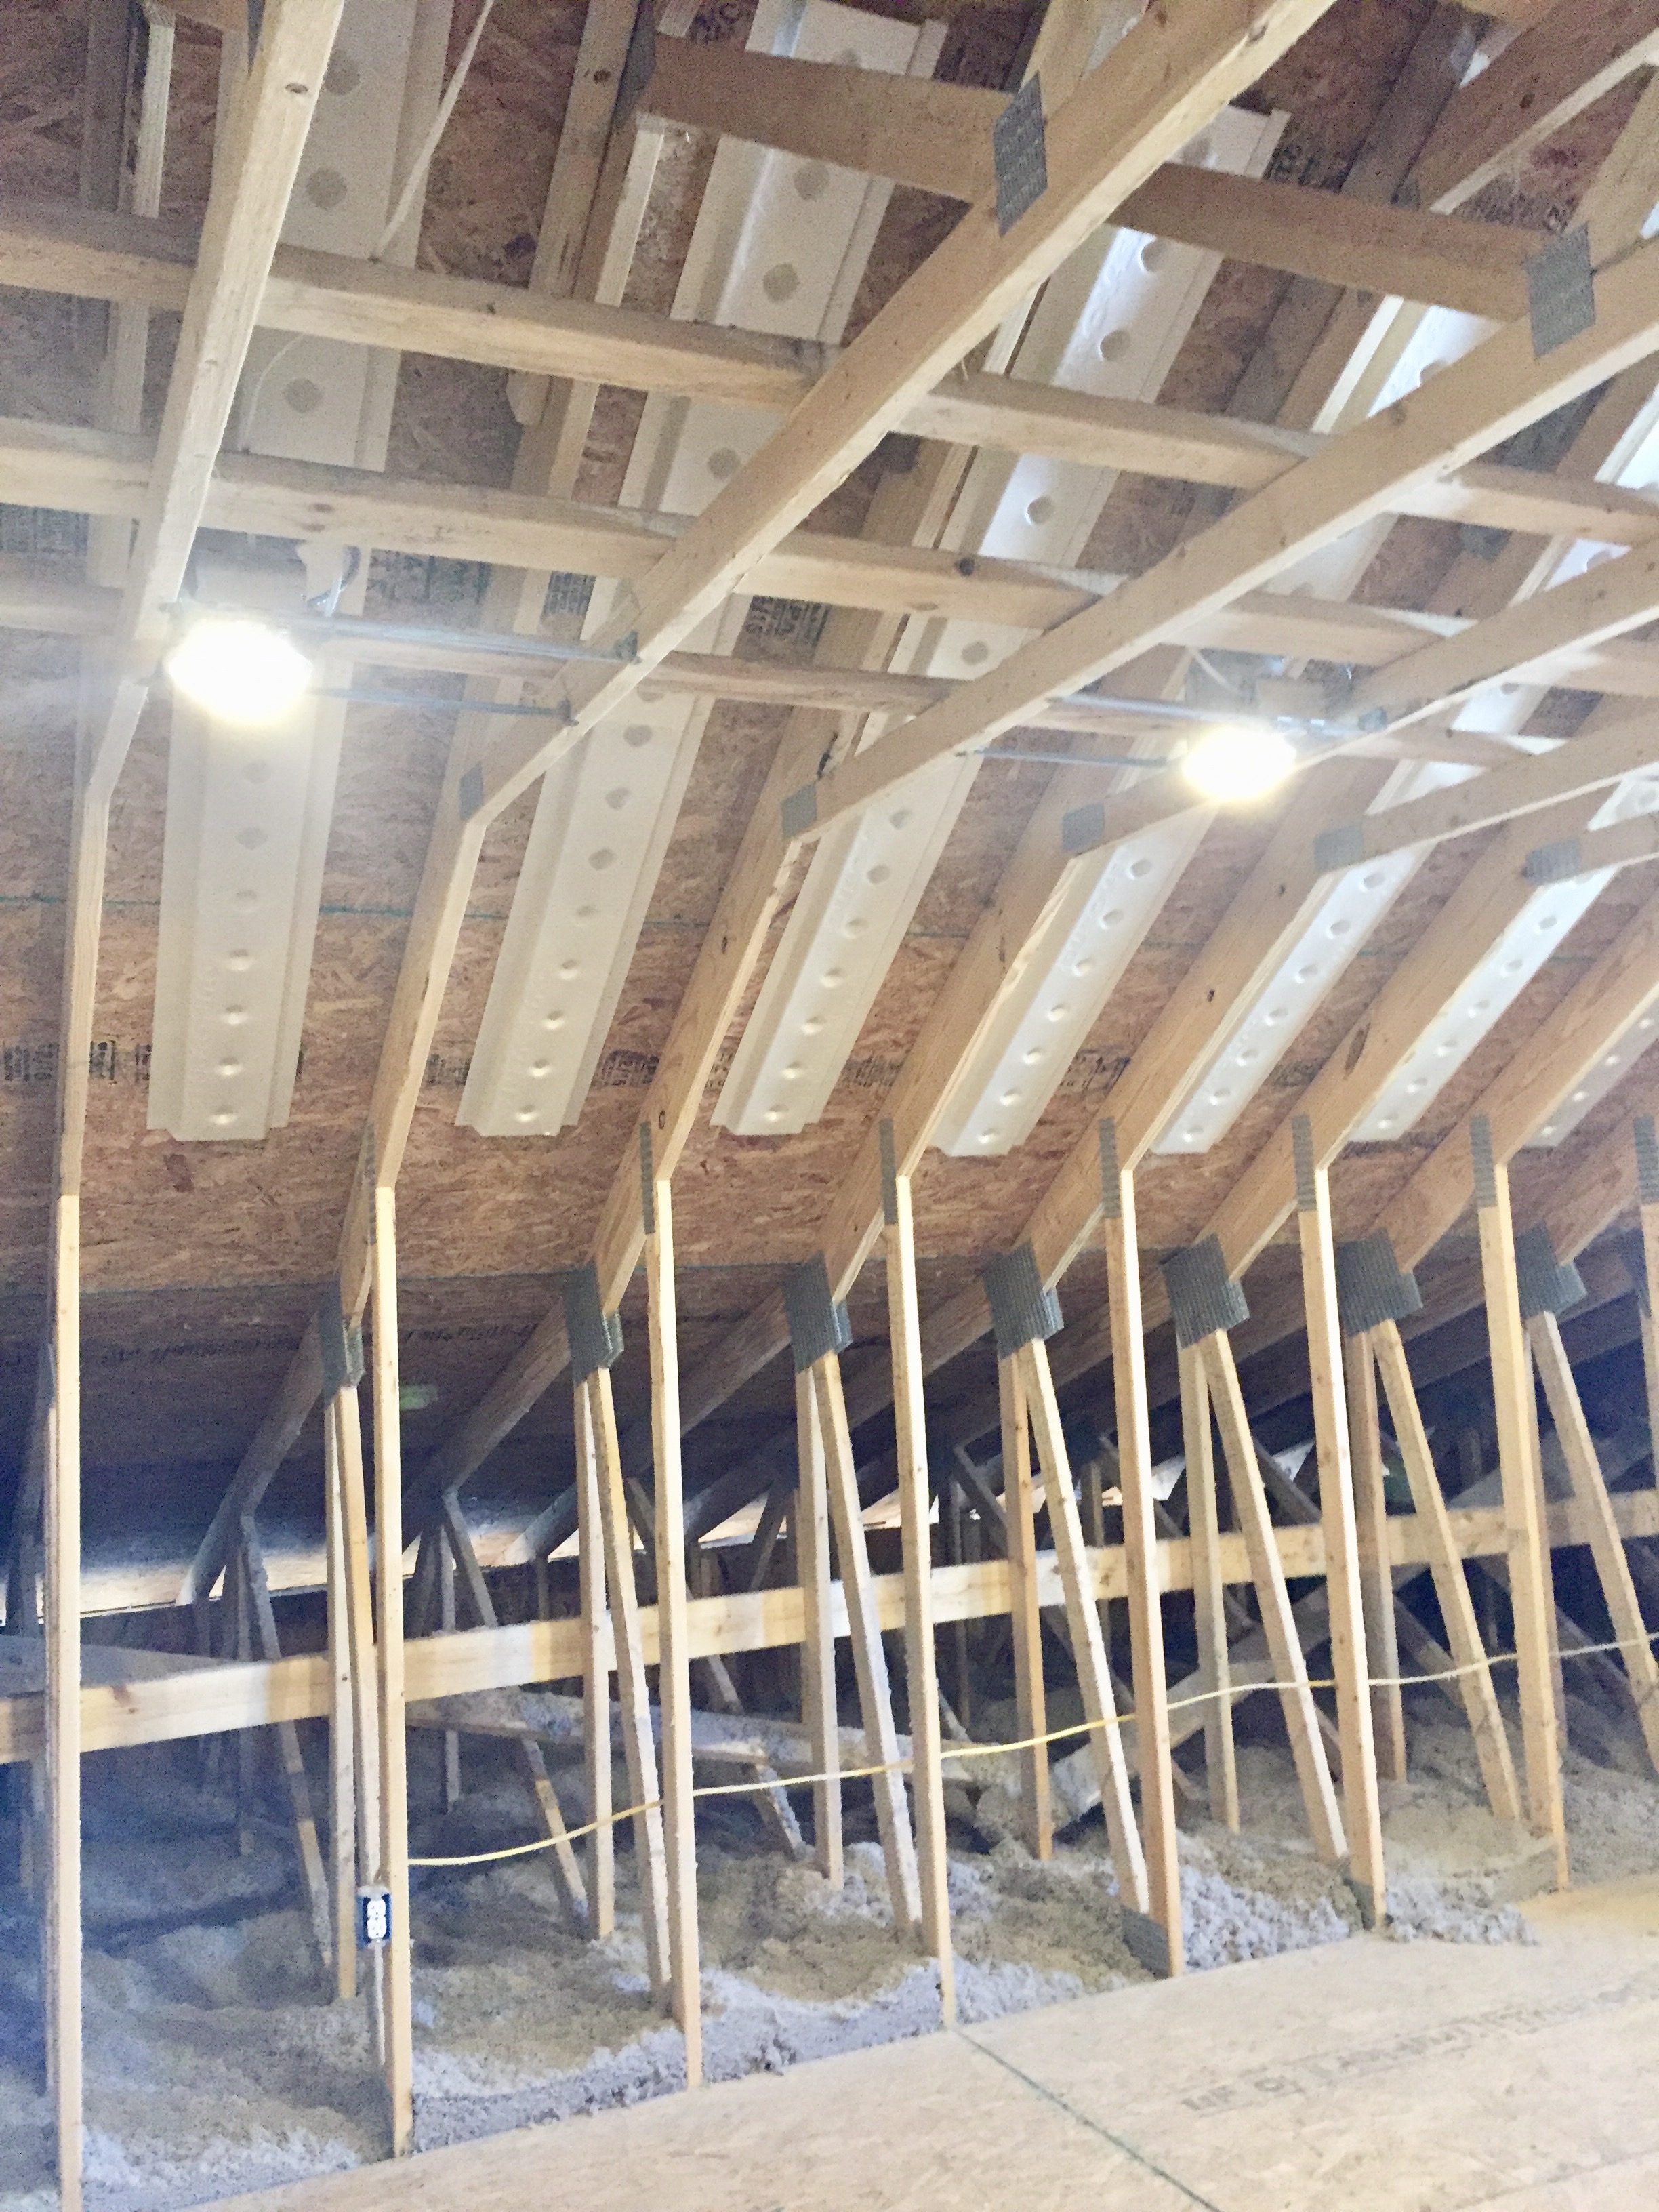
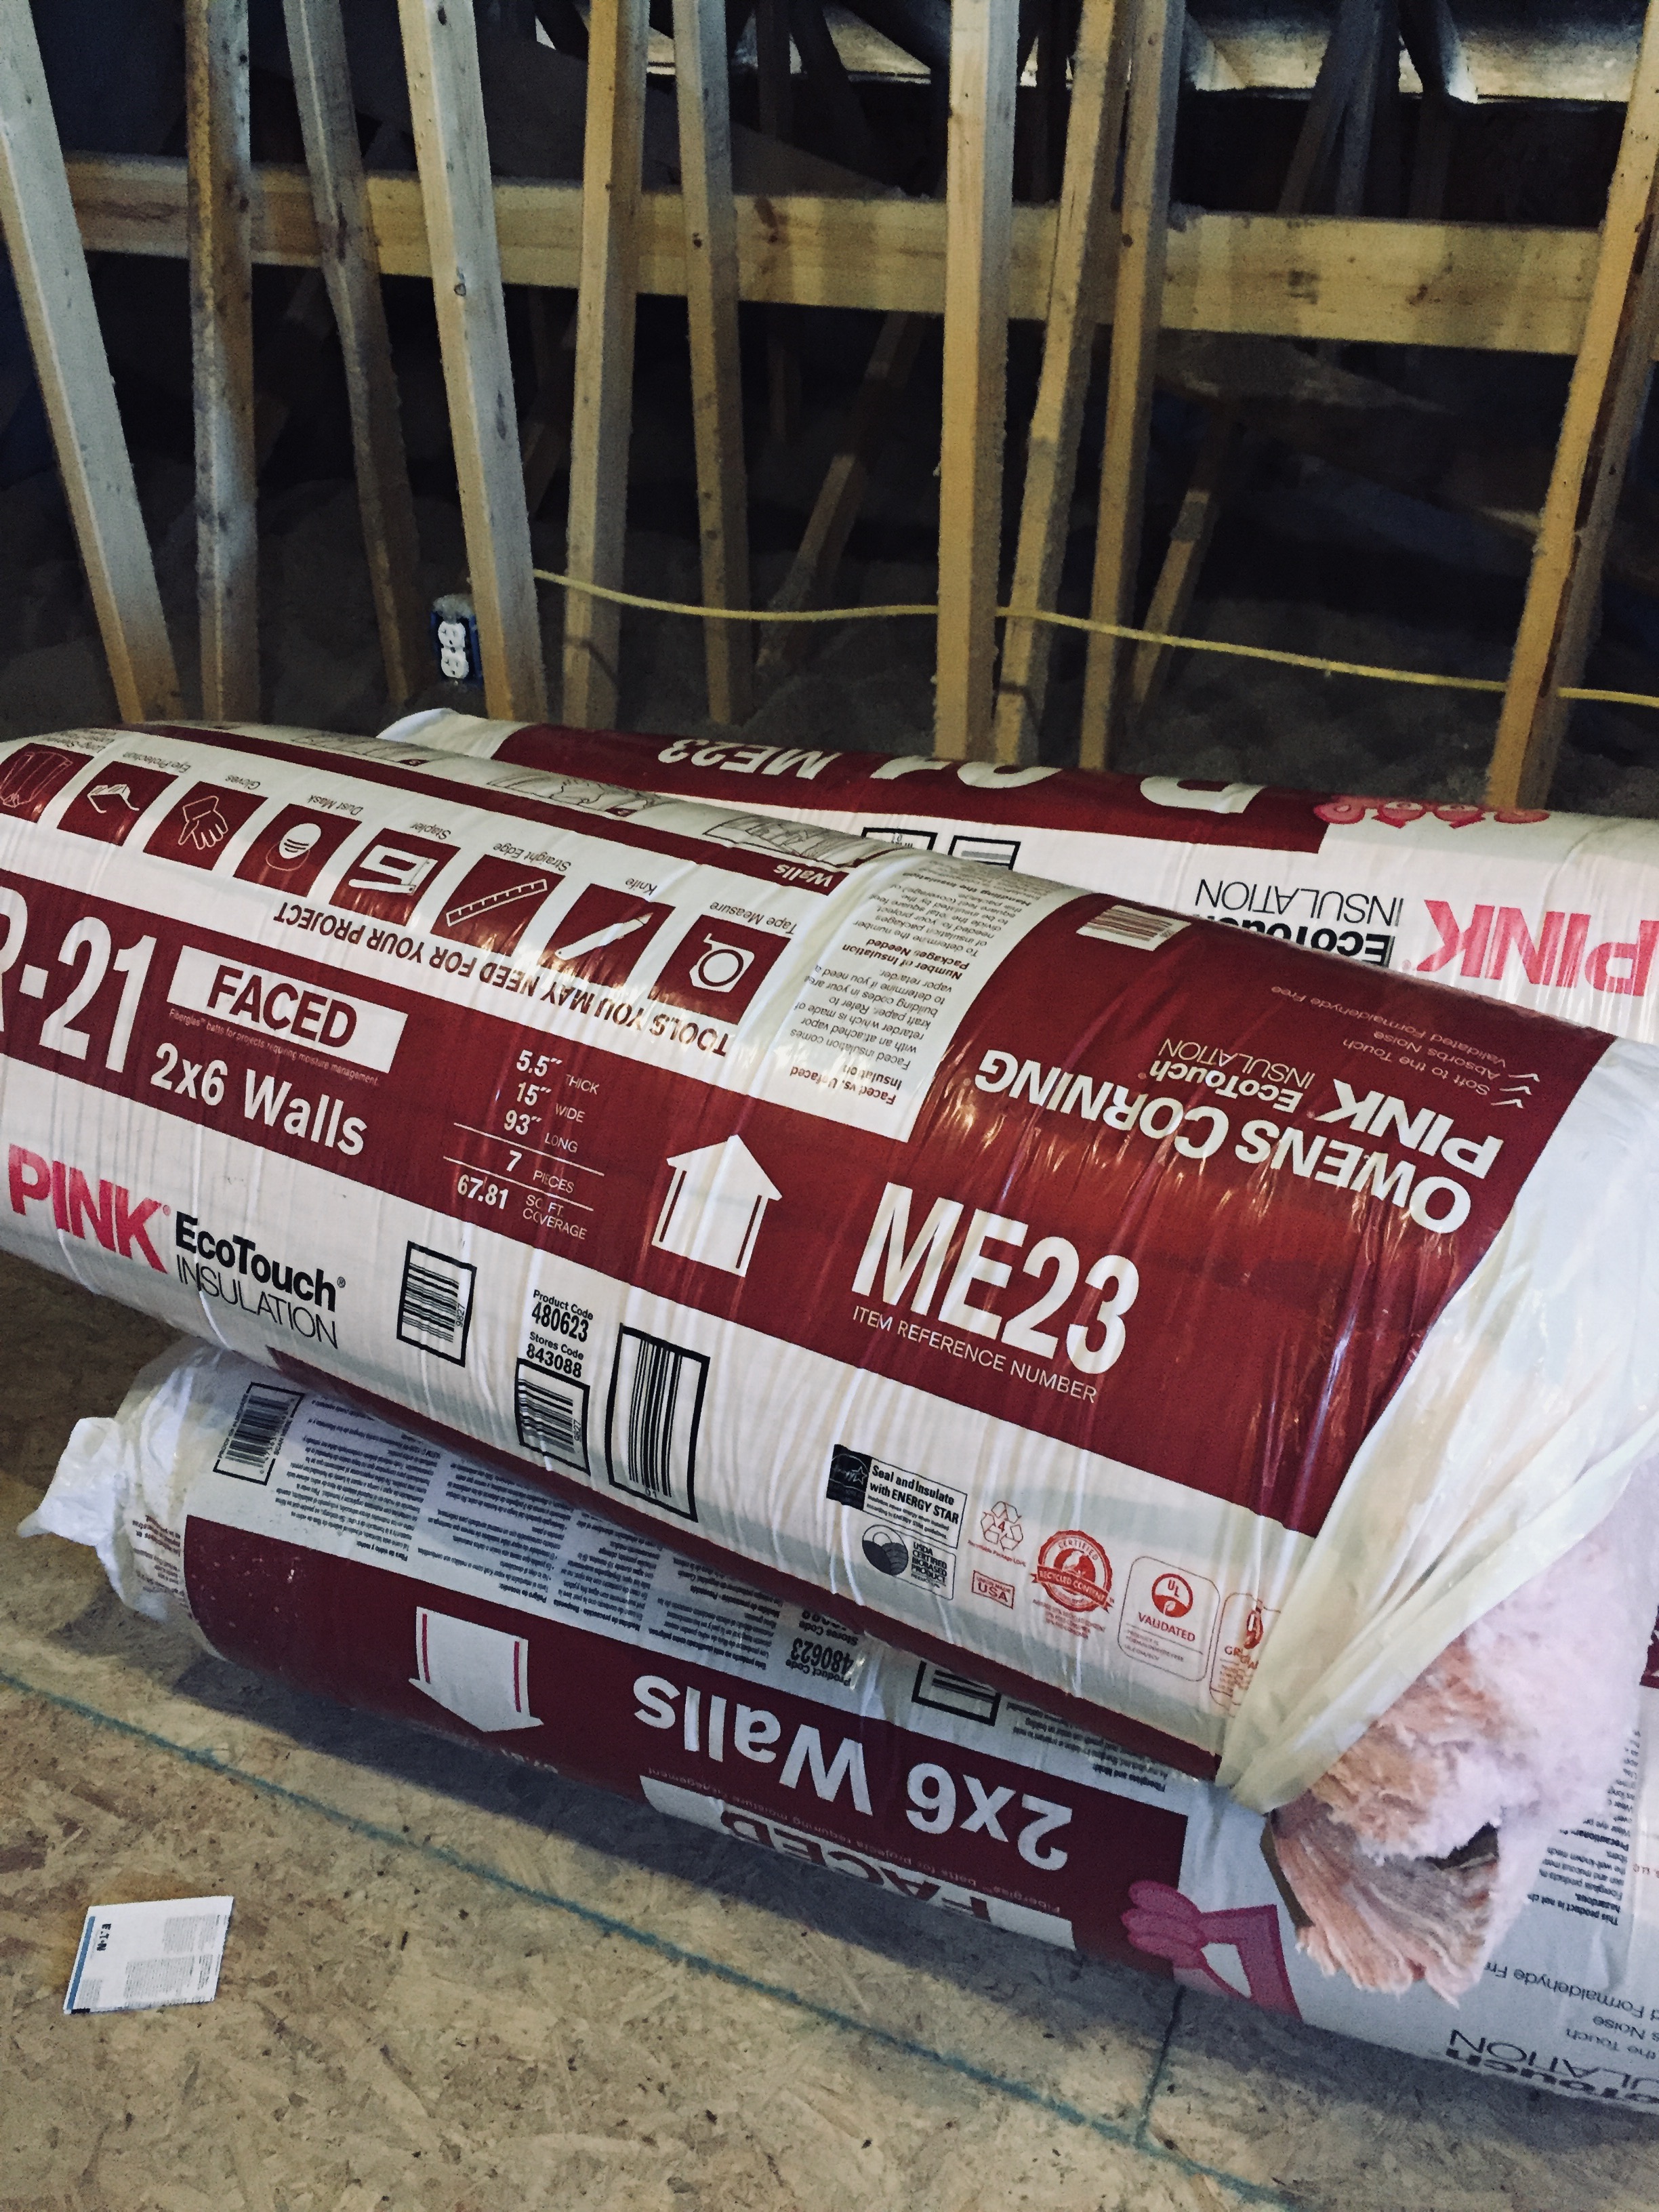
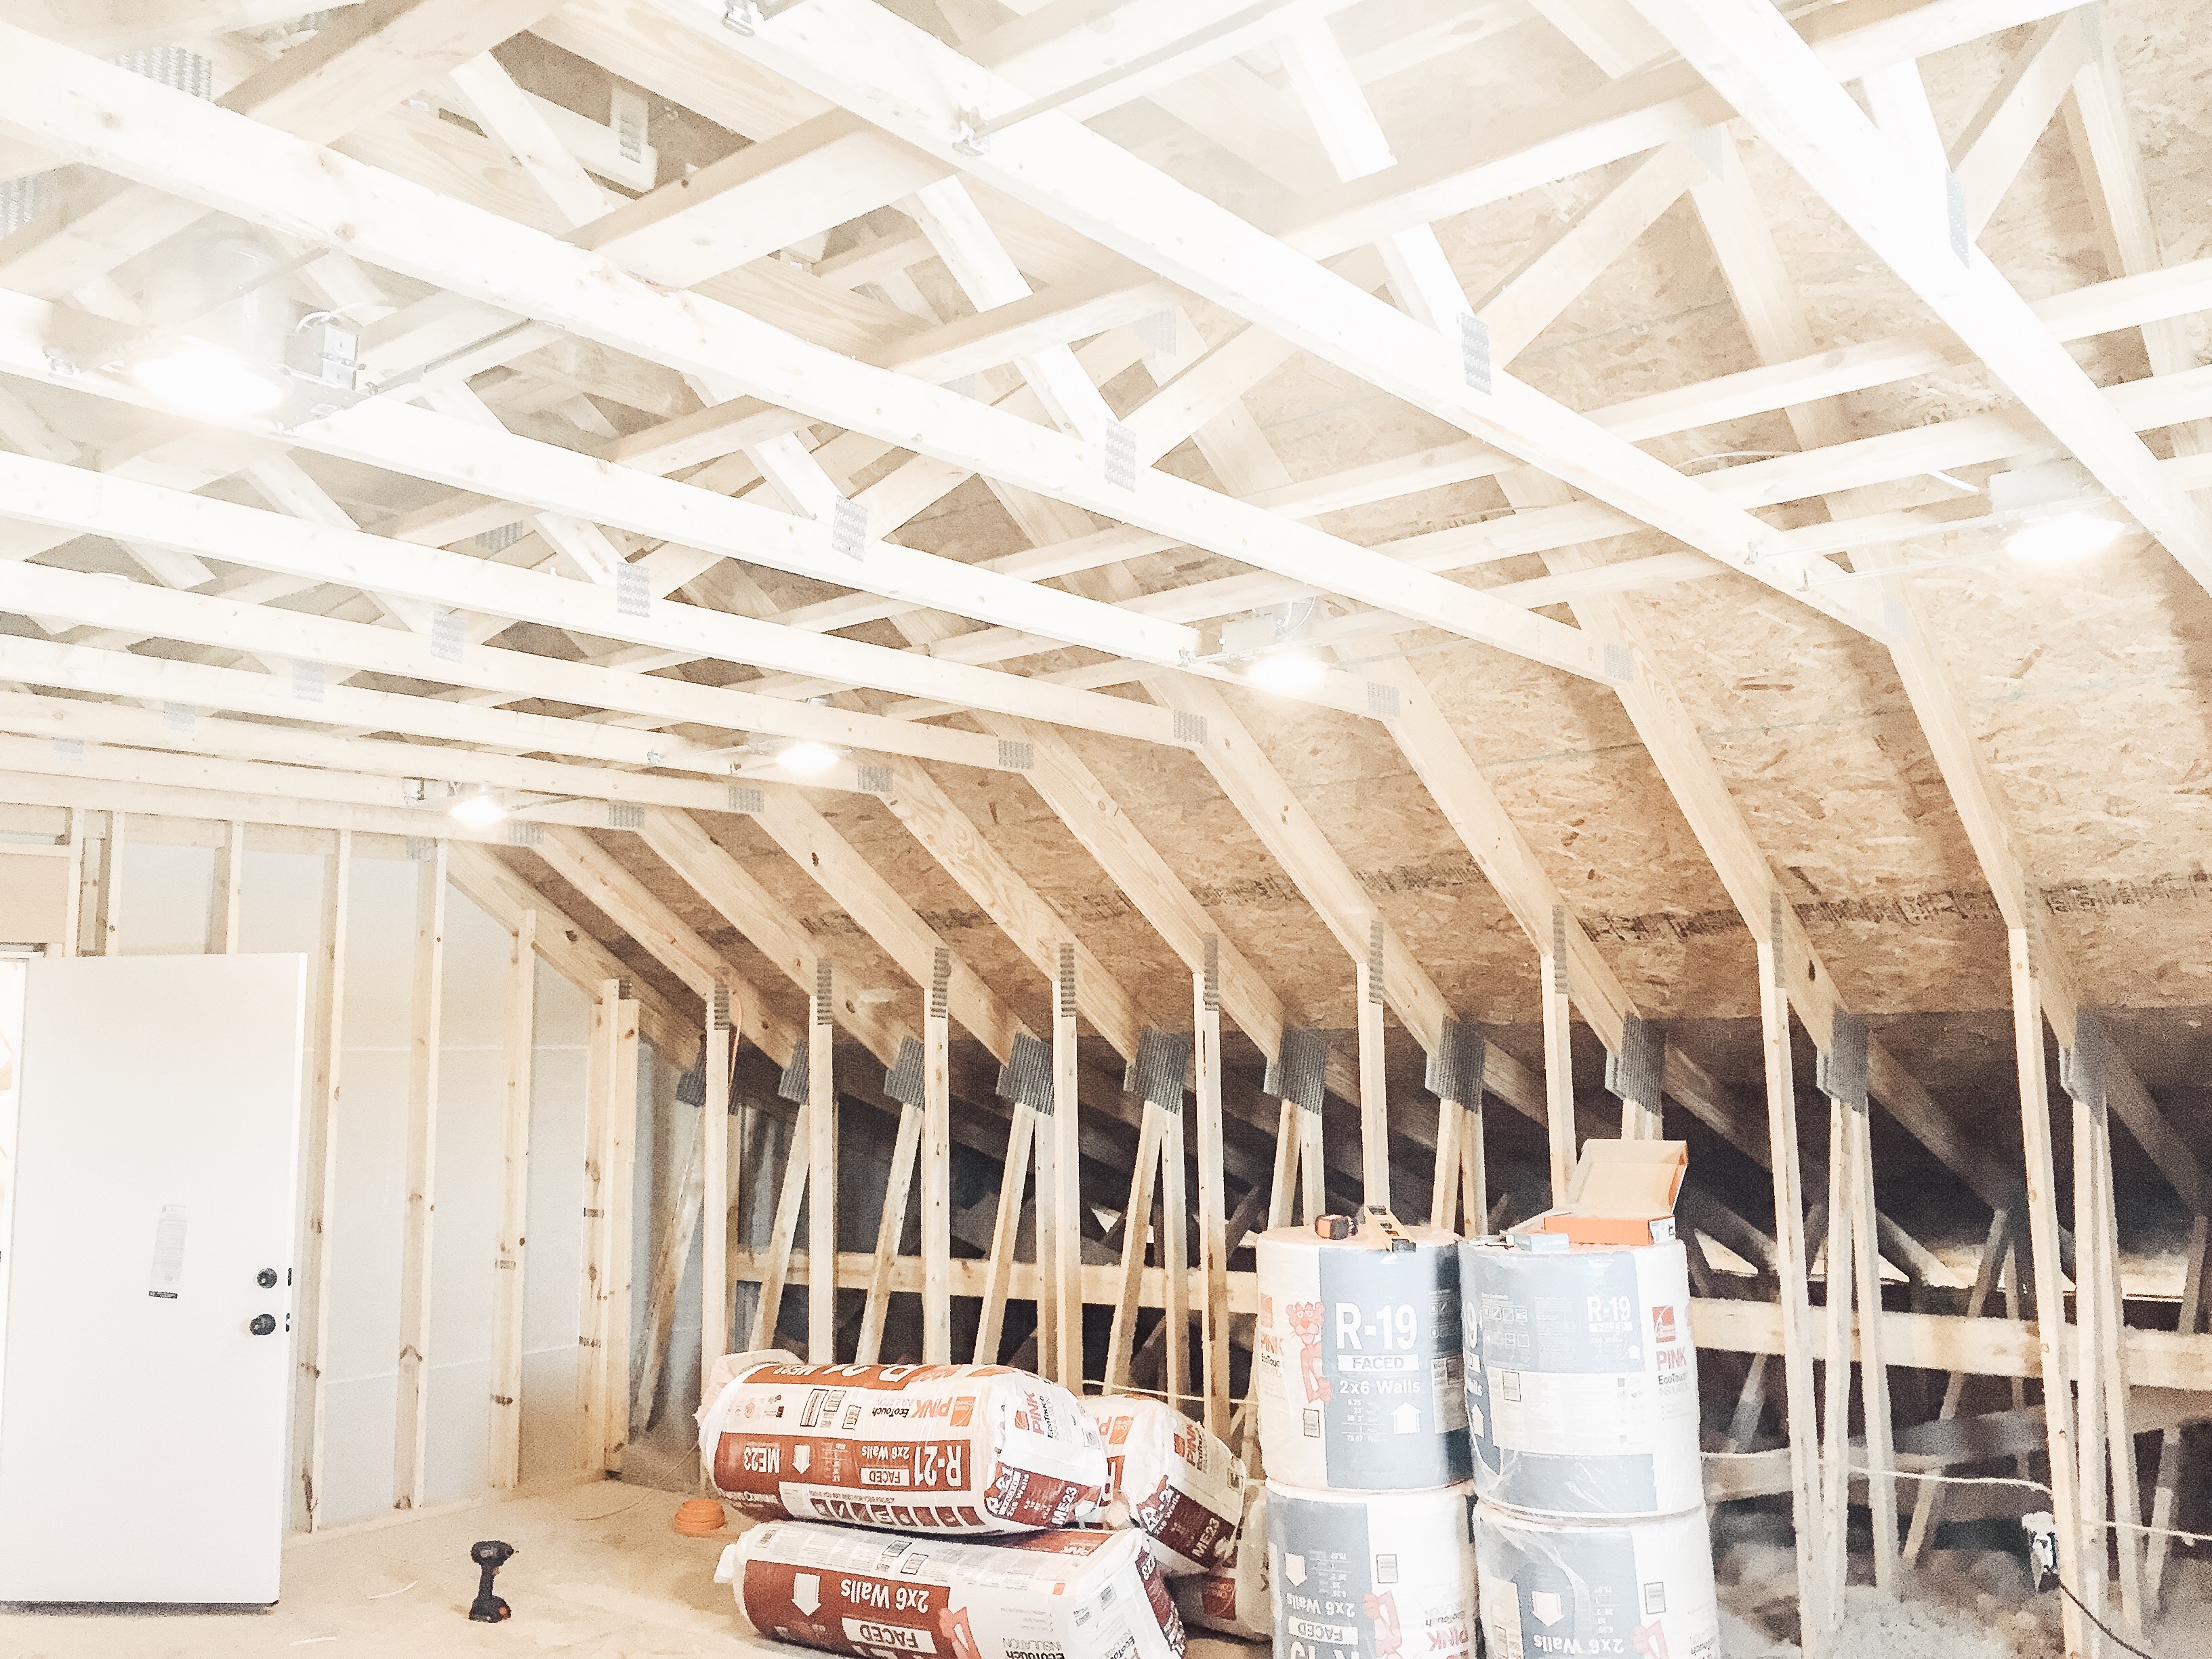
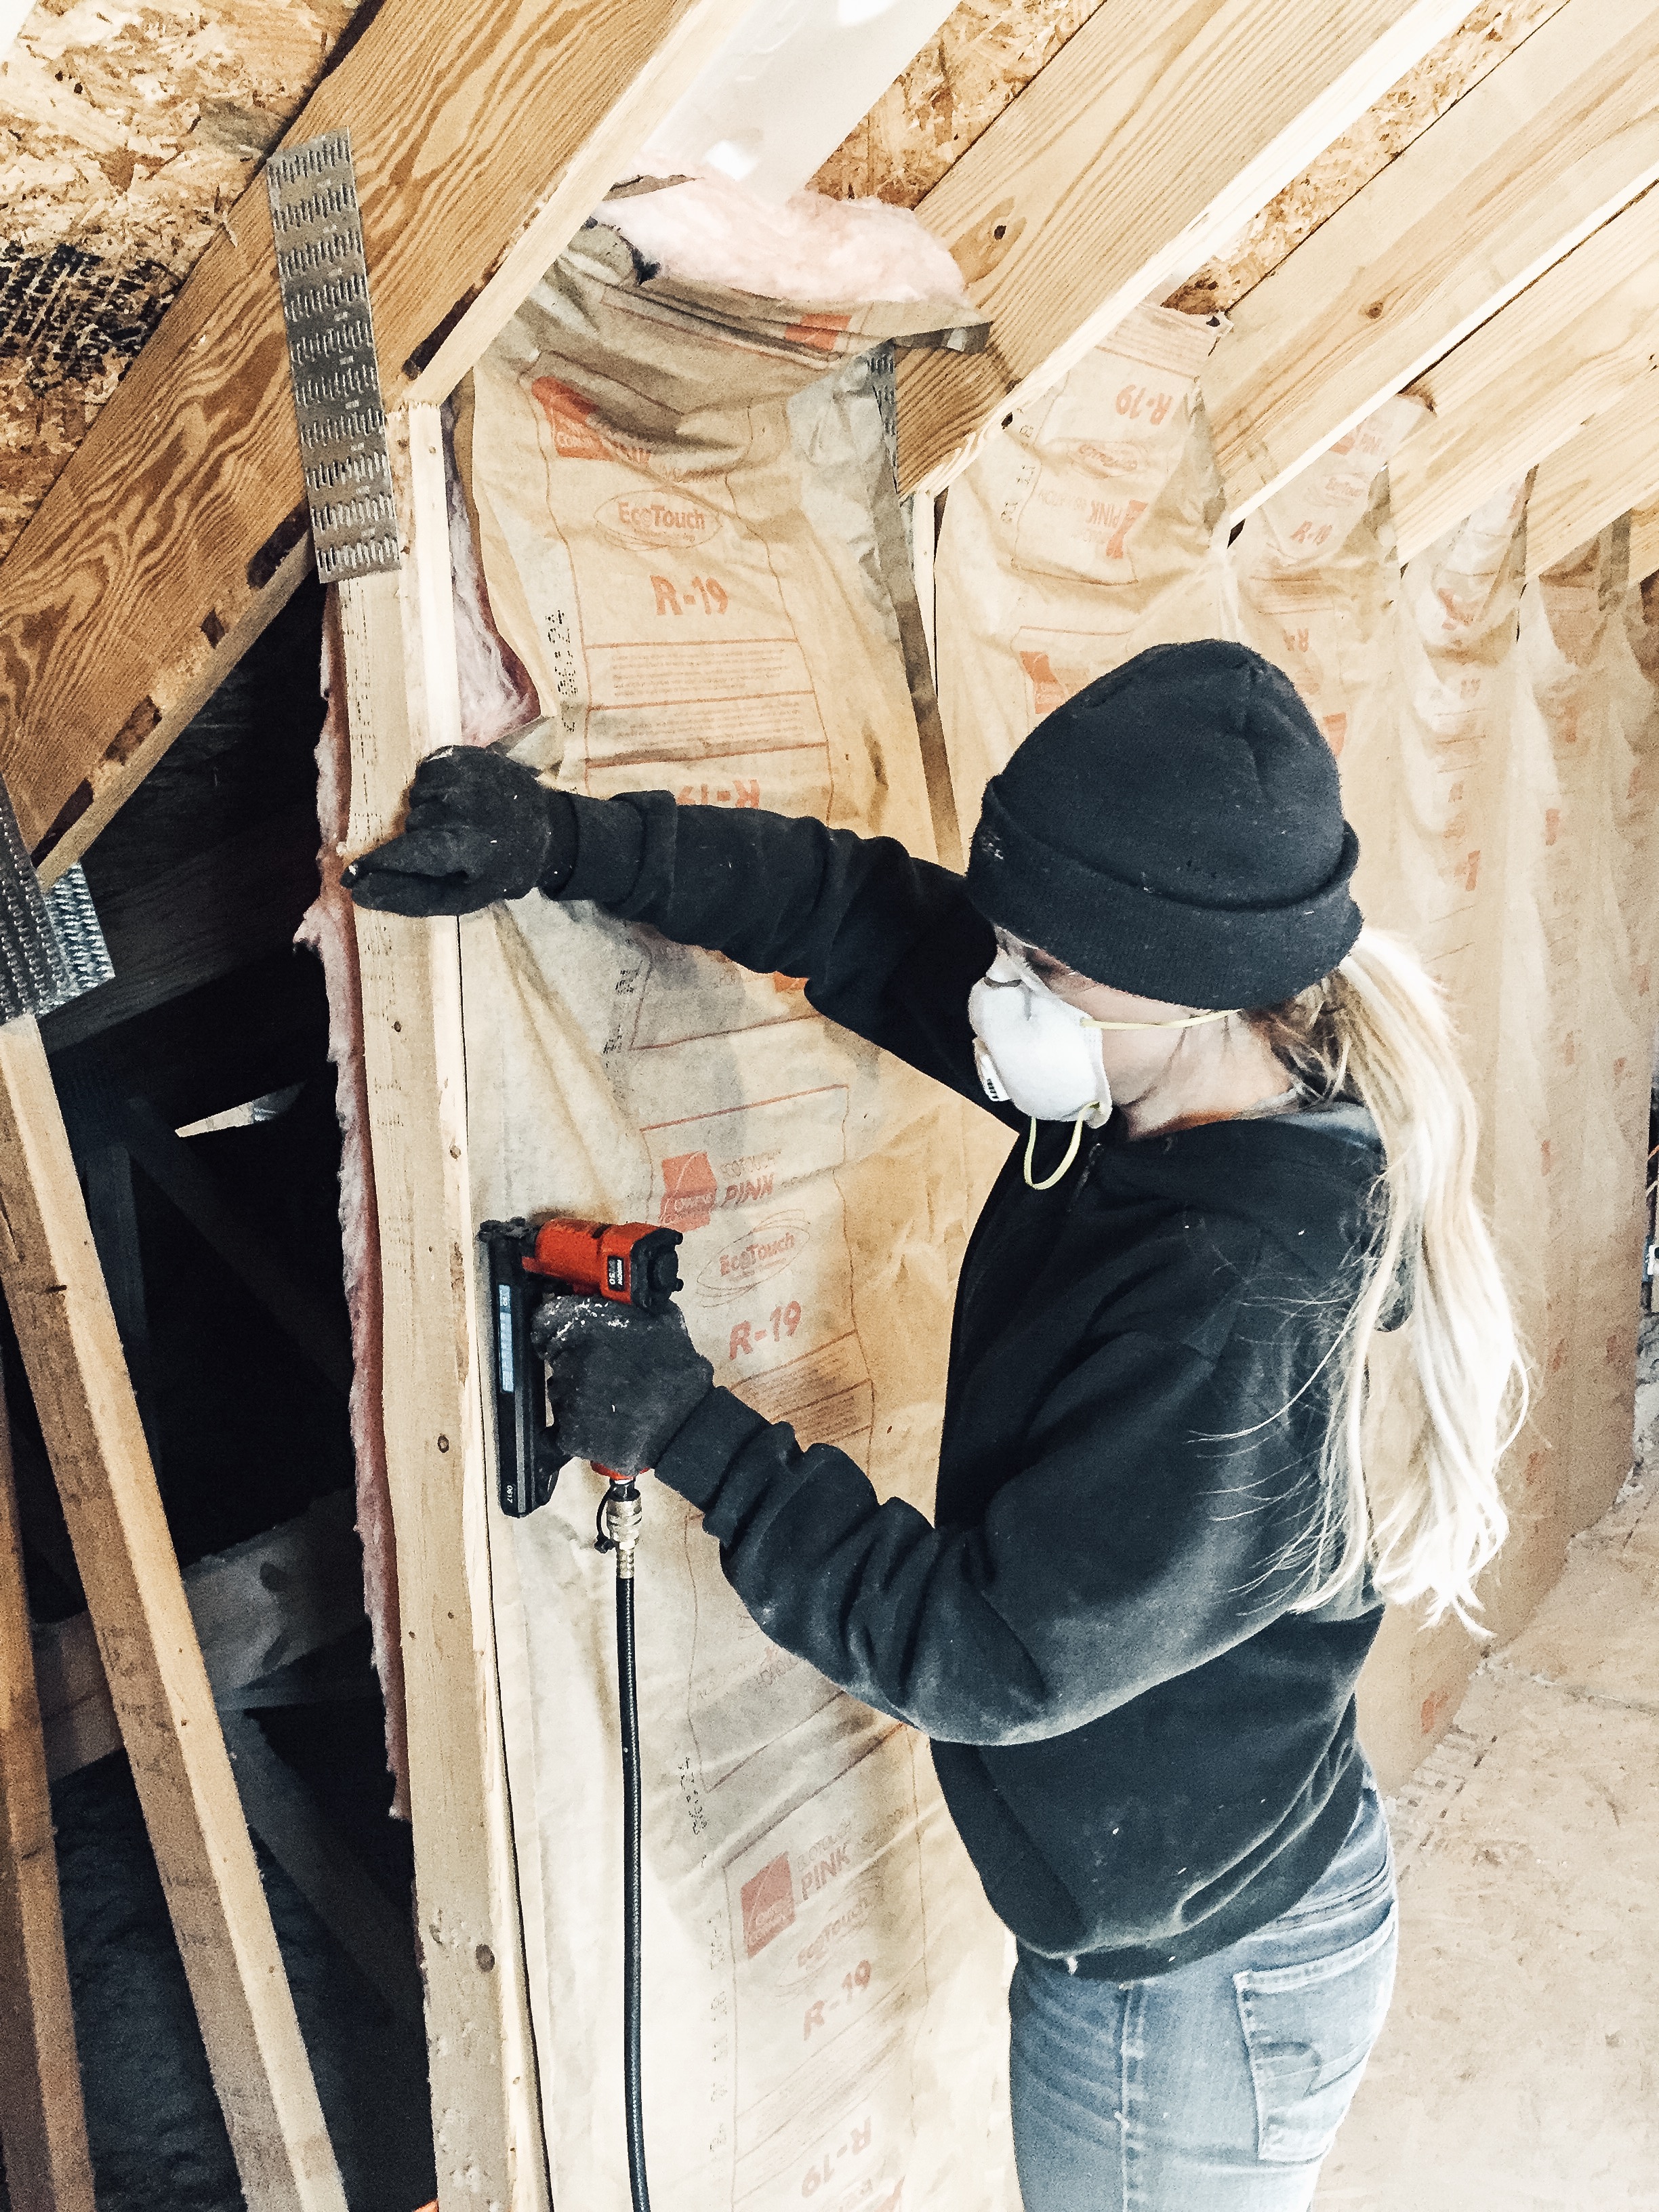
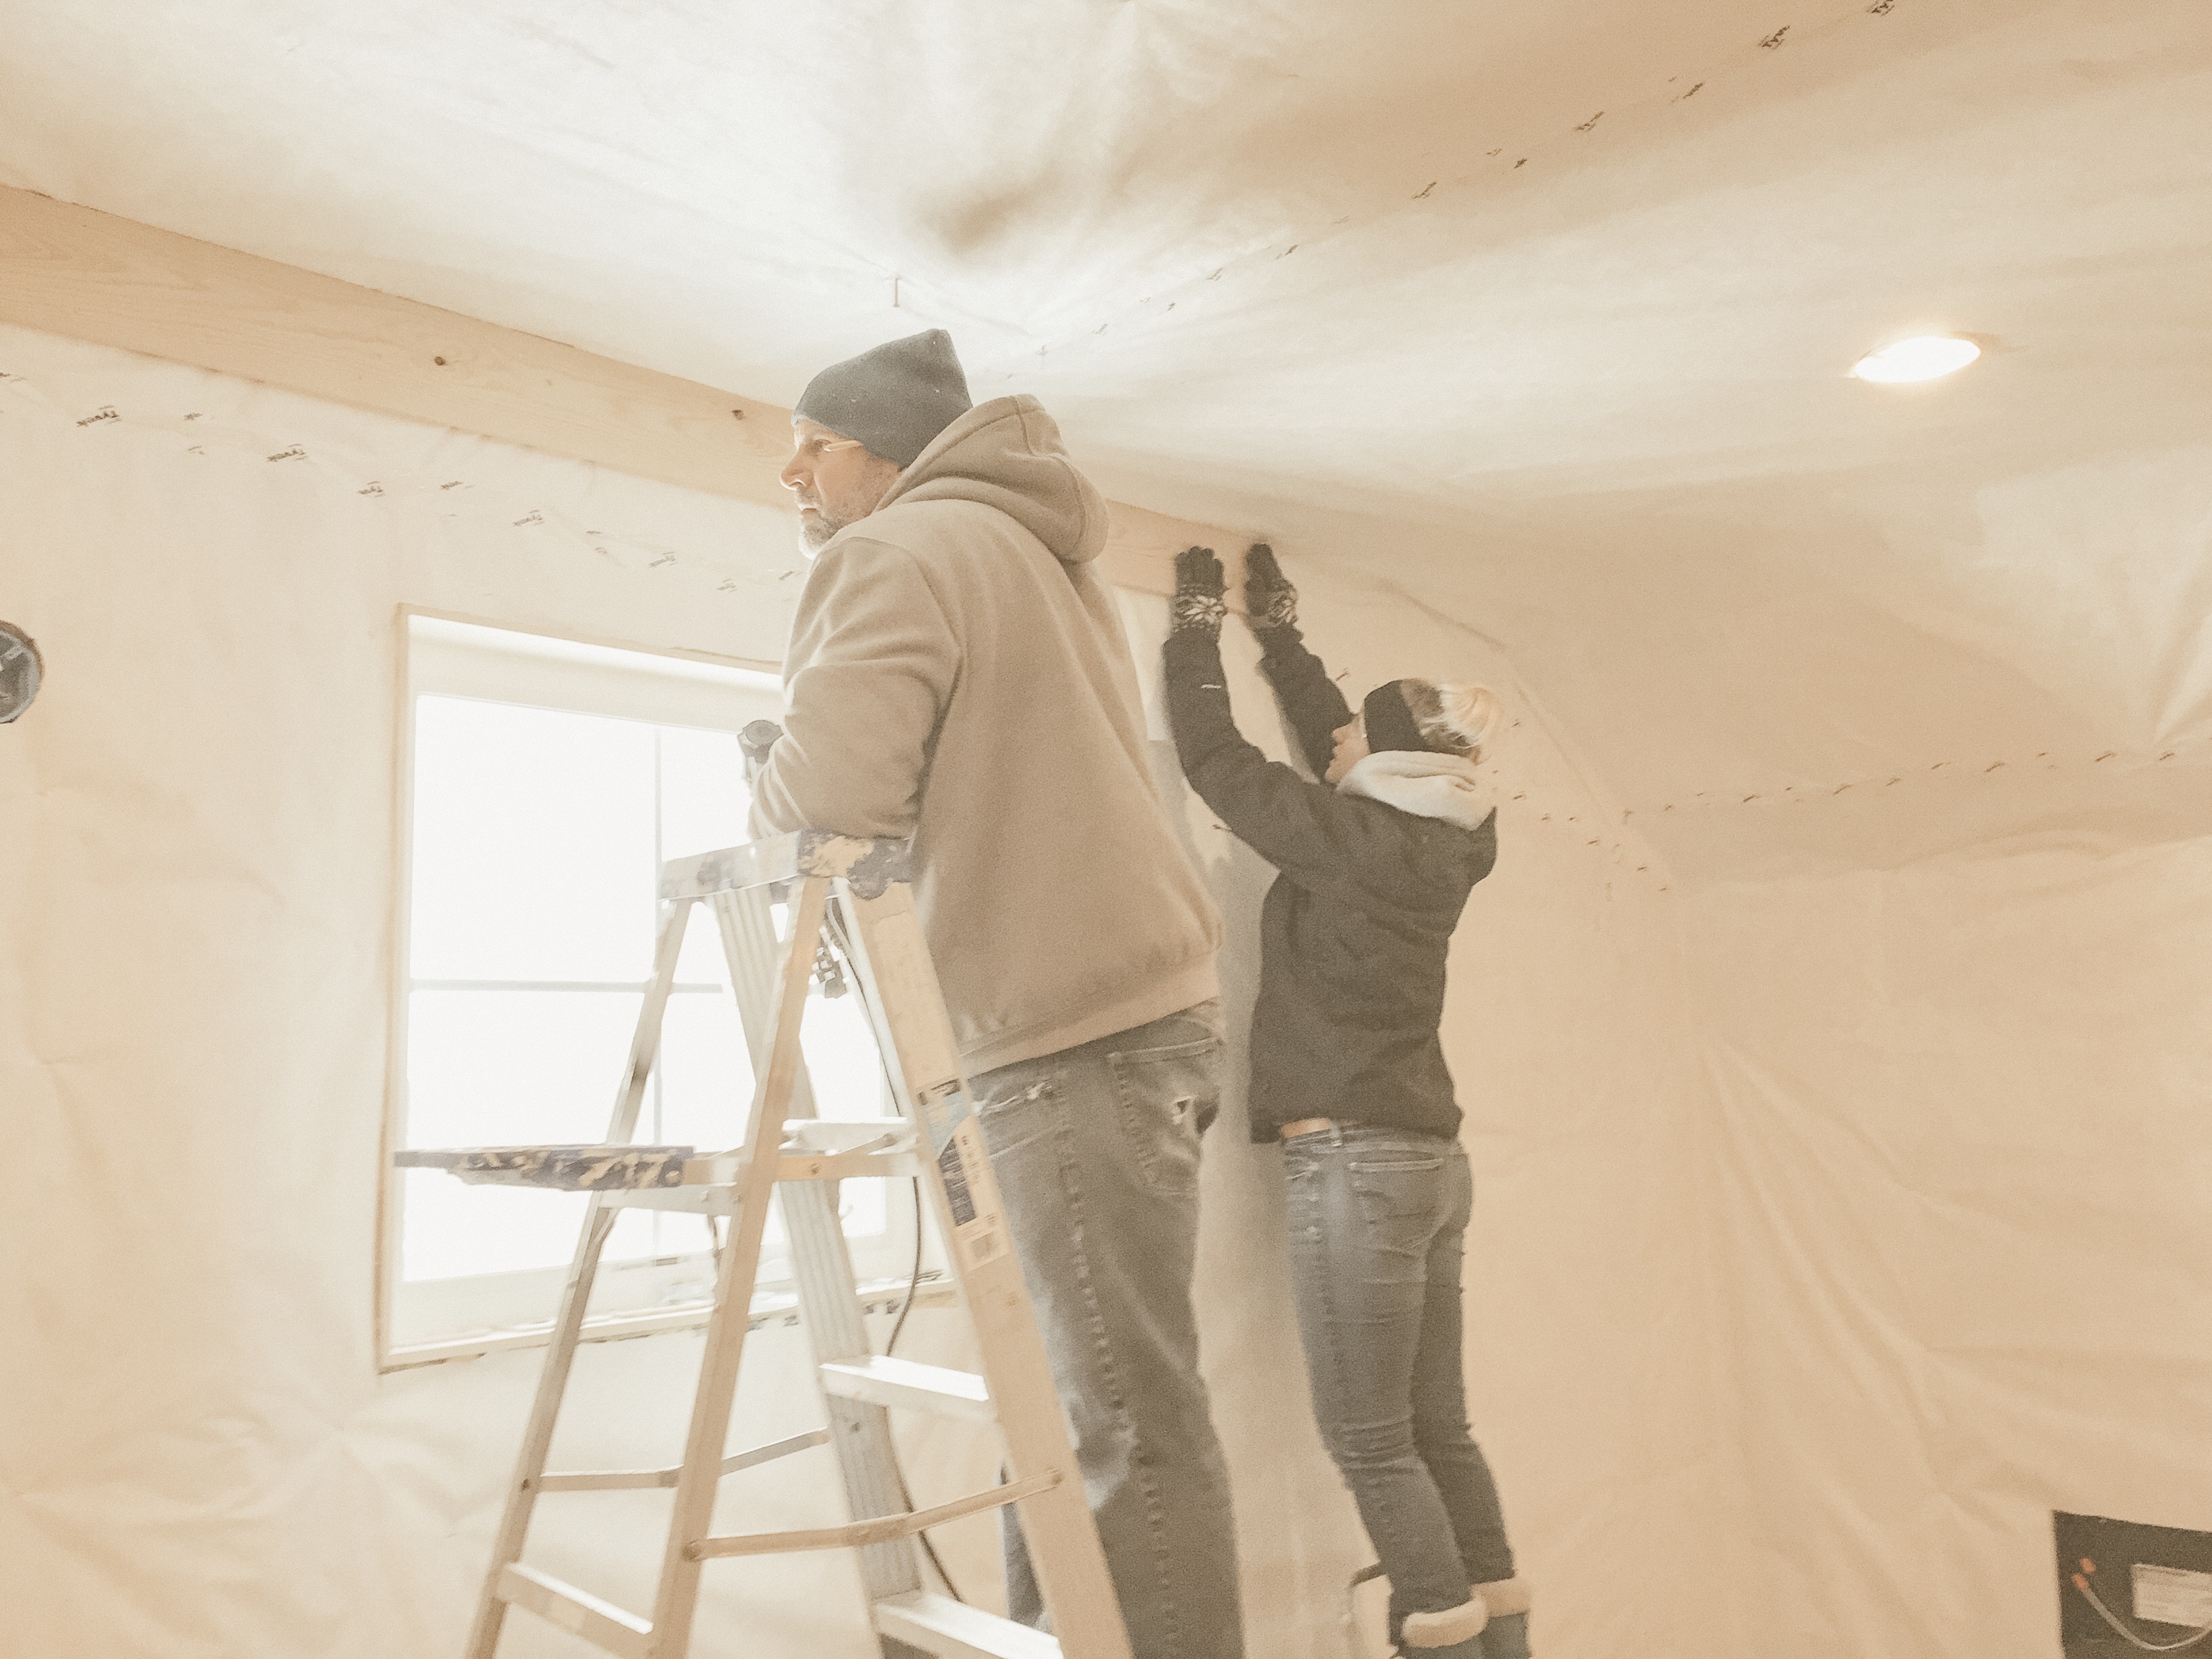
Because this space is attic space we needed to add lots of insulation and a separate heat source. We considered adding a gas fireplace, which would have been absolutely beautiful, but we were really trying to keep this project as budget-friendly as possible so we opted for an electric wall unit with a thermostat. It does the trick and has been fantastic. This space really holds the heat! Here in Michigan, that is super important!
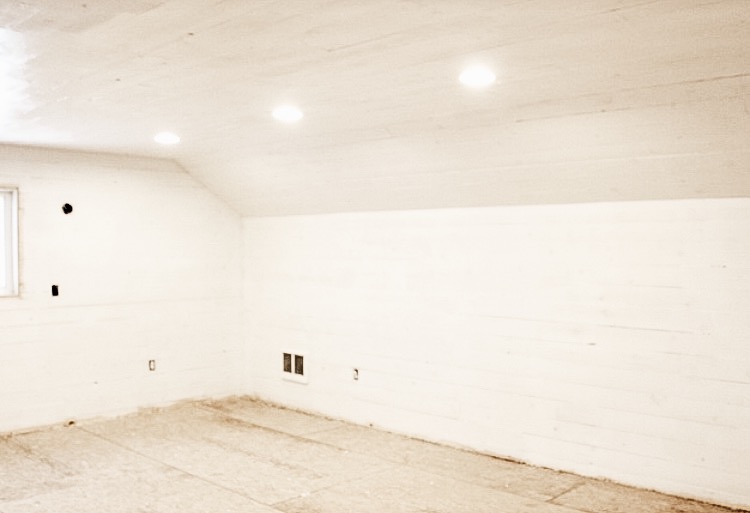
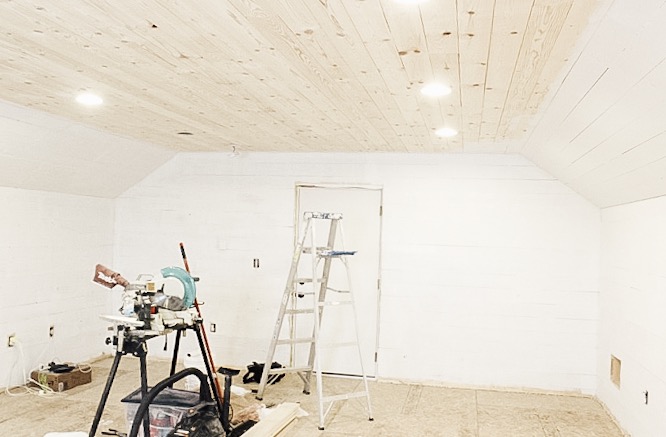
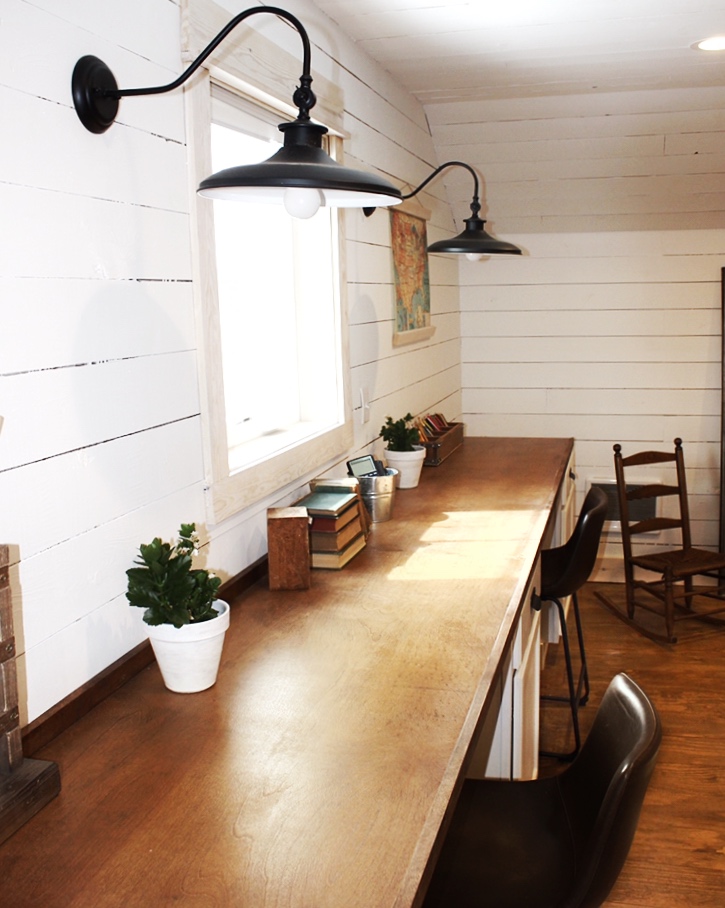
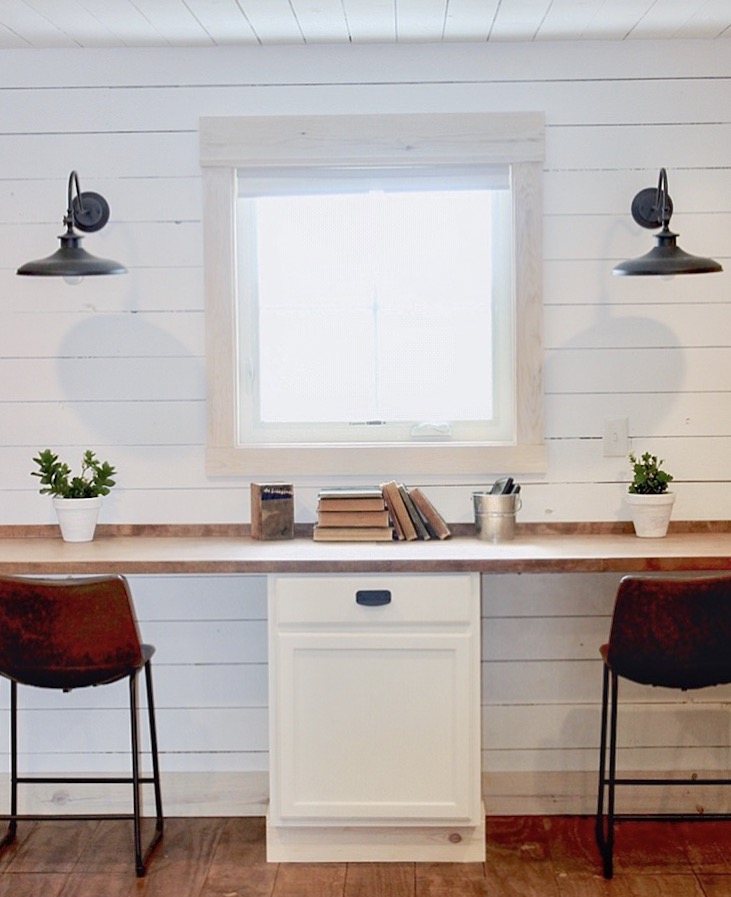
We wanted this space to have lots of lighting so we added the recessed lights and wall sconces for the west wall. We planned to add all built-in desks to that wall so the wall sconces were a must.
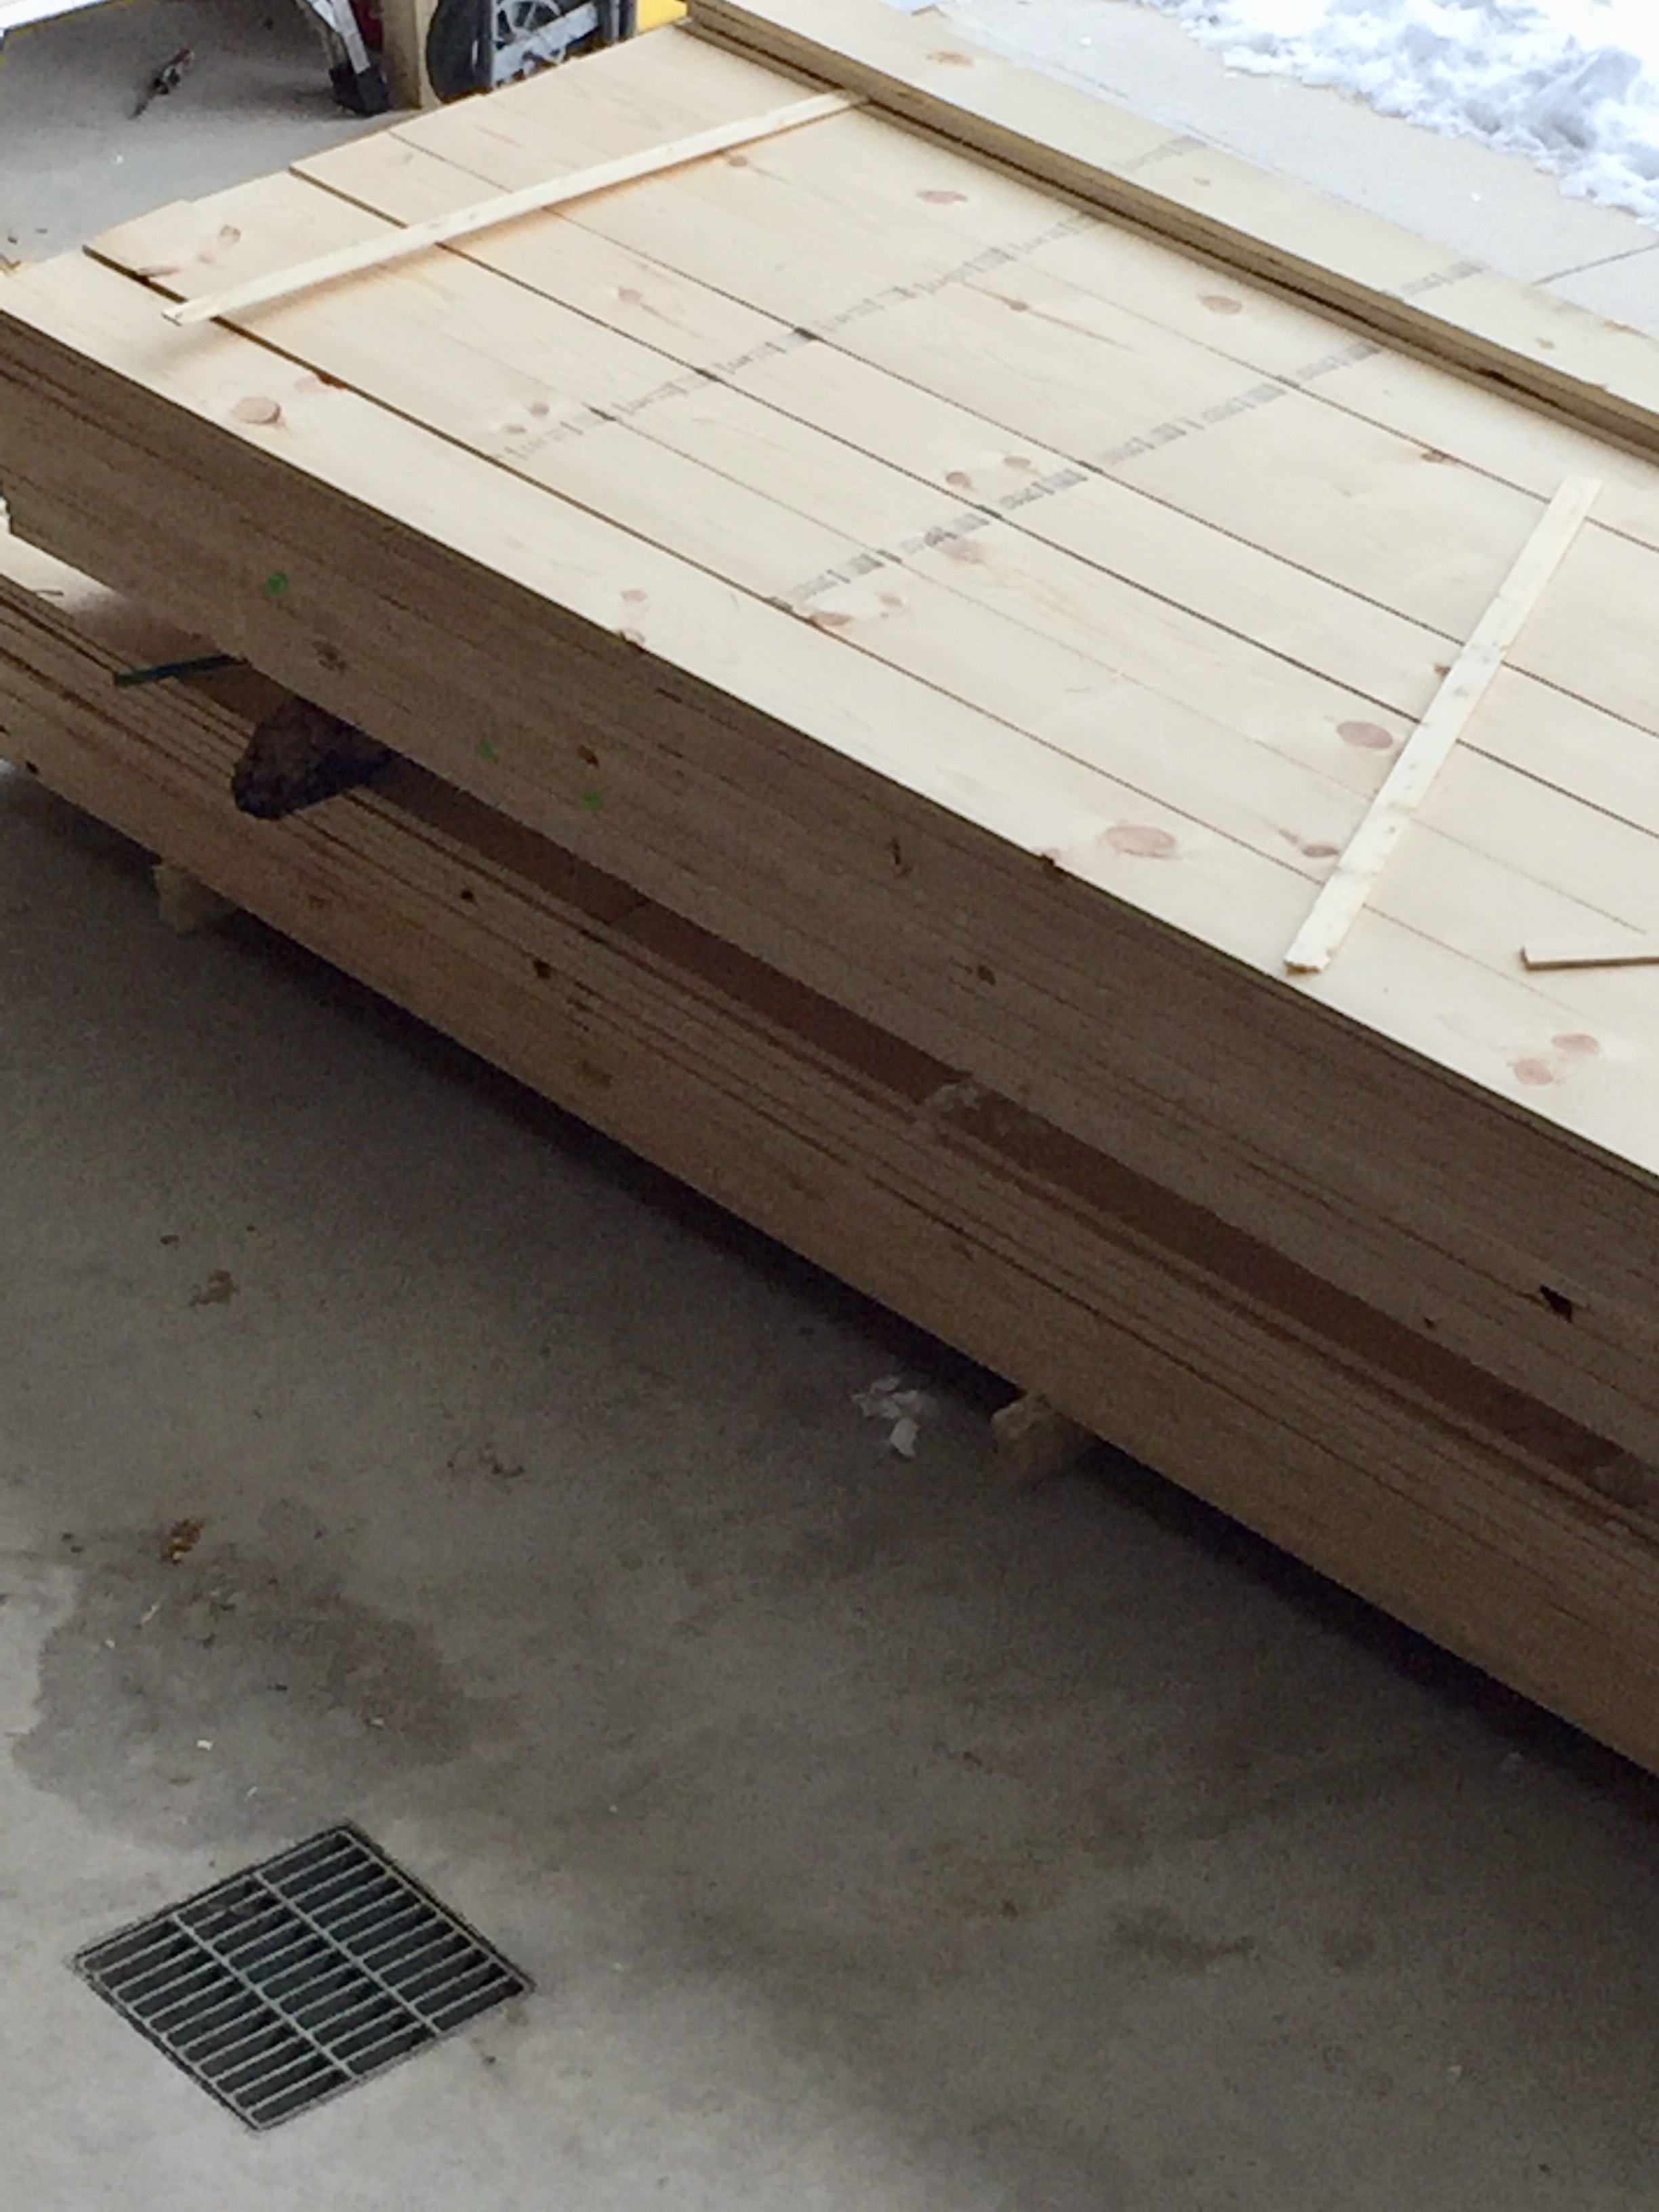
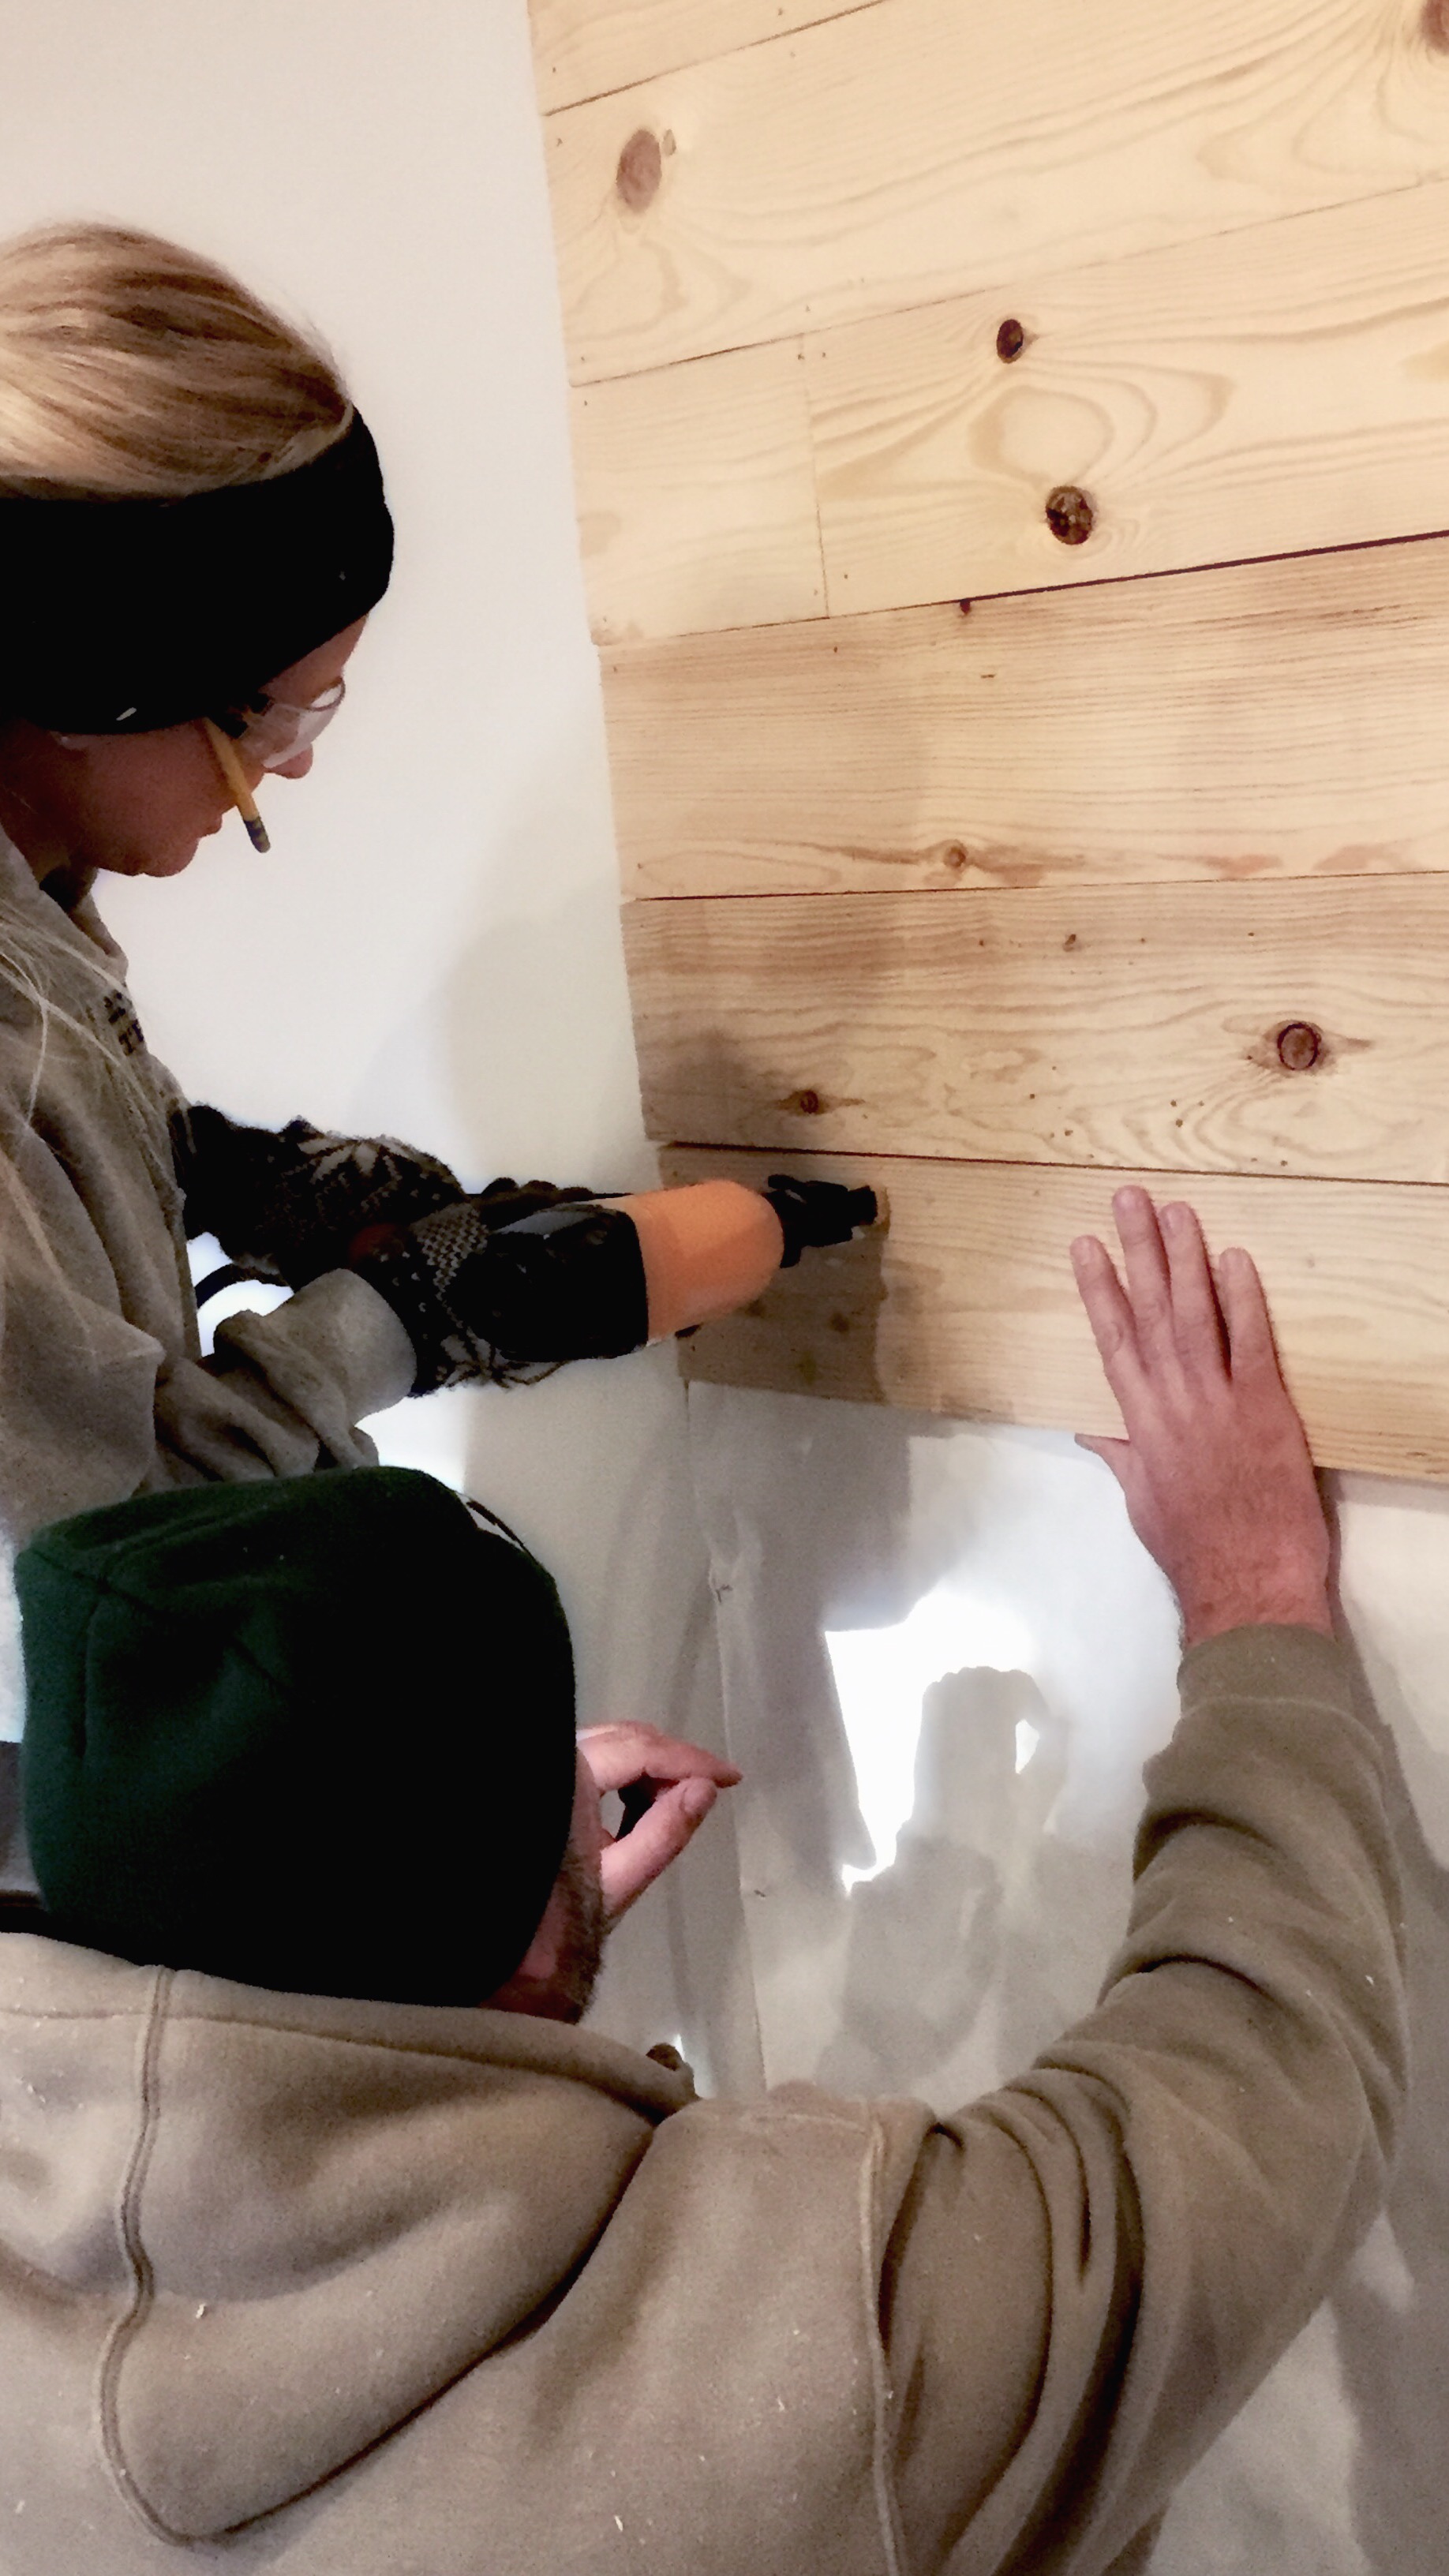
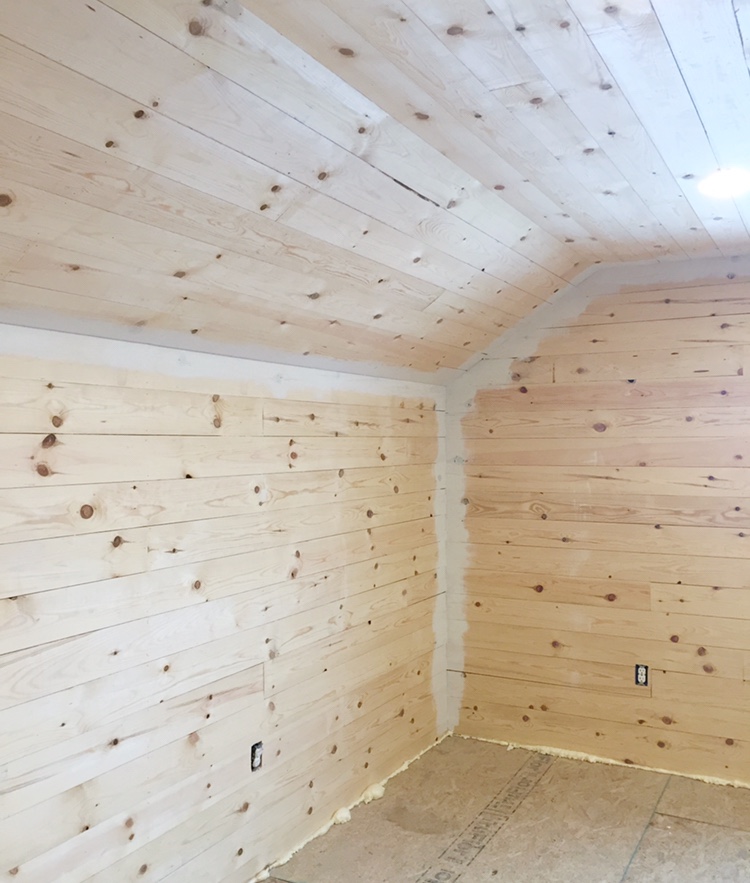
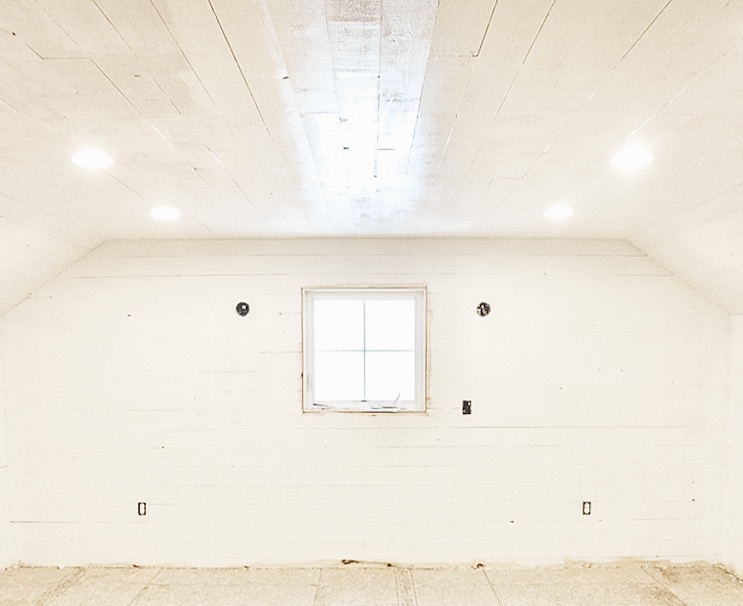
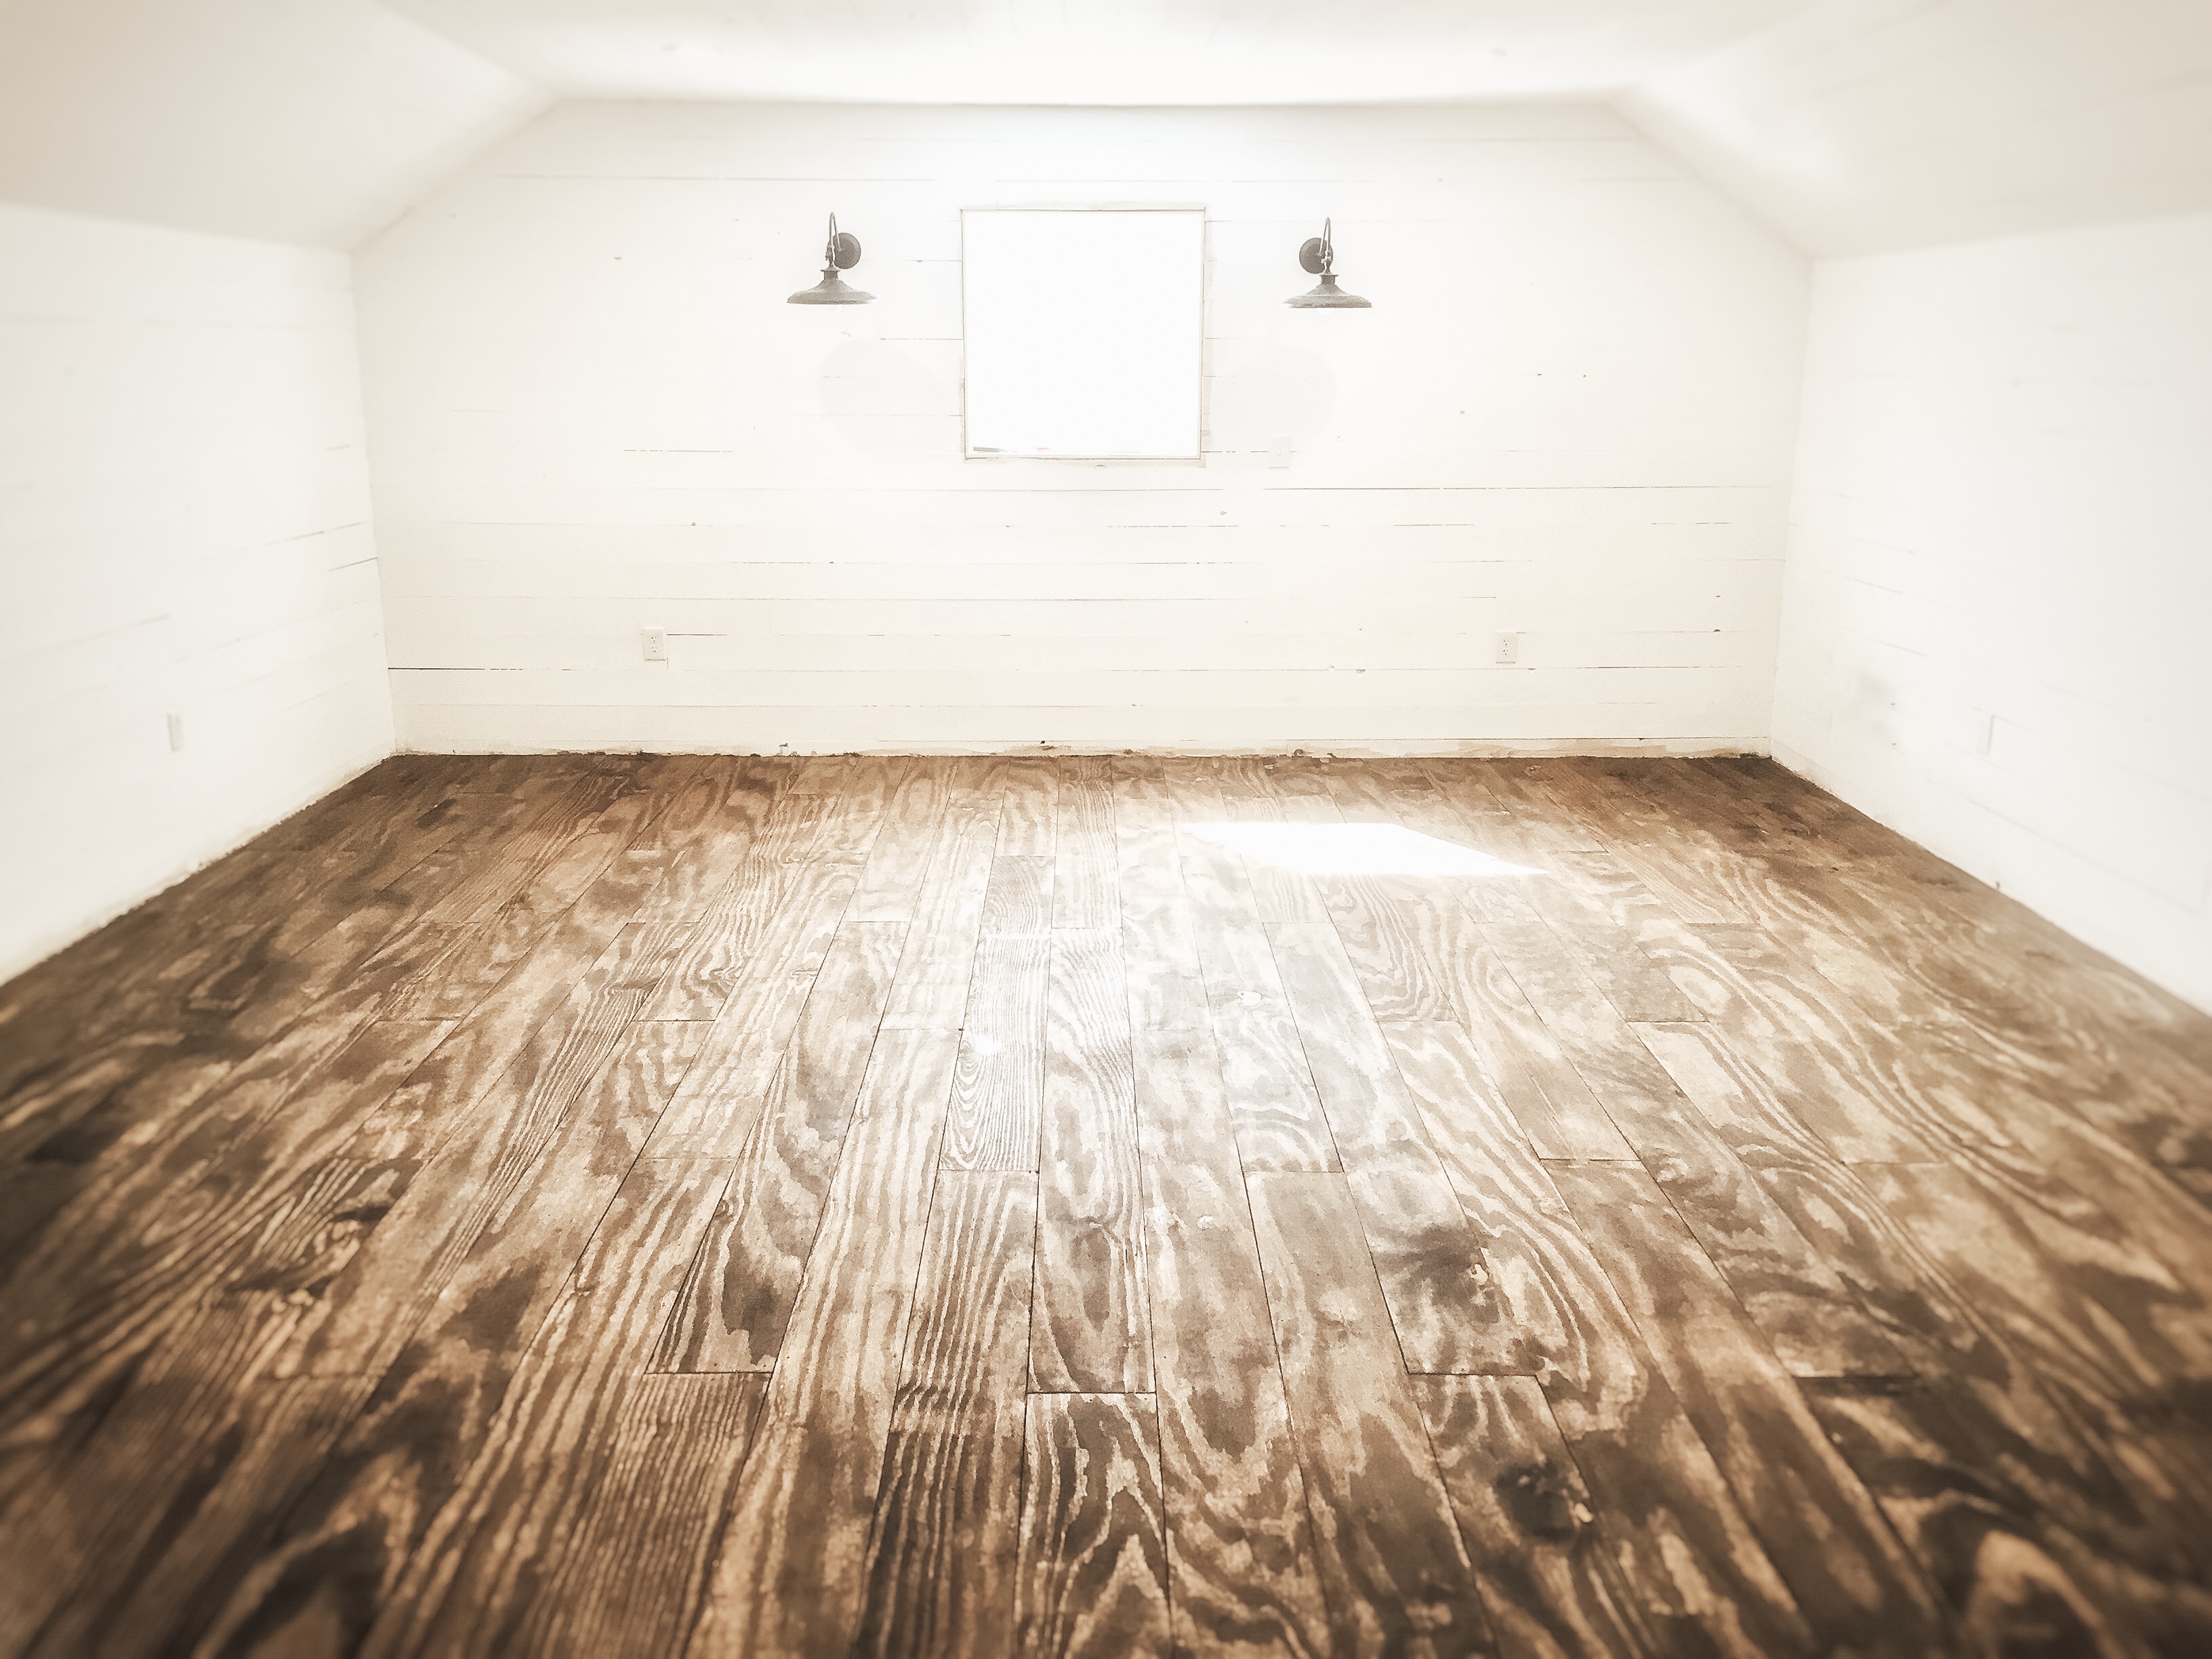
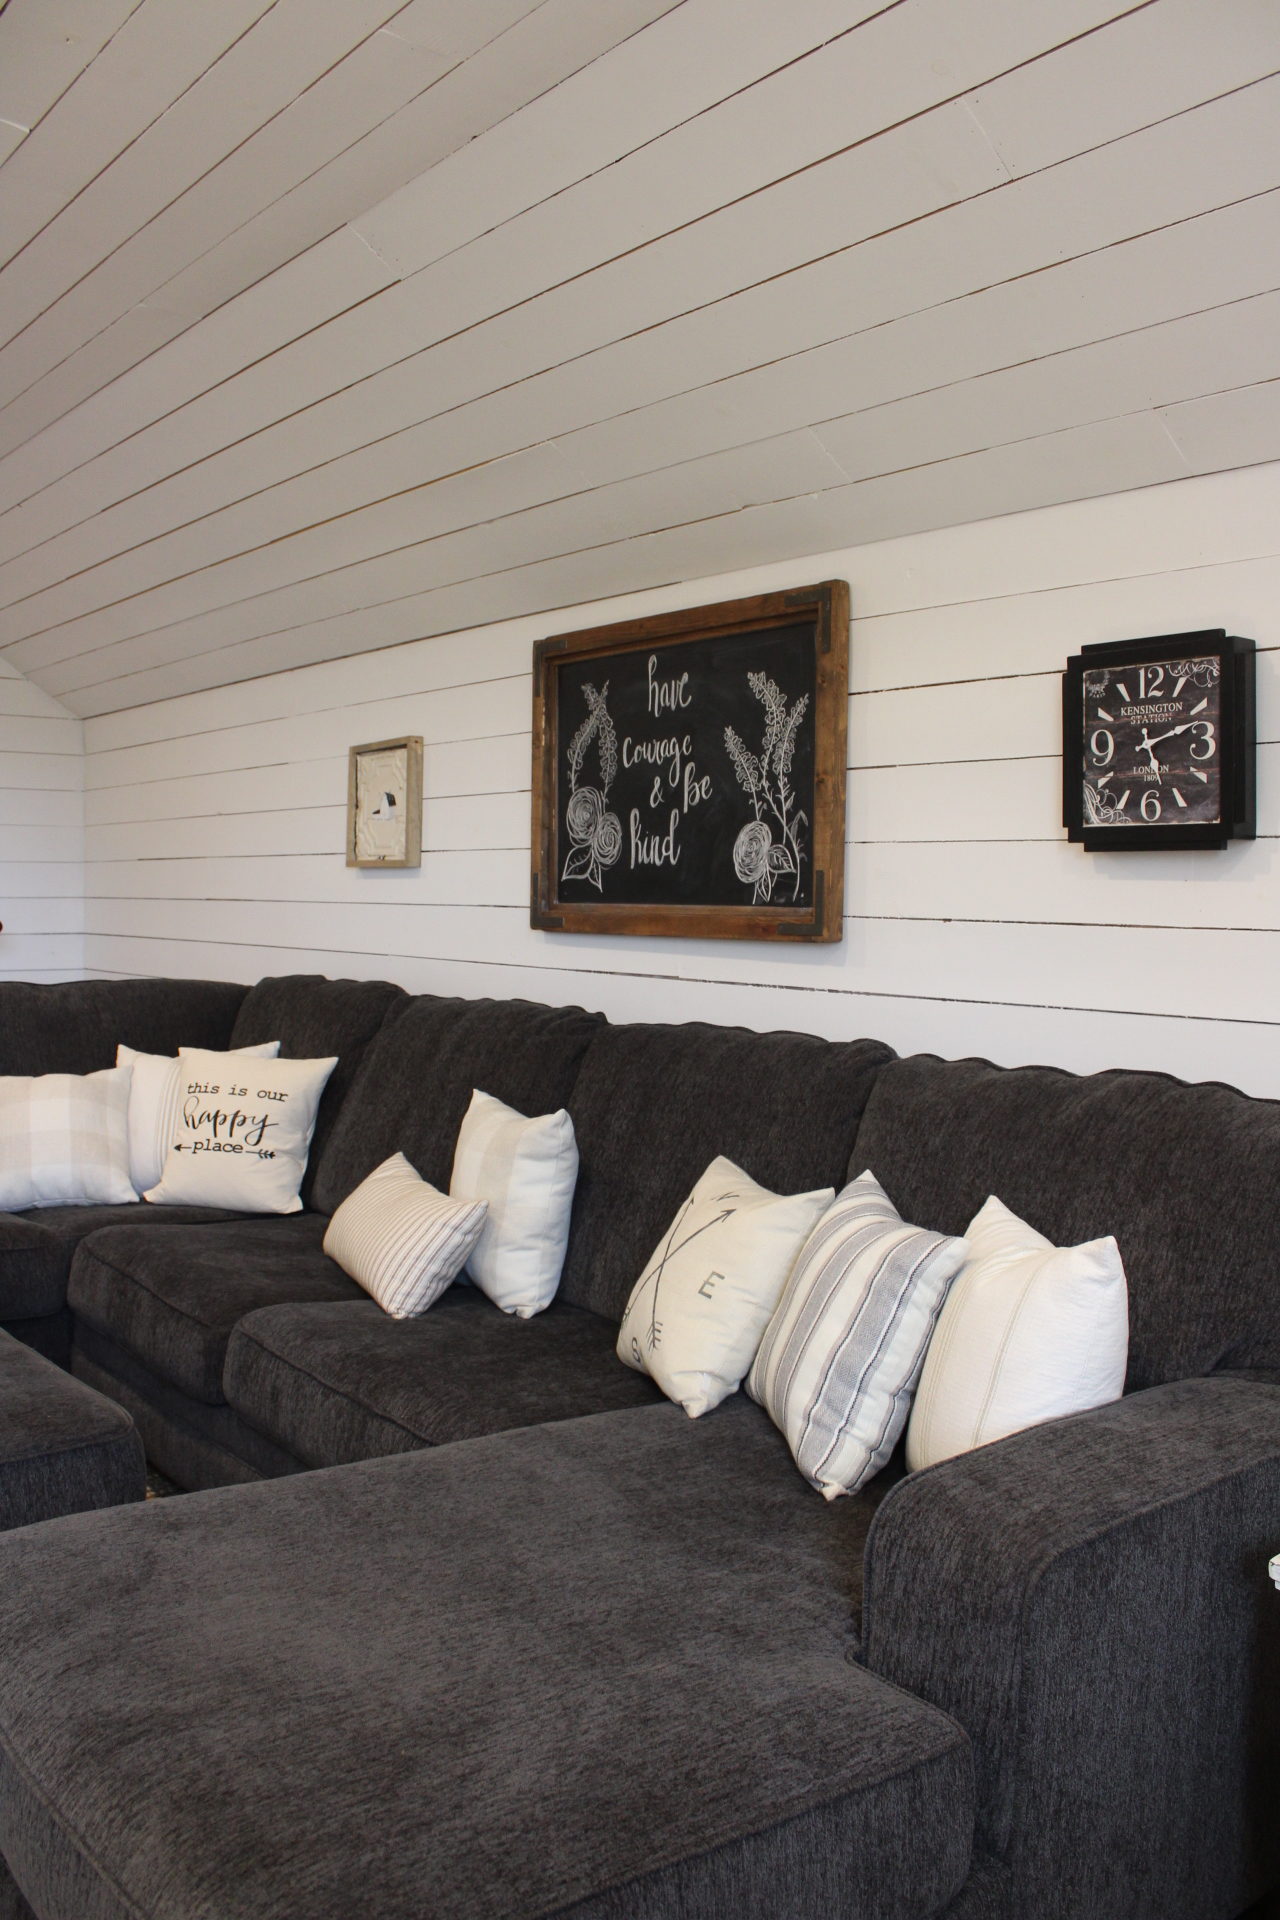
After we finished with everything behind the walls we were ready to enclose it! If you’ve read my other blog posts about the downstairs…you already know how much I love shiplap and planked walls. I knew I wanted to go with 1×6 planks for the loft’s walls and for the ceiling too!!! The loft ceiling has a hip roof barn shape to it so I knew the planked ceiling would look awesome!
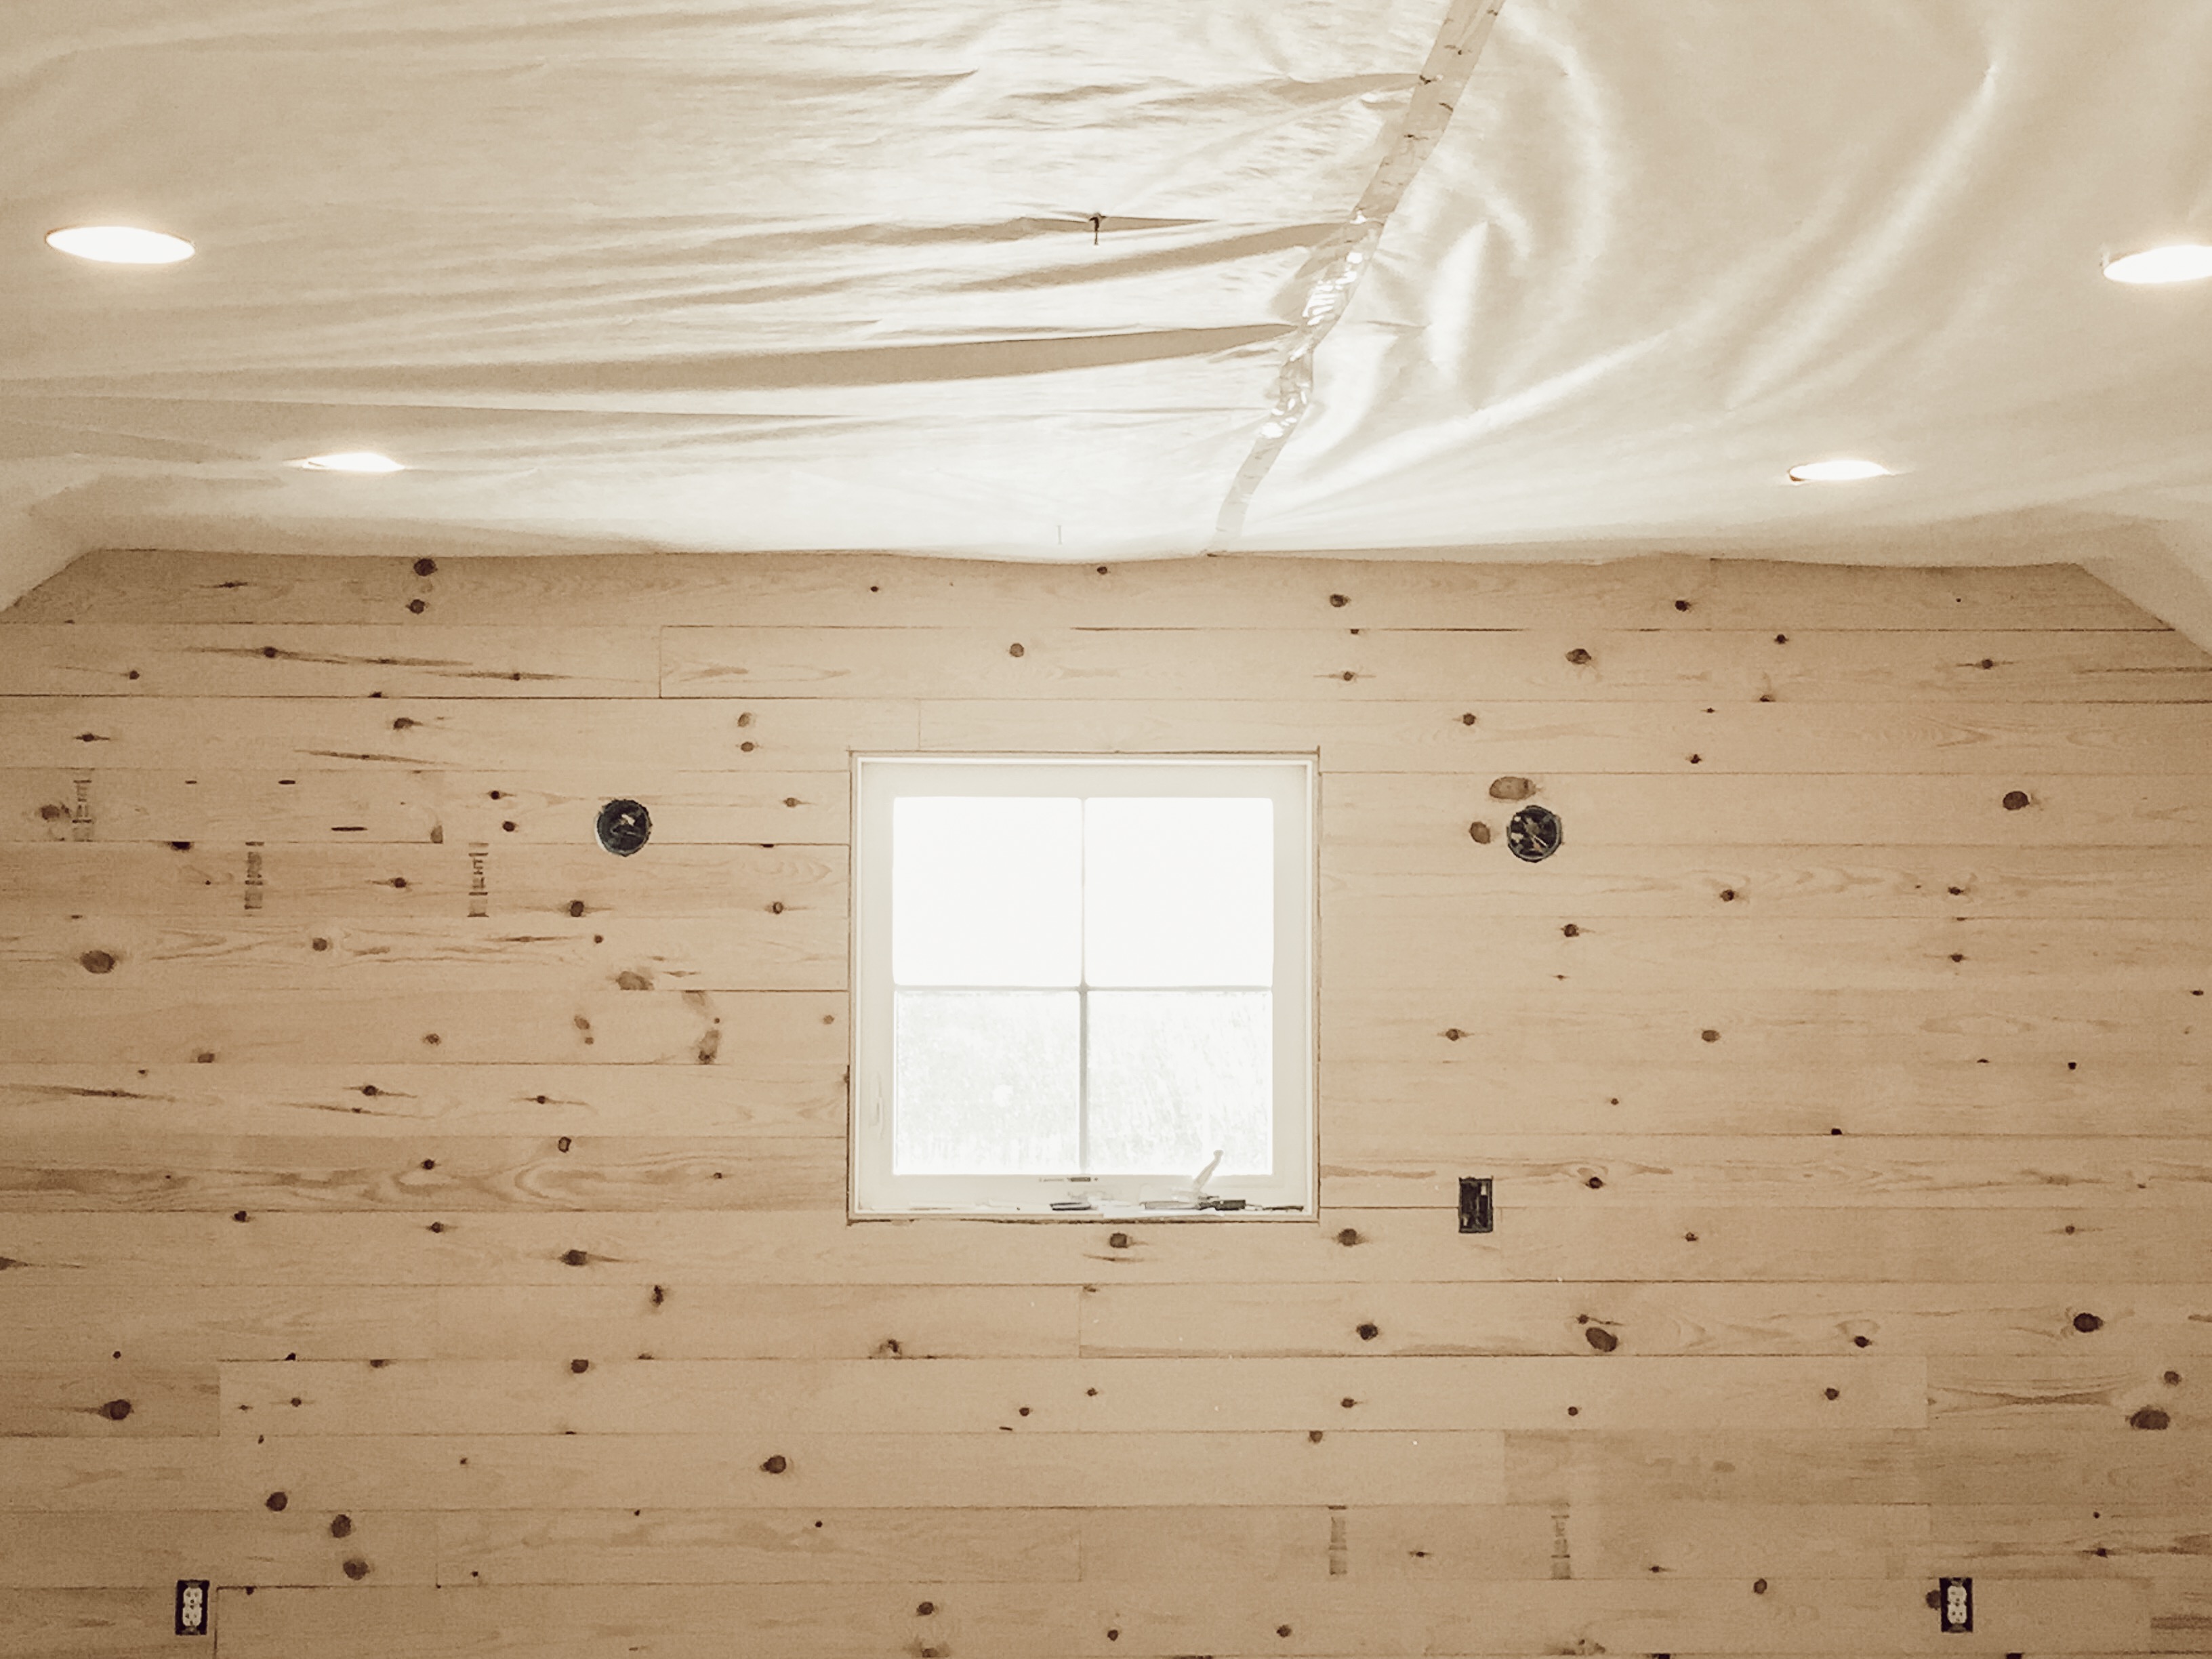
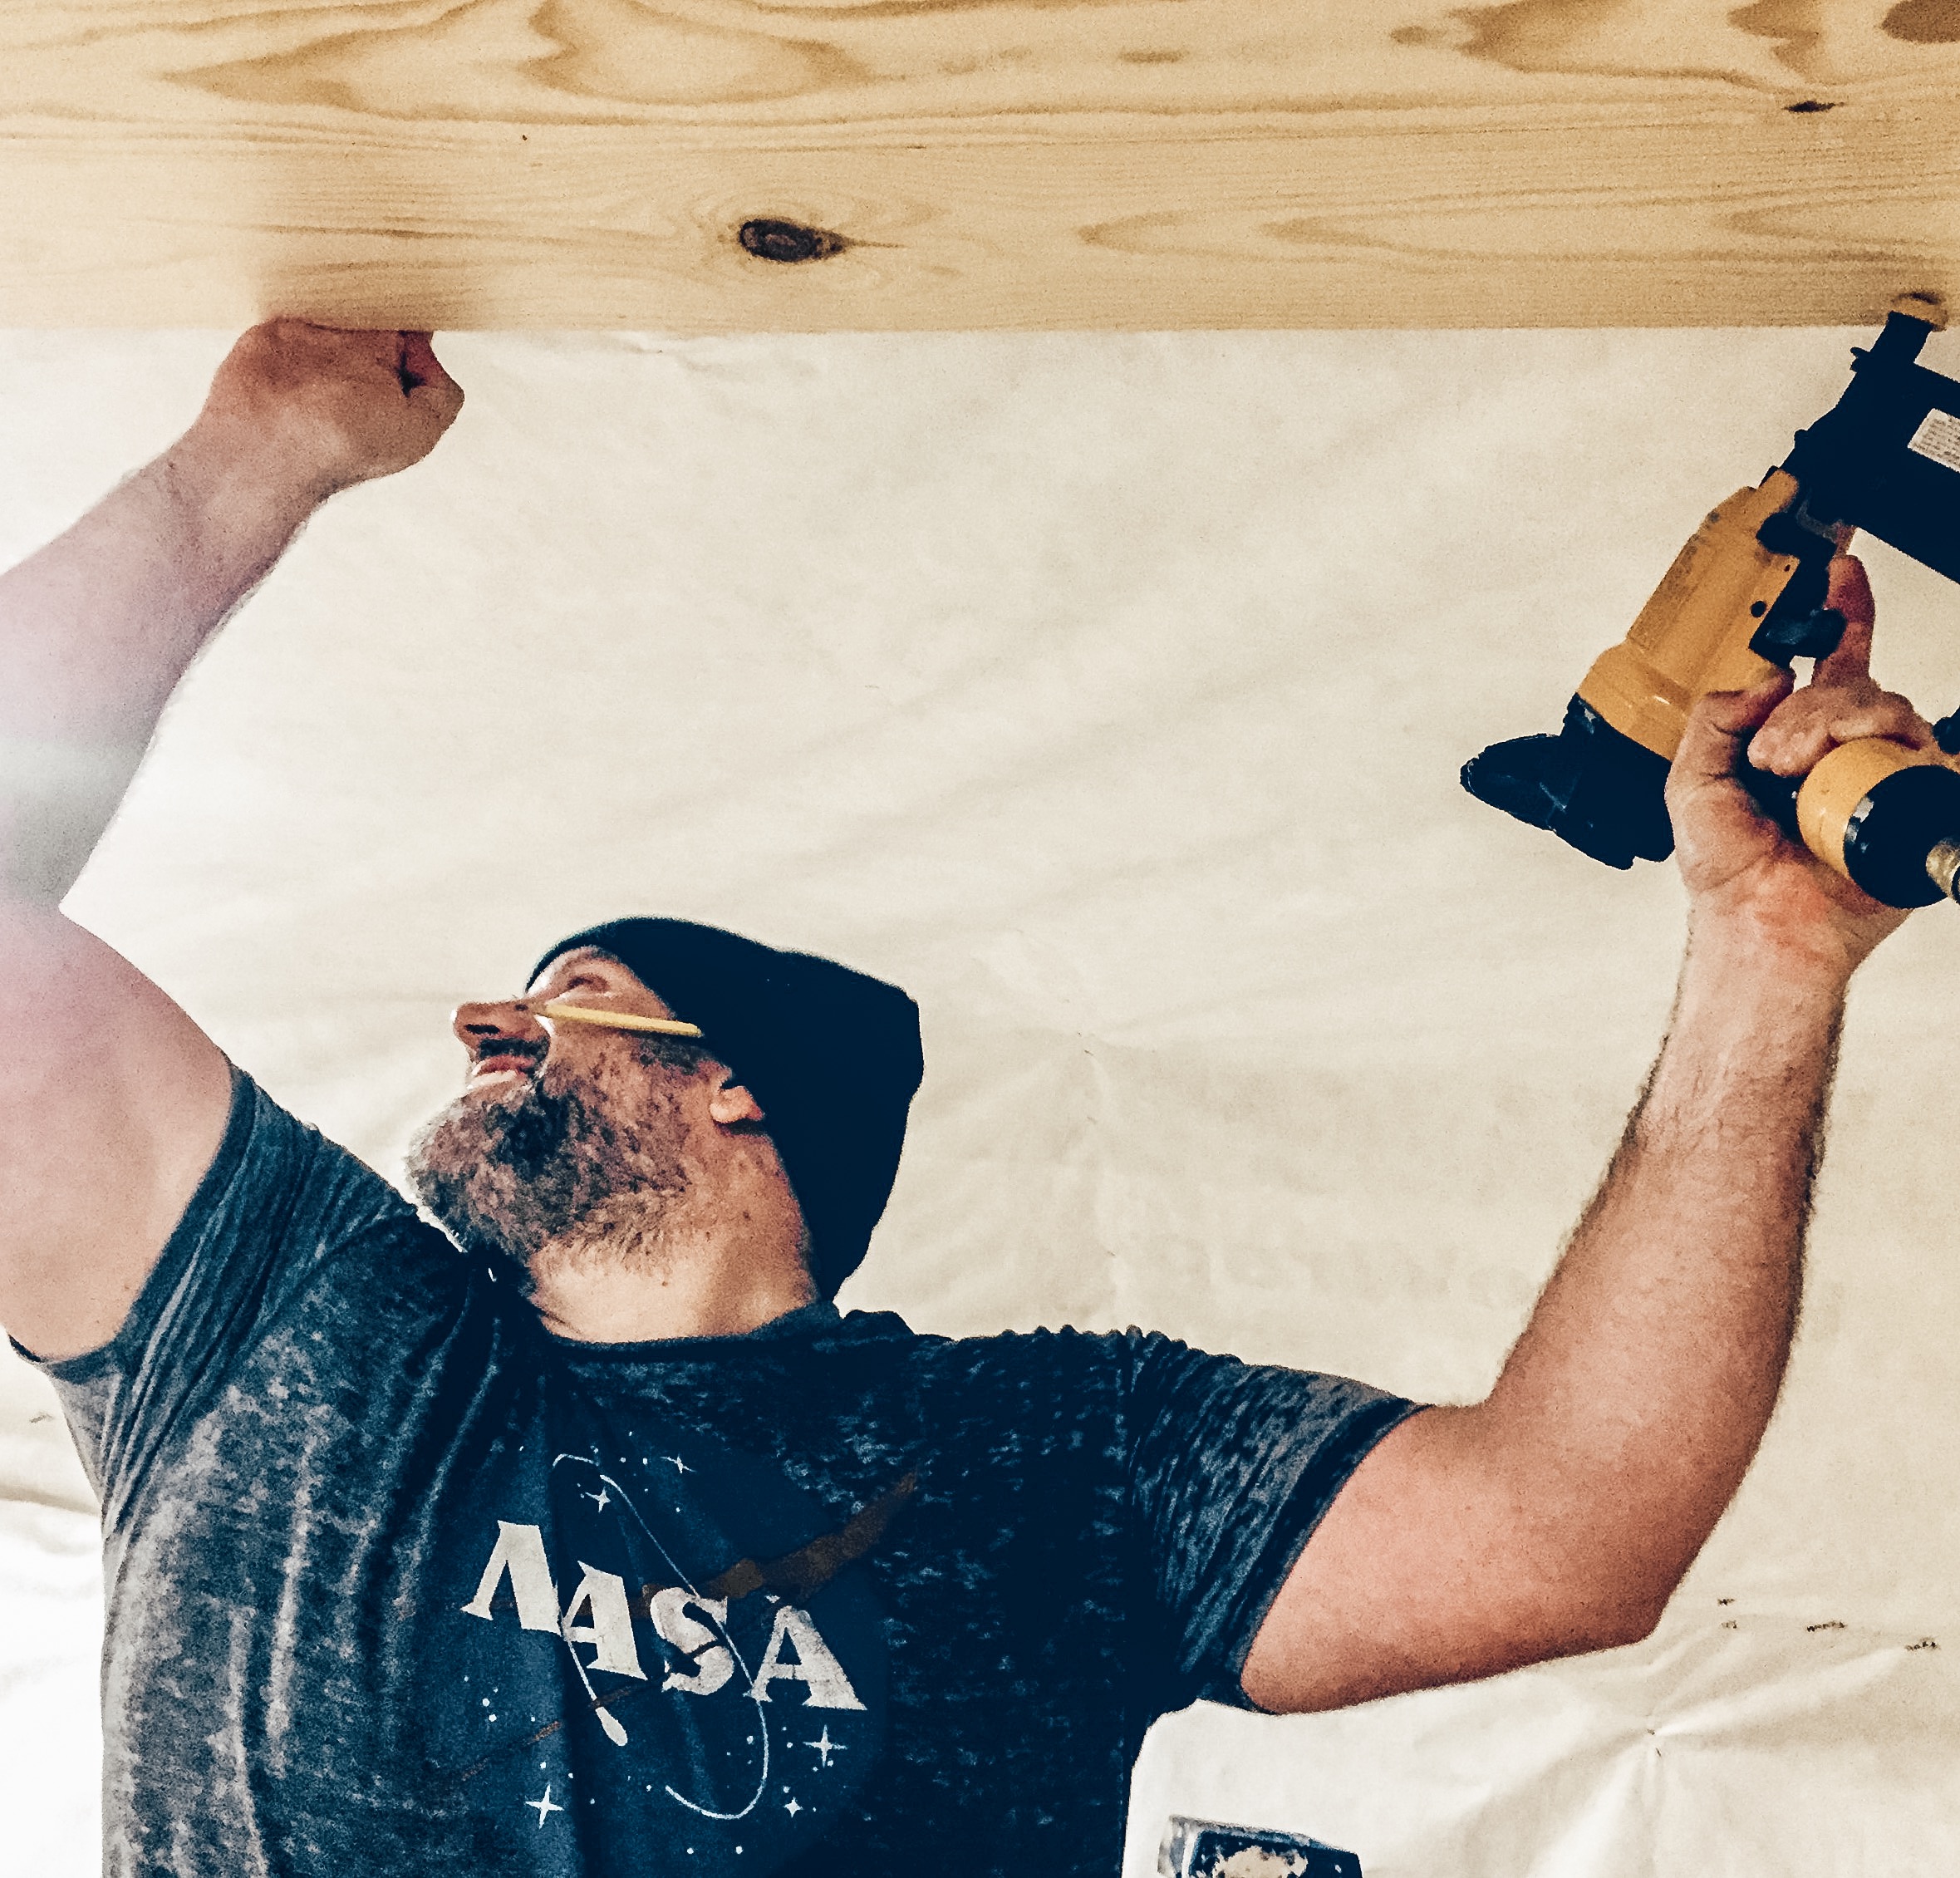
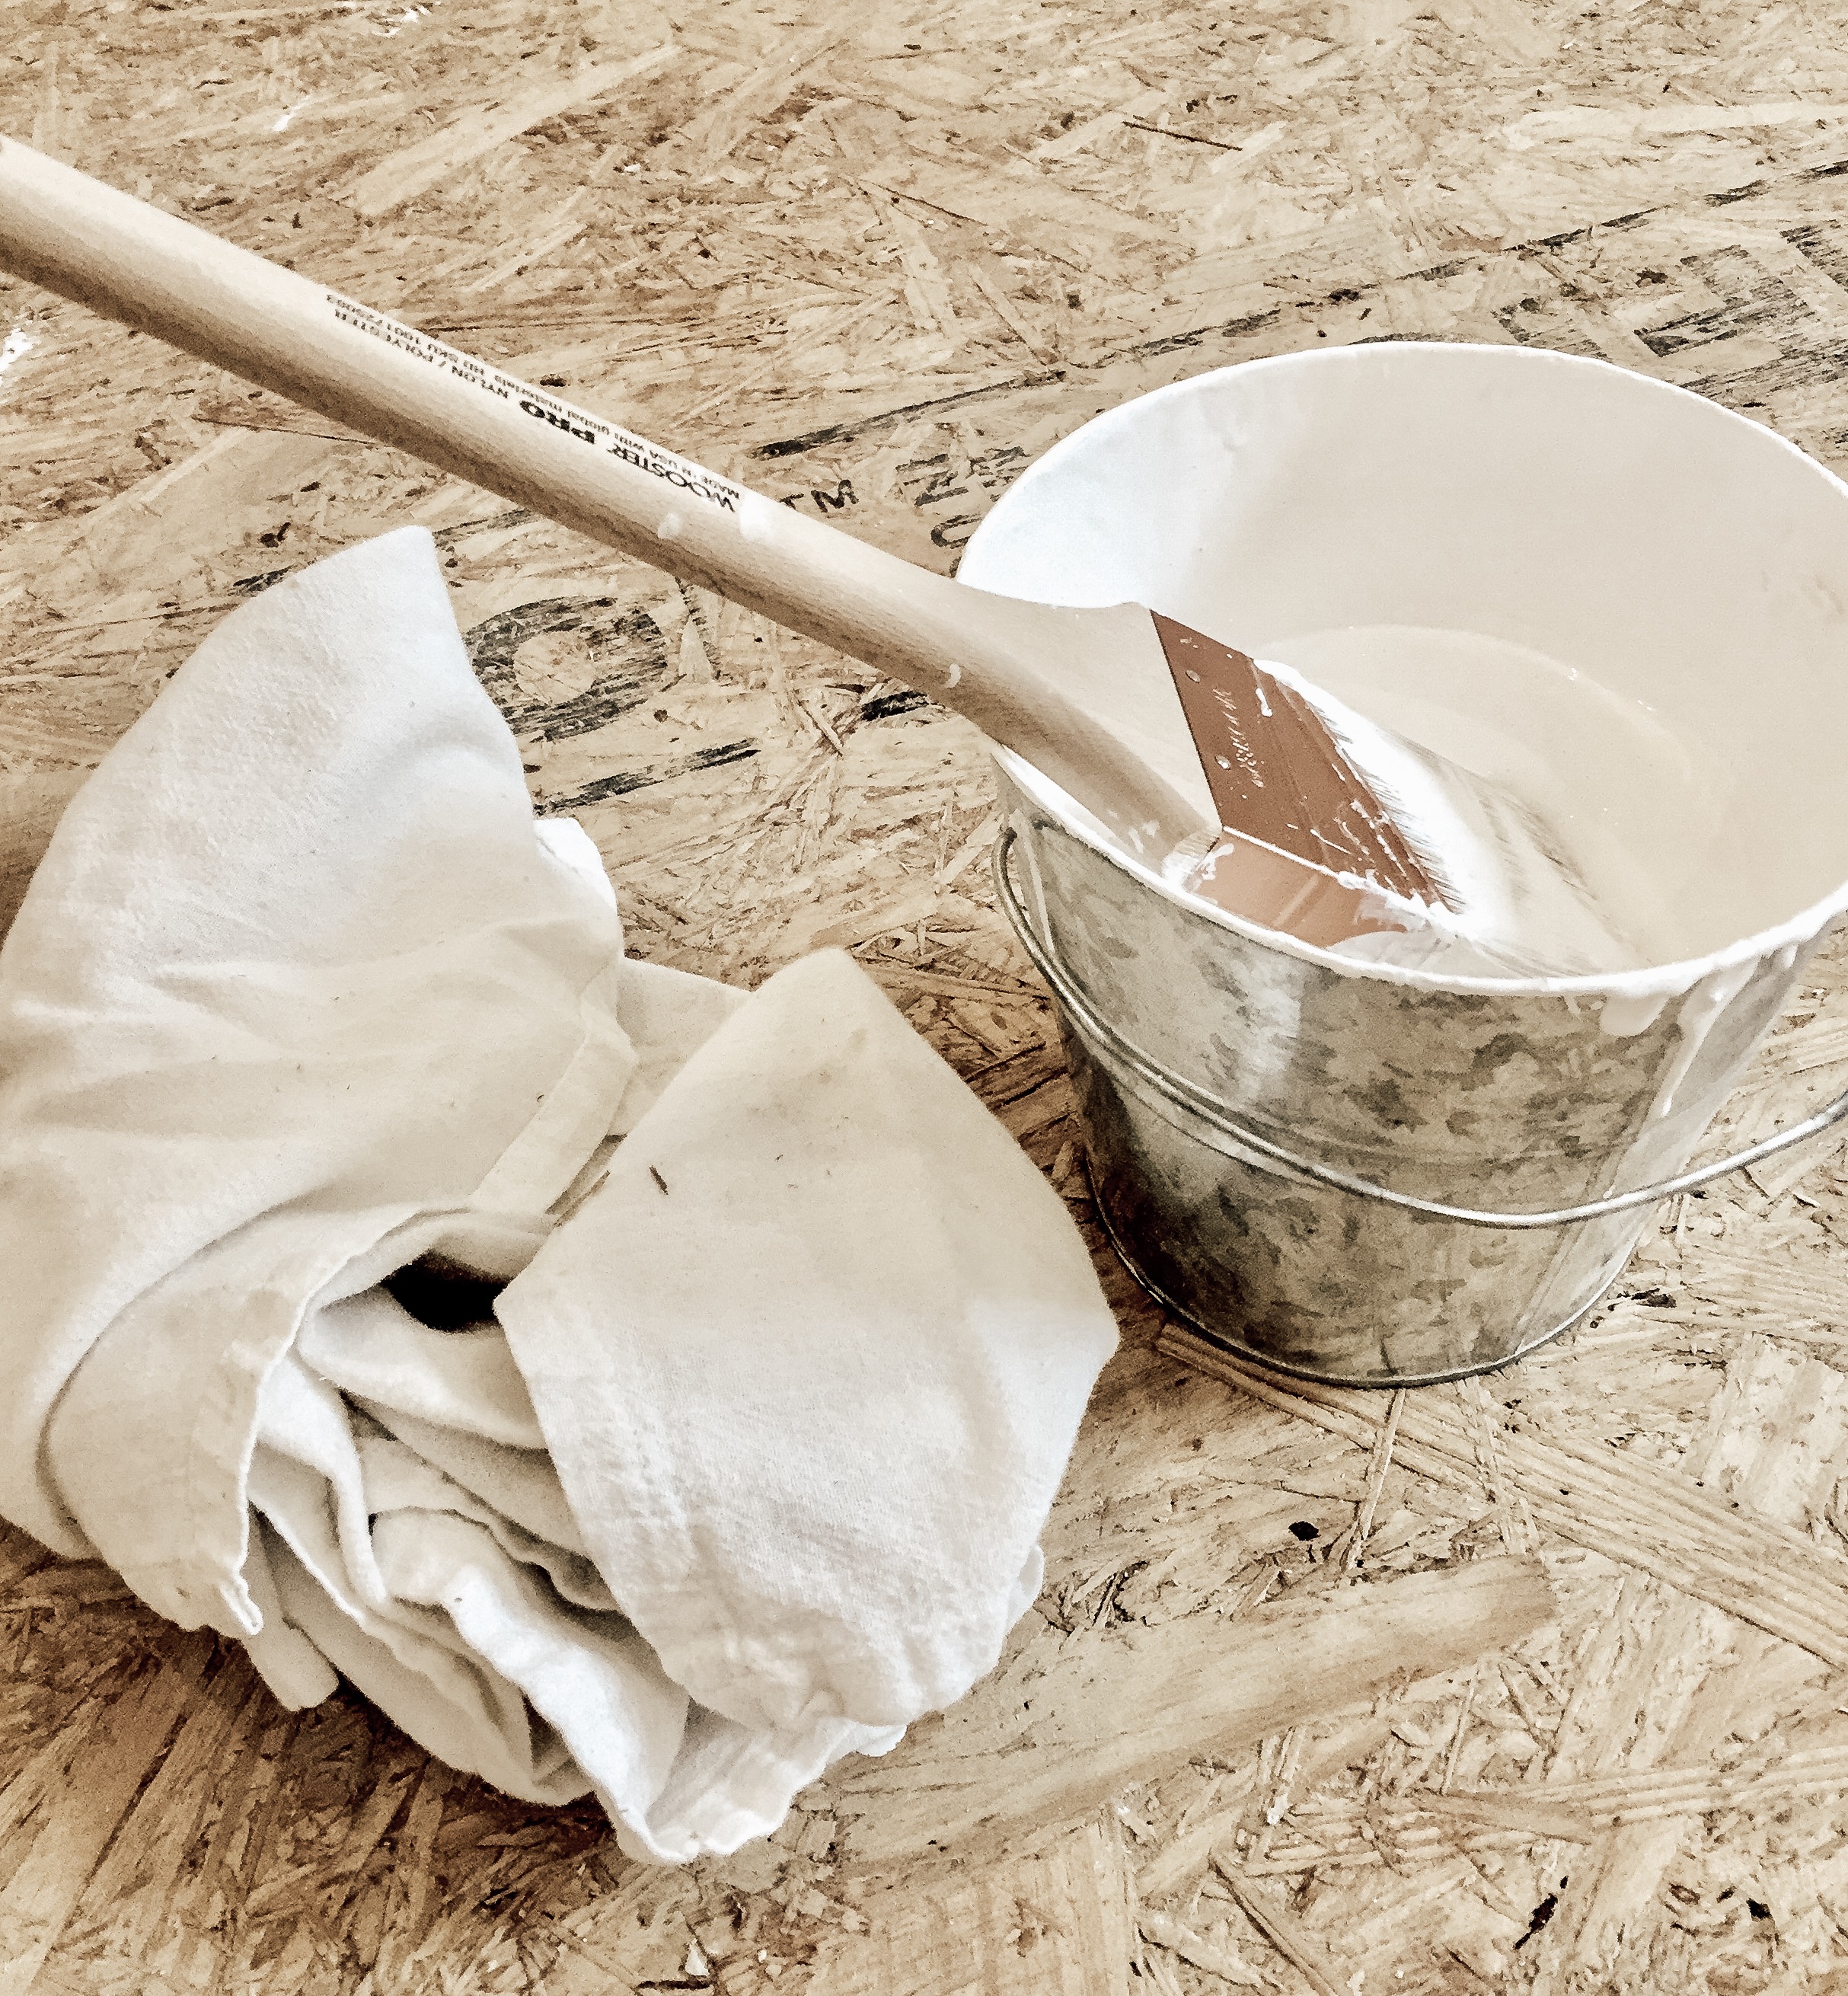
Planking the entire space went super fast using the 1×6 versus the 1×4 that we used in on all the main floor walls. After we had it all finished I decided to paint it all white! This space only has one window and I knew that paining it would really brighten it up.
When I originally drew up the design for the Cottage, I had NO CLUE that the view from the attic would be so incredible!!!
I really should have designed it with a much larger window…I would change that if I could have a “do-over”! Oh well! We will keep that in mind when we build the main house for sure!
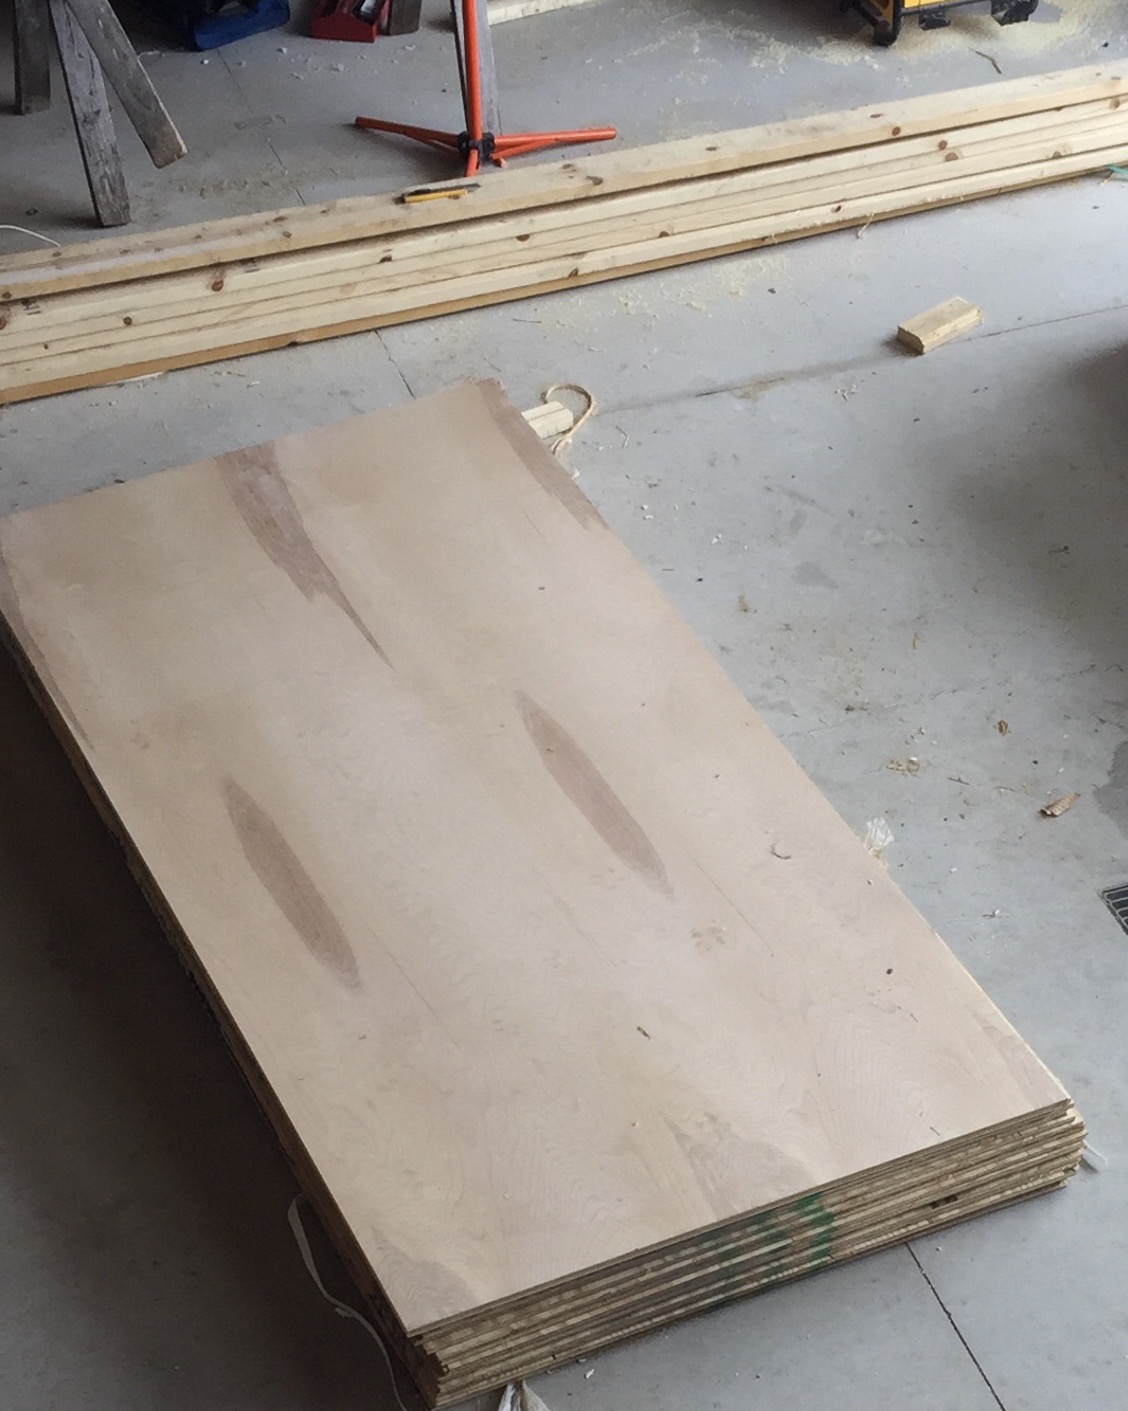
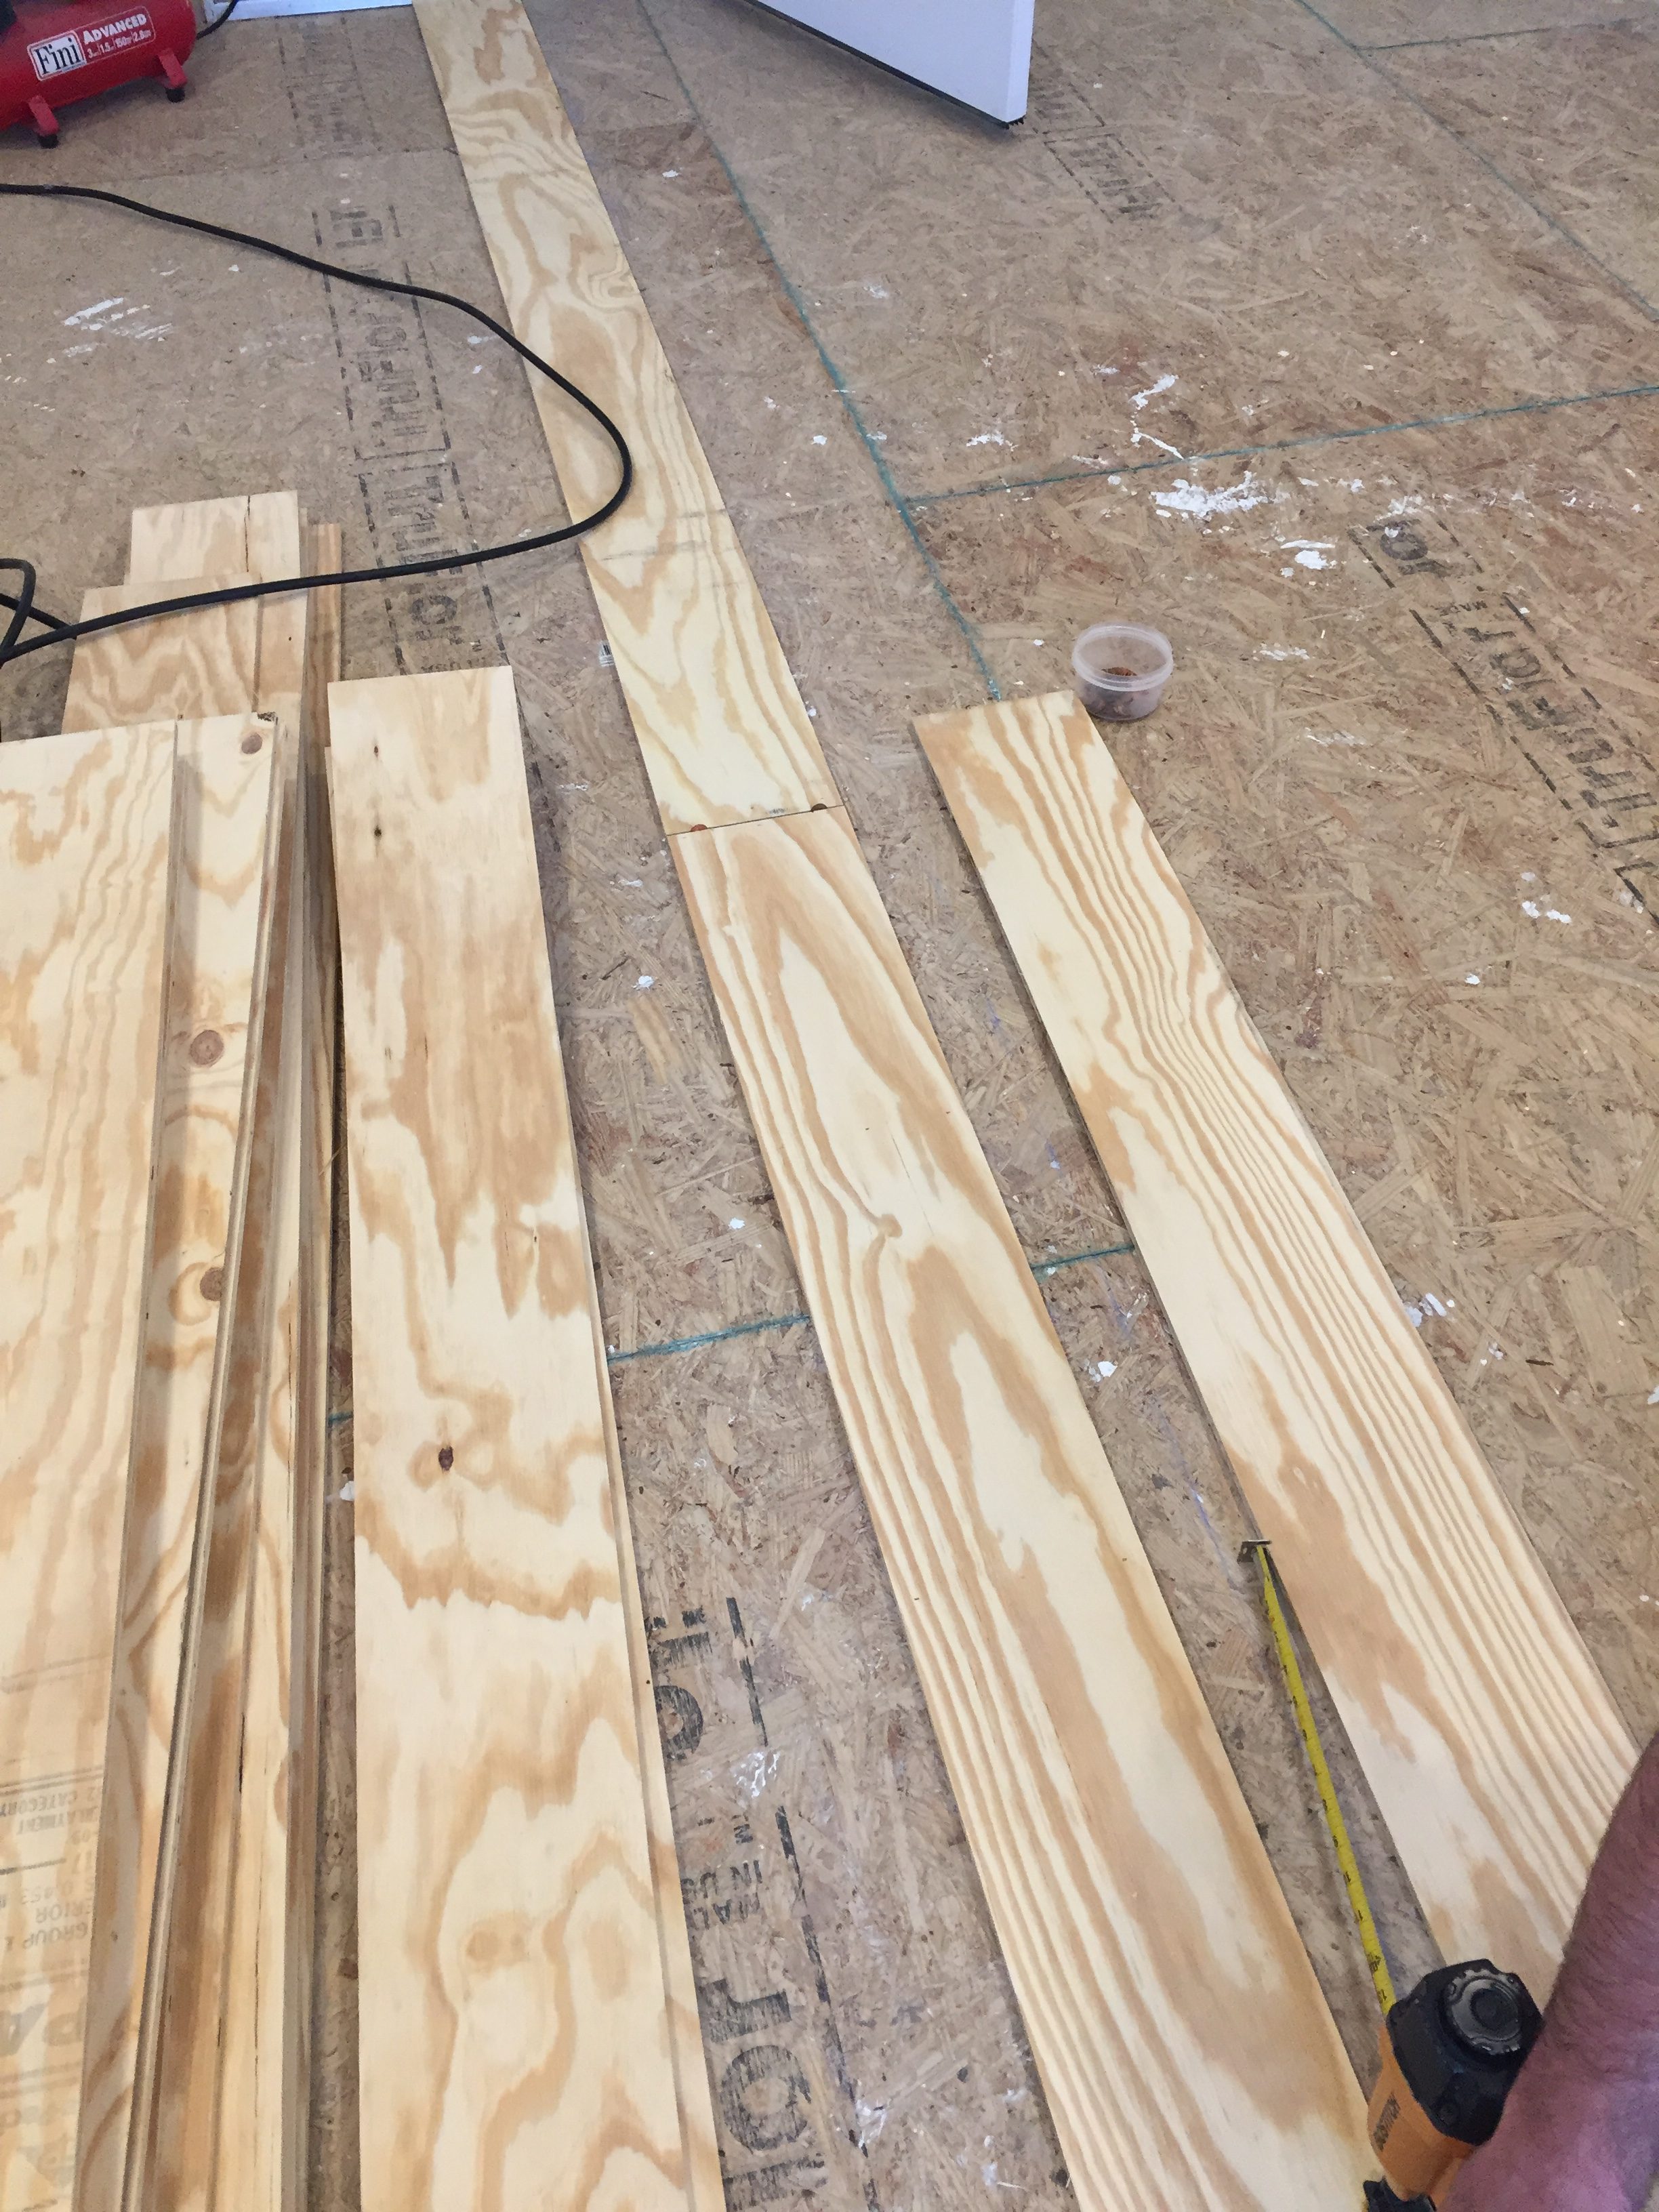
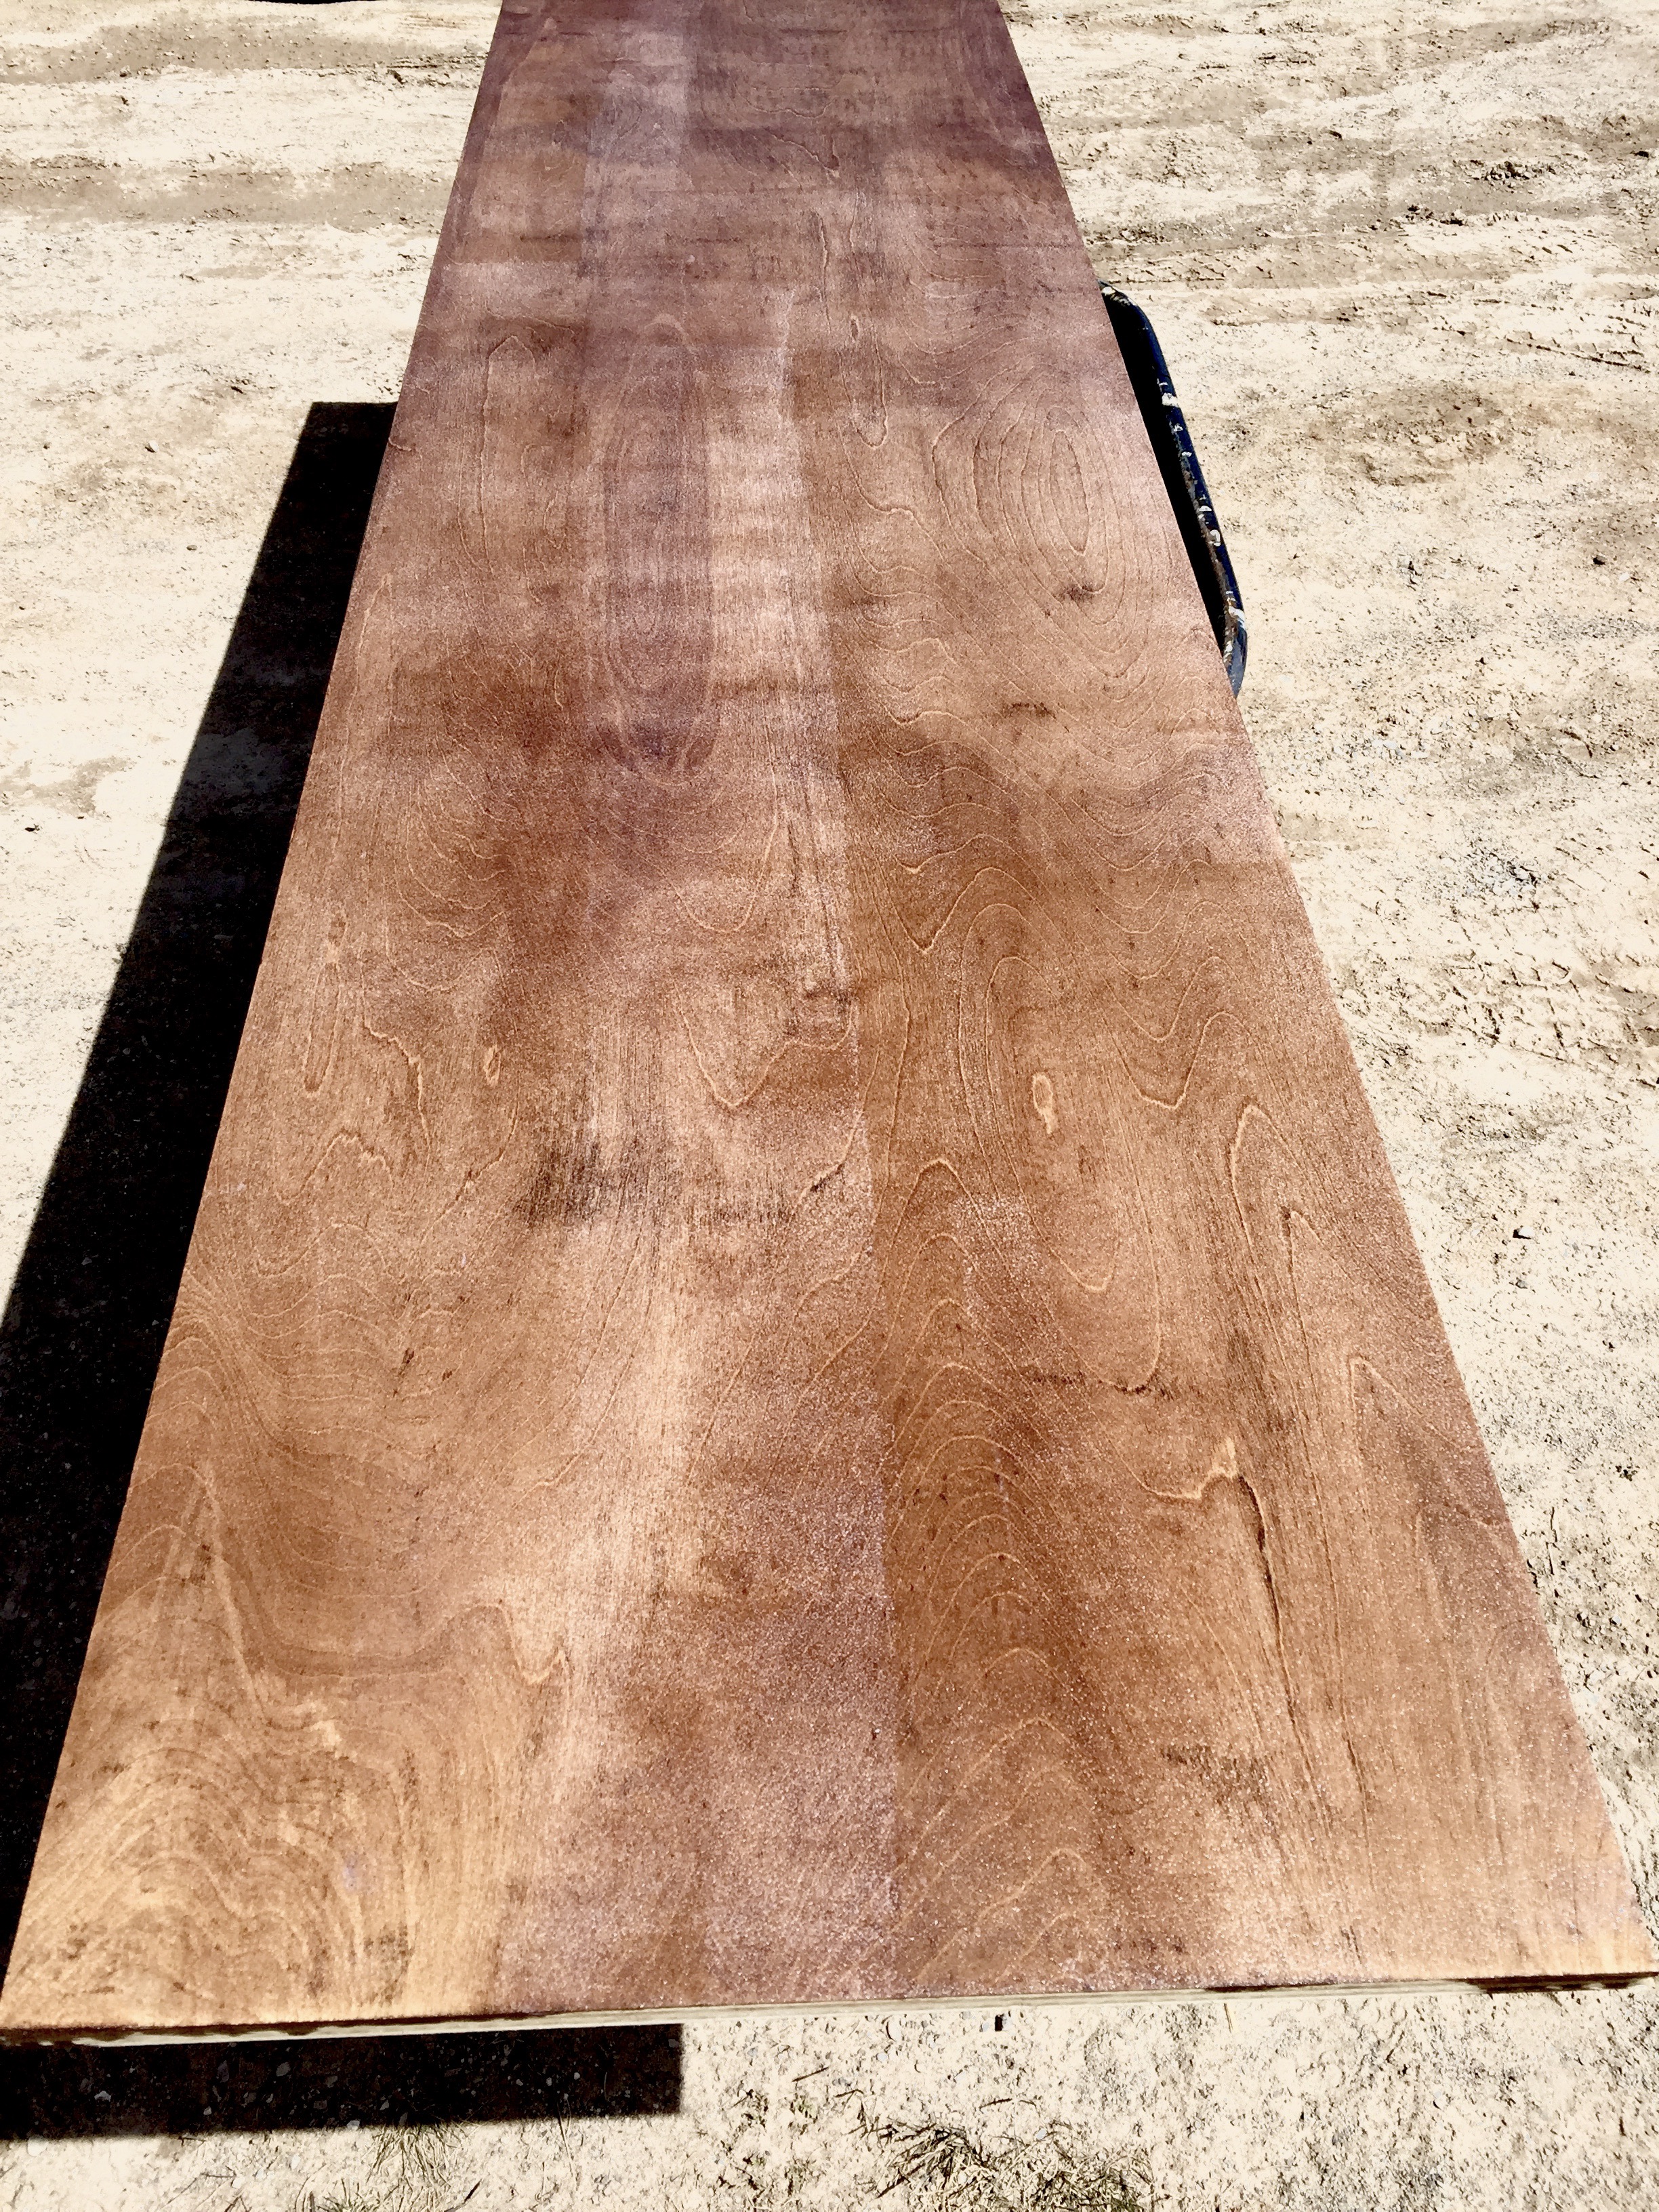
DIY Plywood Wide Plank Flooring
Because this is an attic we needed to add another layer of the subfloor. I decided to go ahead and try out DIY plywood flooring! I knew that if it didn’t look that great that we could just lay hardwood flooring right over the plywood. I really wanted to save money wherever we could…so we ripped down those plywood sheets and gave it a go!
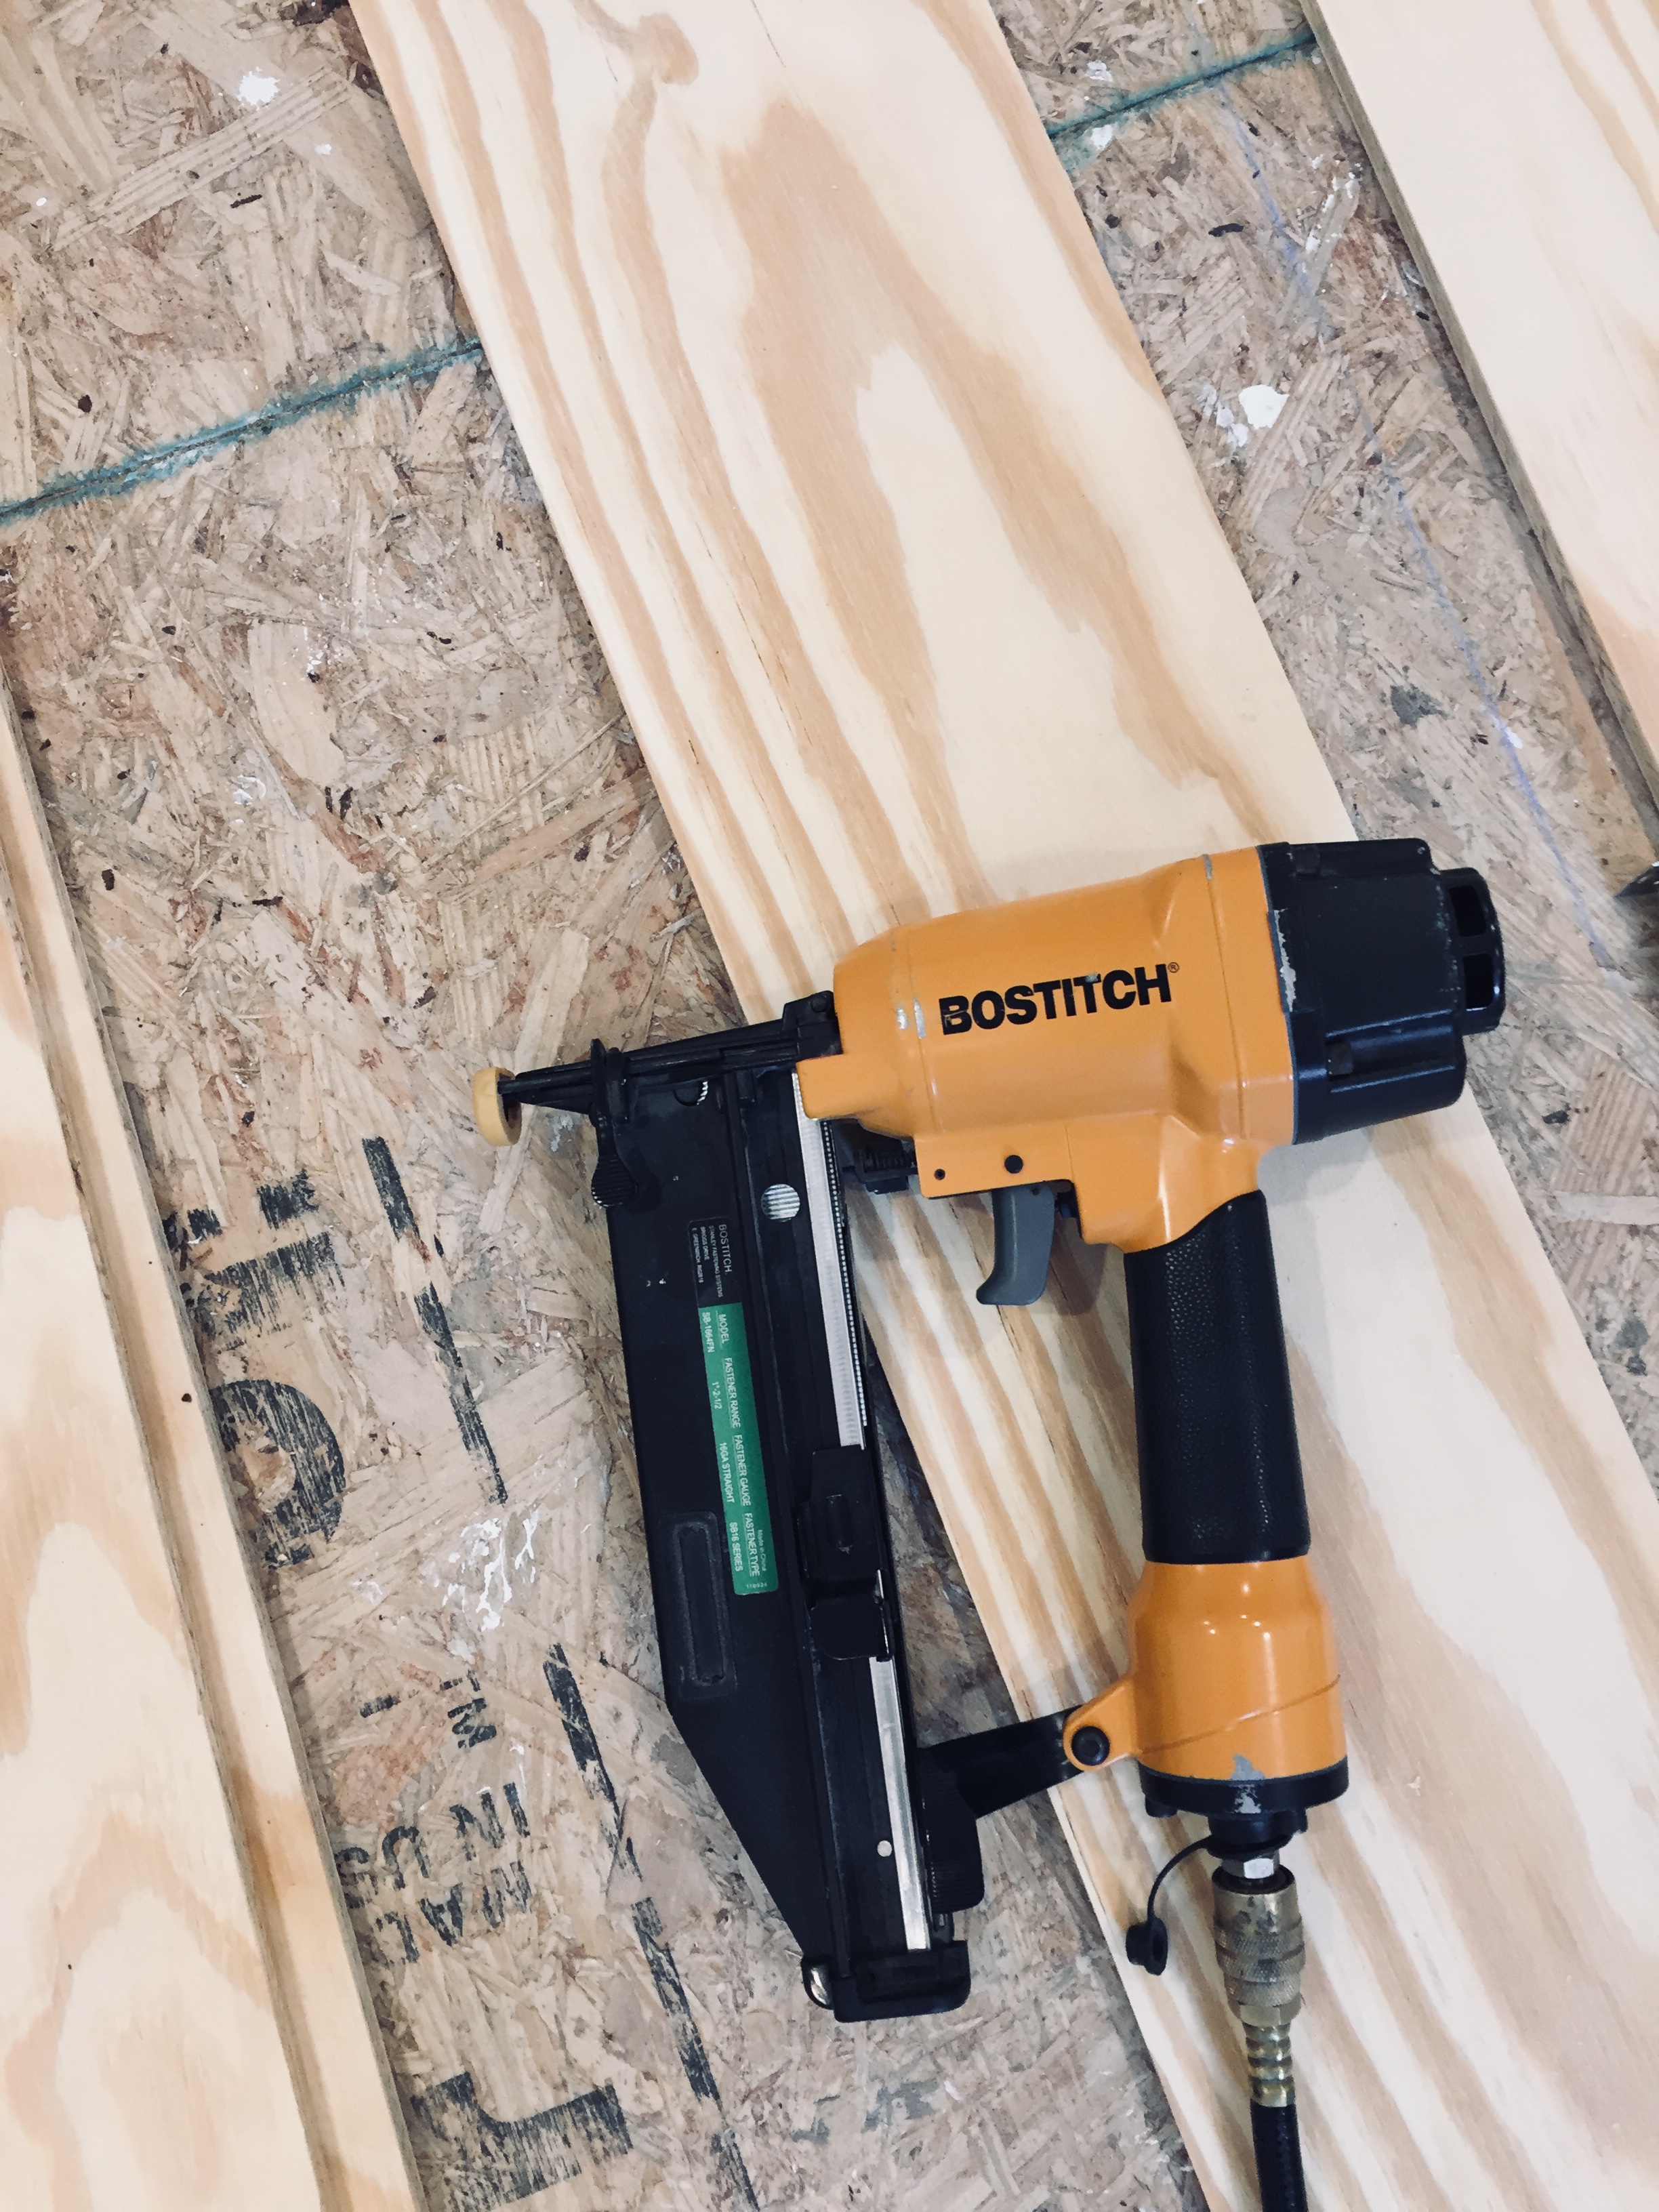
I used my Bostitch Brad Nailer from The Home Depot to secure the boards after using Liquid Nails on the back and used pennies for spacers.

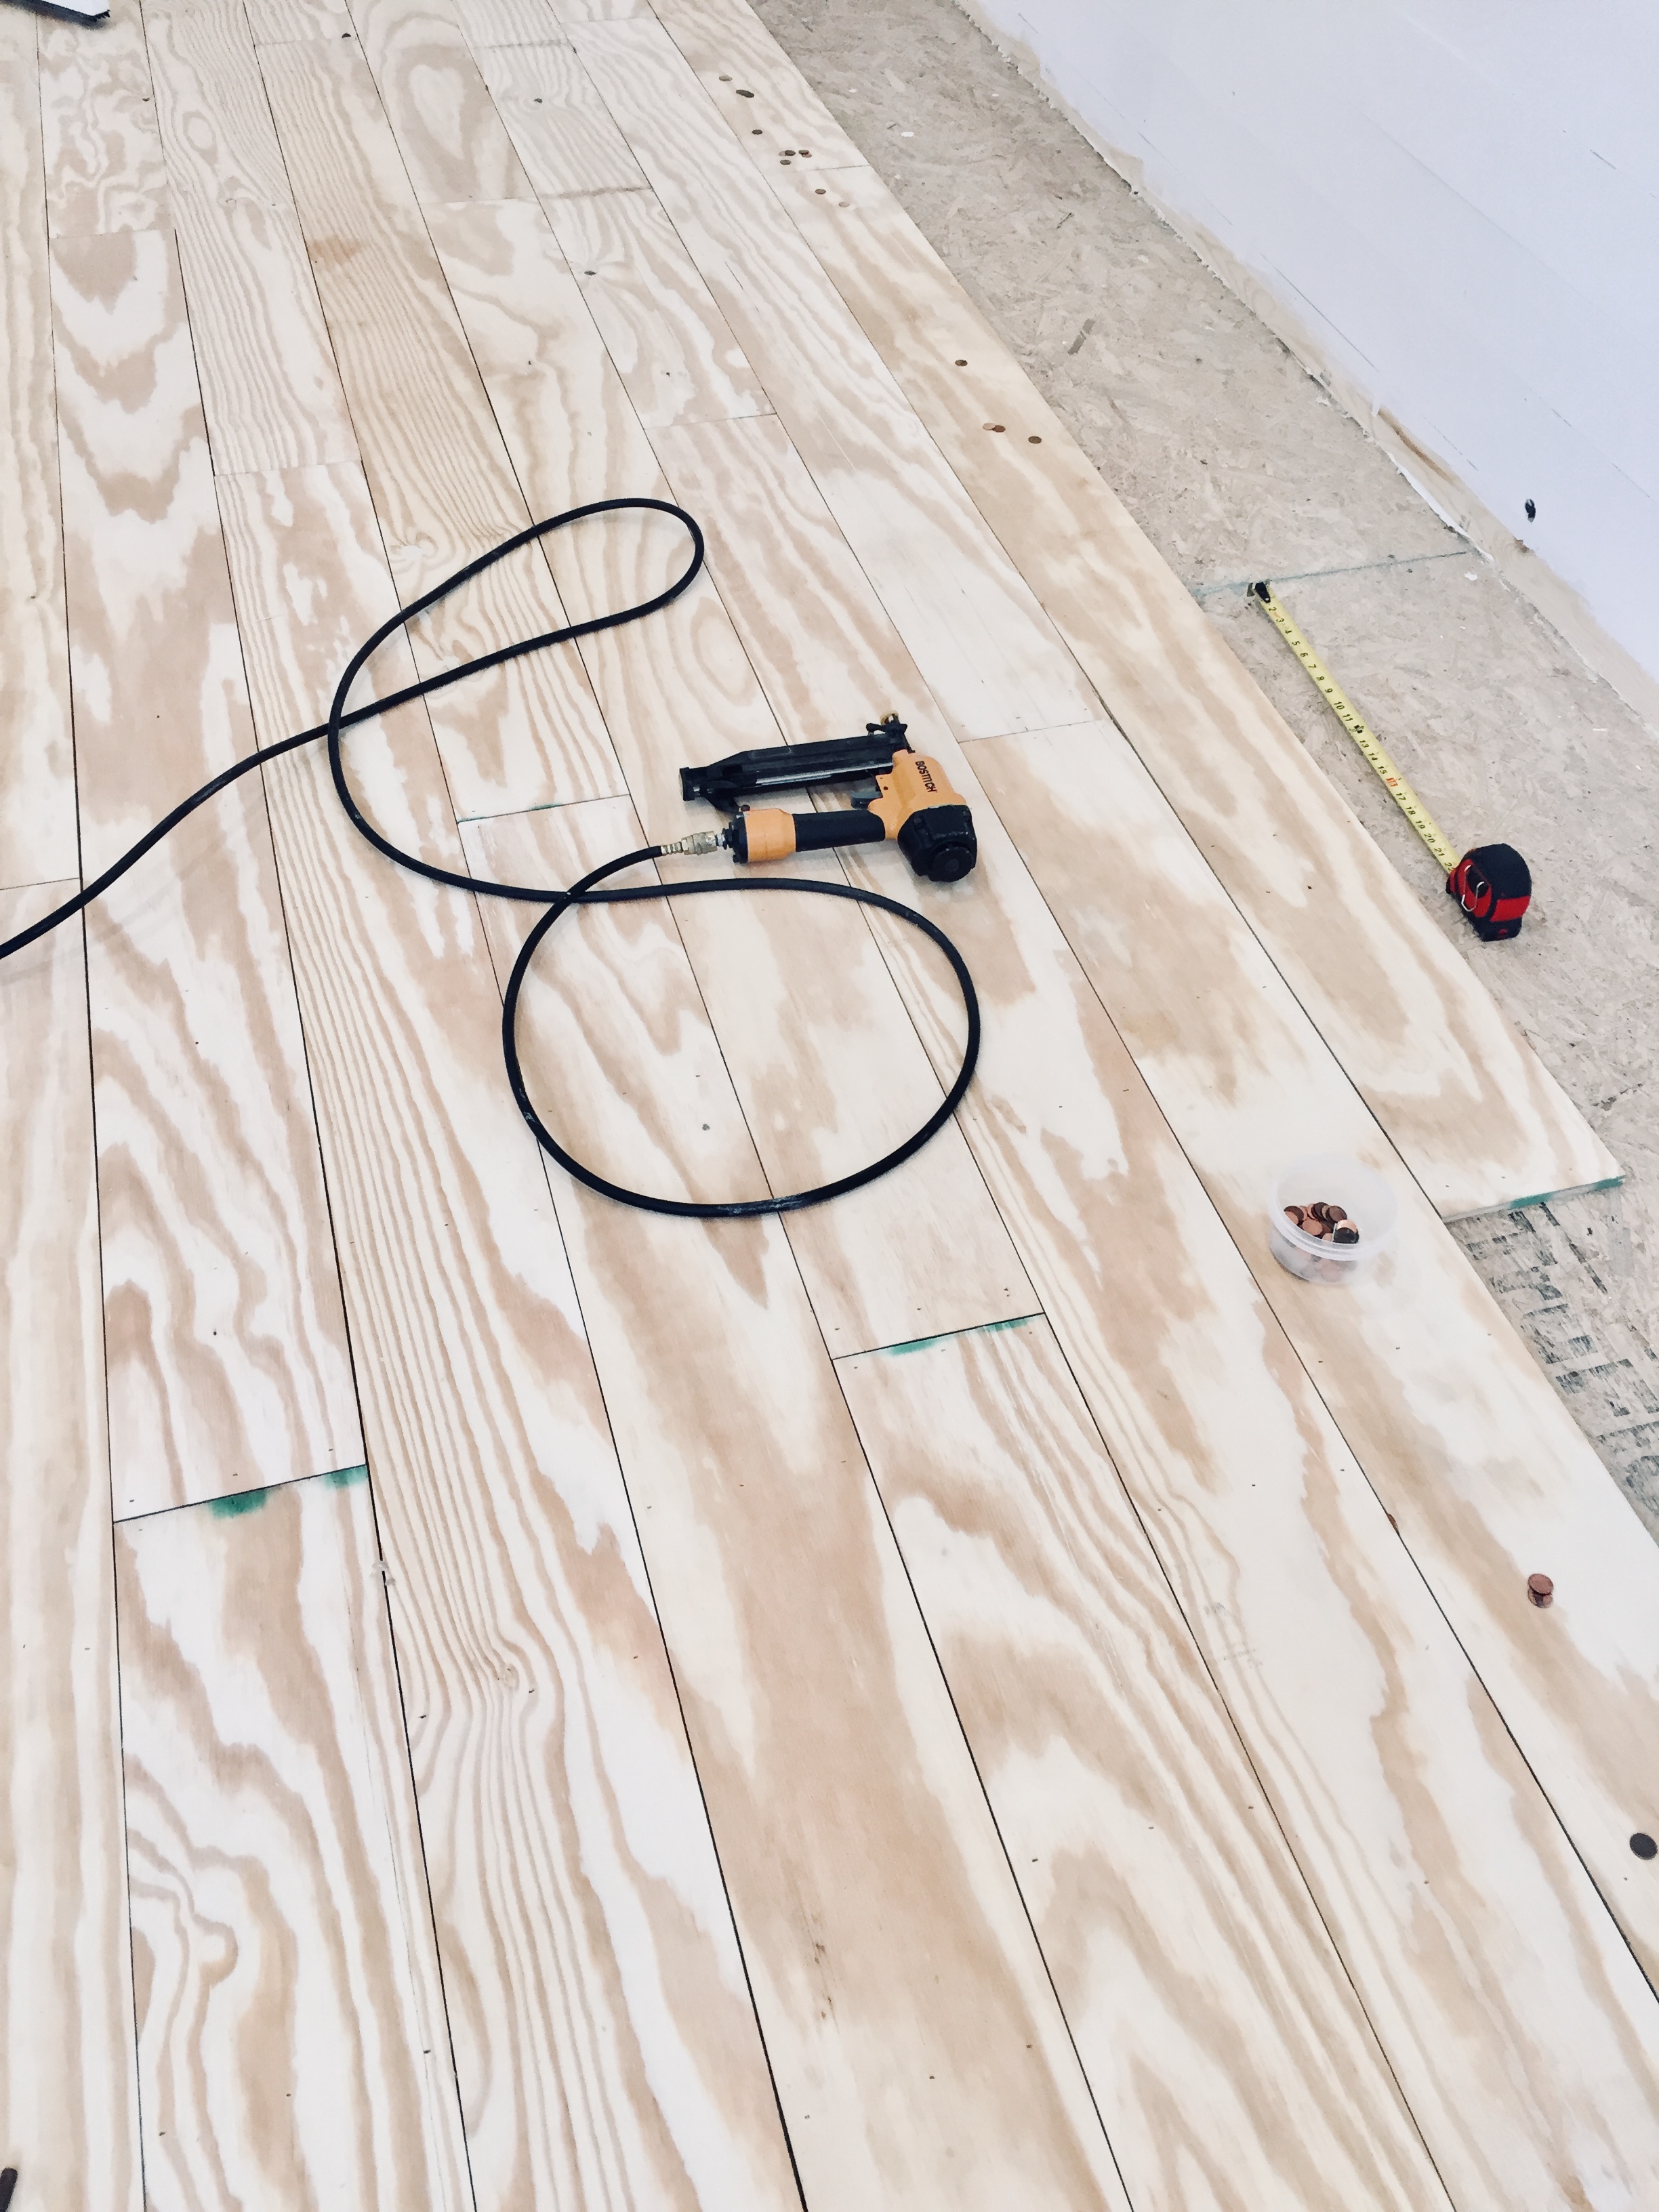
Boy oh boy, am I glad we did the DIY project! I LOVE it so much that I am trying to convince my husband that we should DIY all the flooring in the main house after we build it. It was so easy!
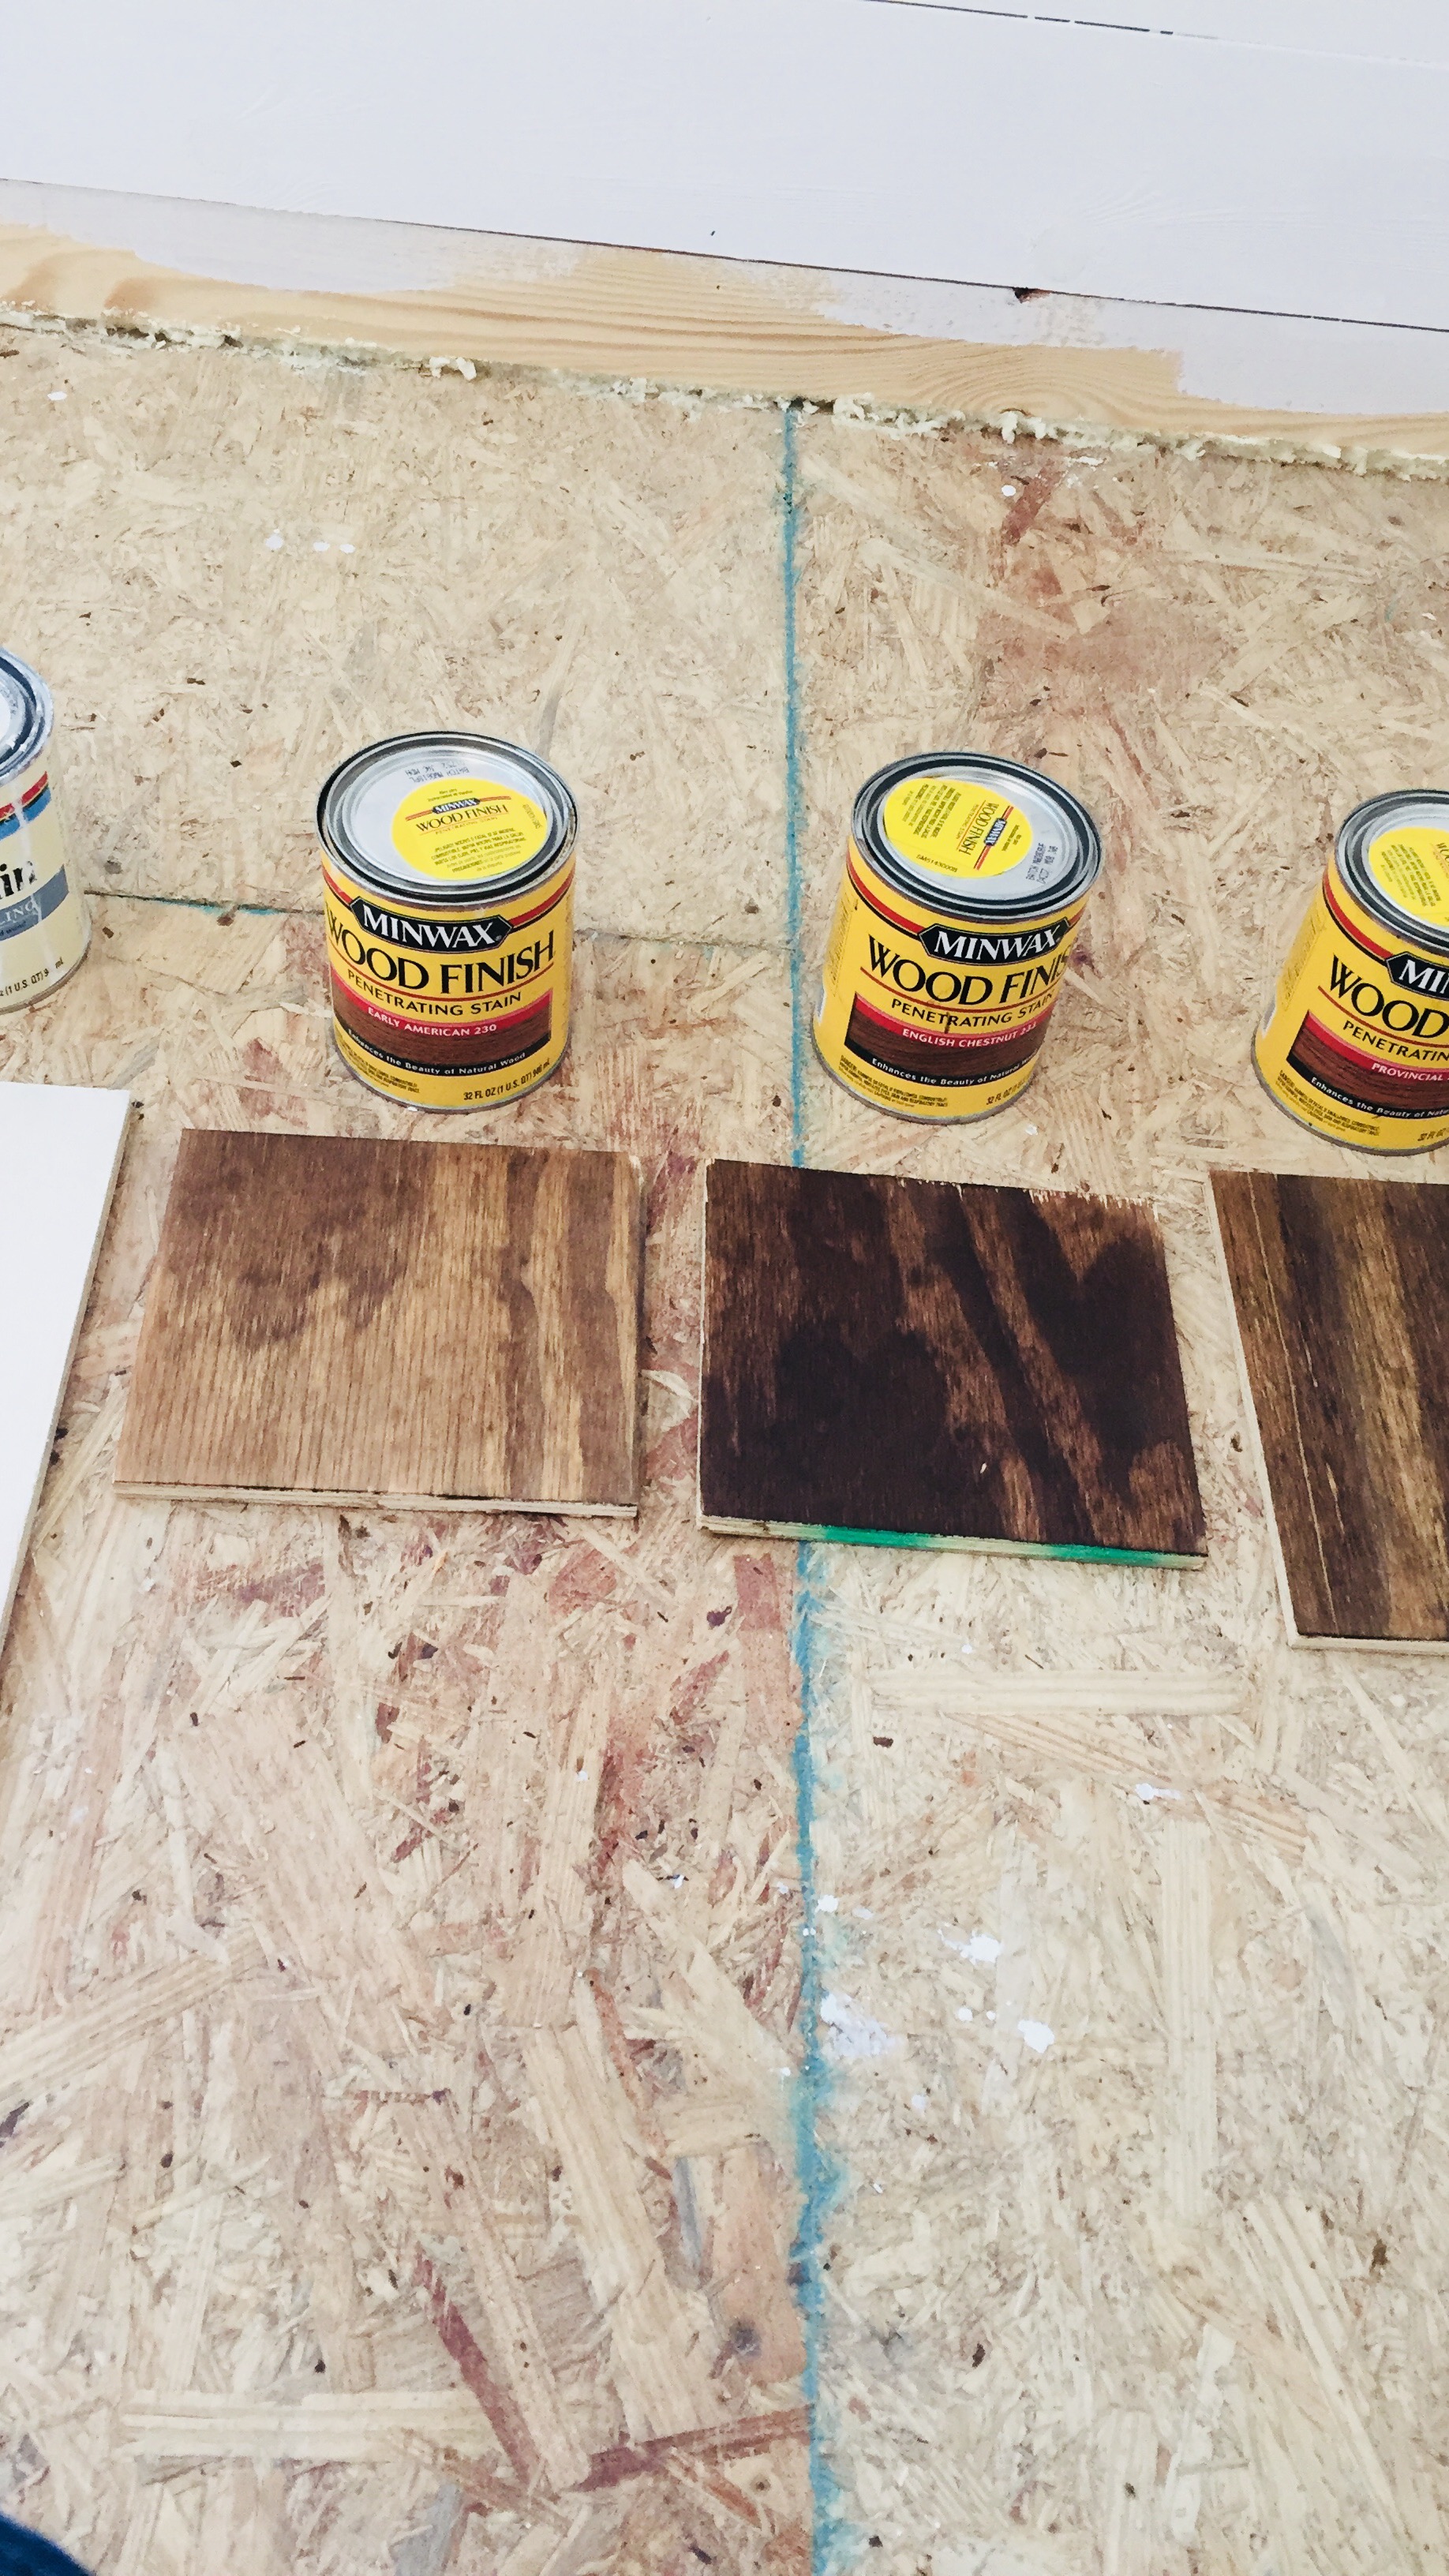
I tried a few stain colors and went with Early American Stain from Minwax. I really didn’t want anything too warm and the Early American was a neutral brown, just perfect for what I was wanting.
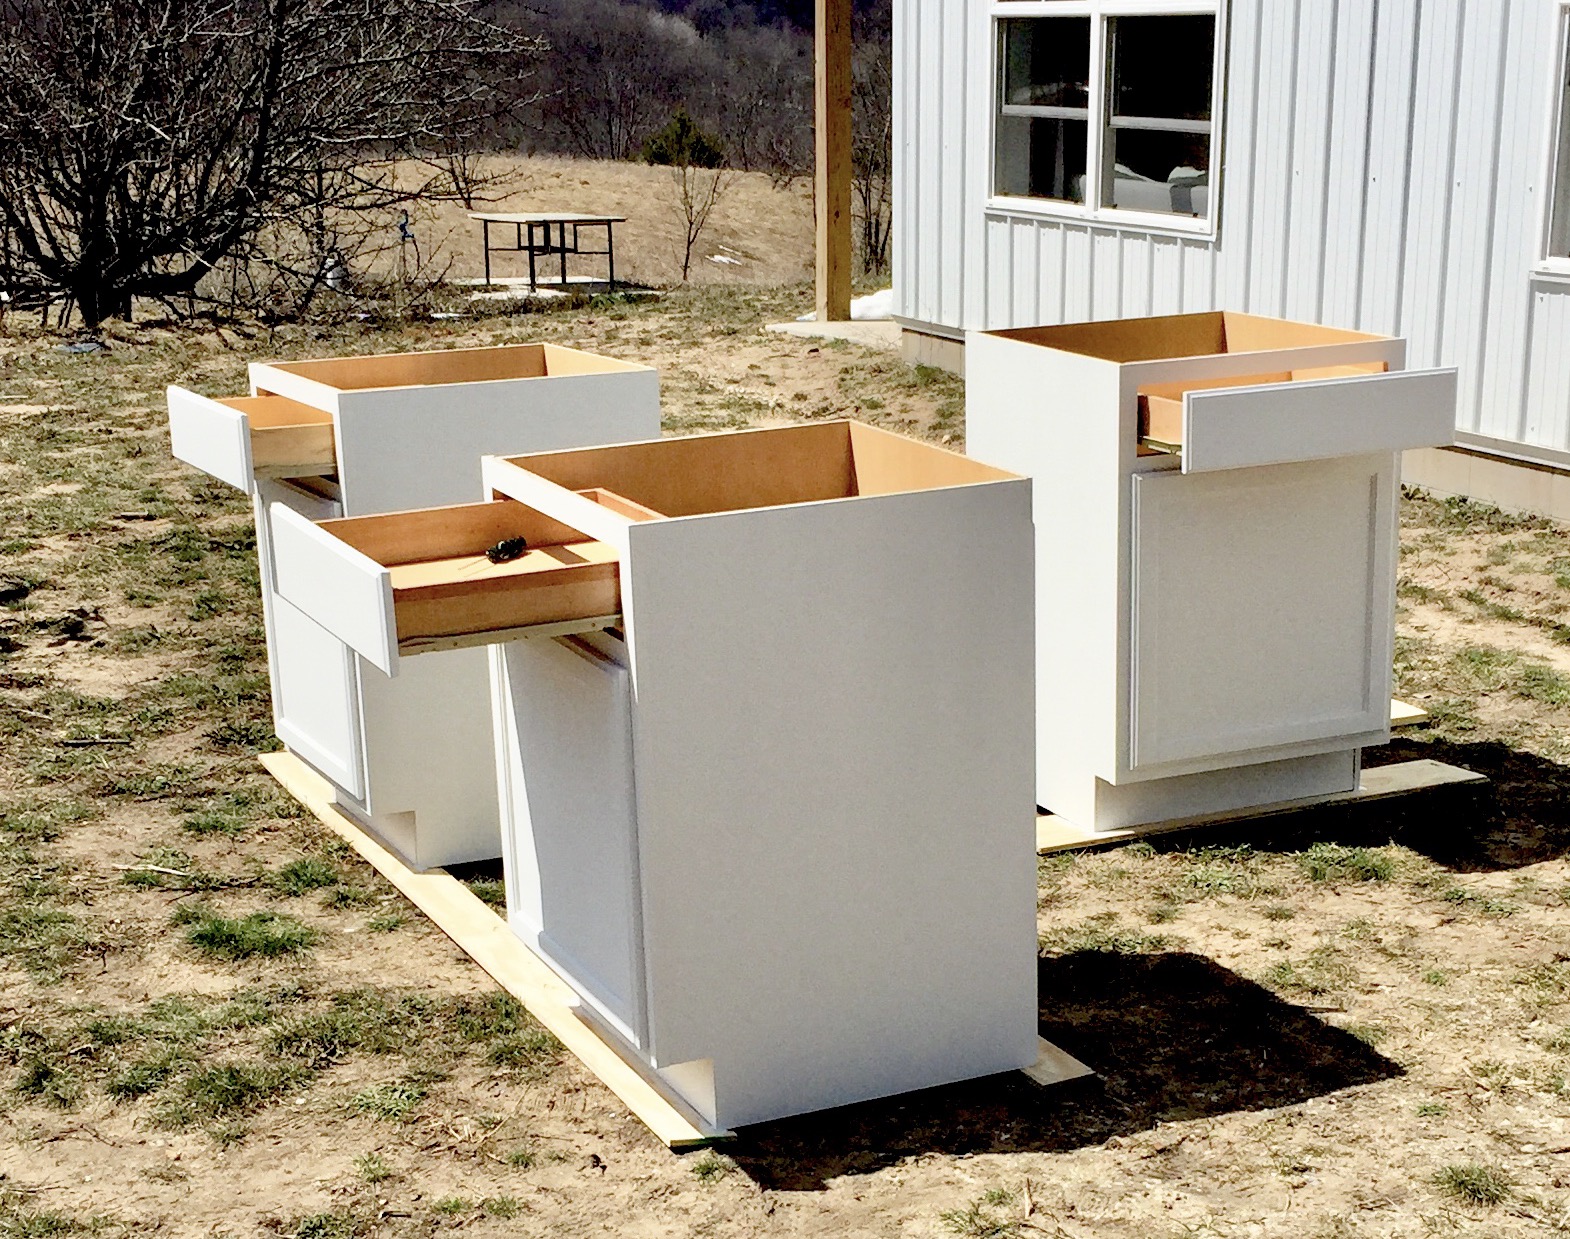
DIY Built-In Desktop
After we finished the floors, we started building the wall of desks. I bought three prefab cabinets that were each 24×24 and painted them with Magnolia Chalk Style Paint. We ripped down a sheet of birch plywood for the desktop. The little trim overhang on the desktop gives it the illusion that the countertop is thicker than it really is! This whole project was only a couple hundred dollars and it gave us a huge desktop!!! YAY!!!
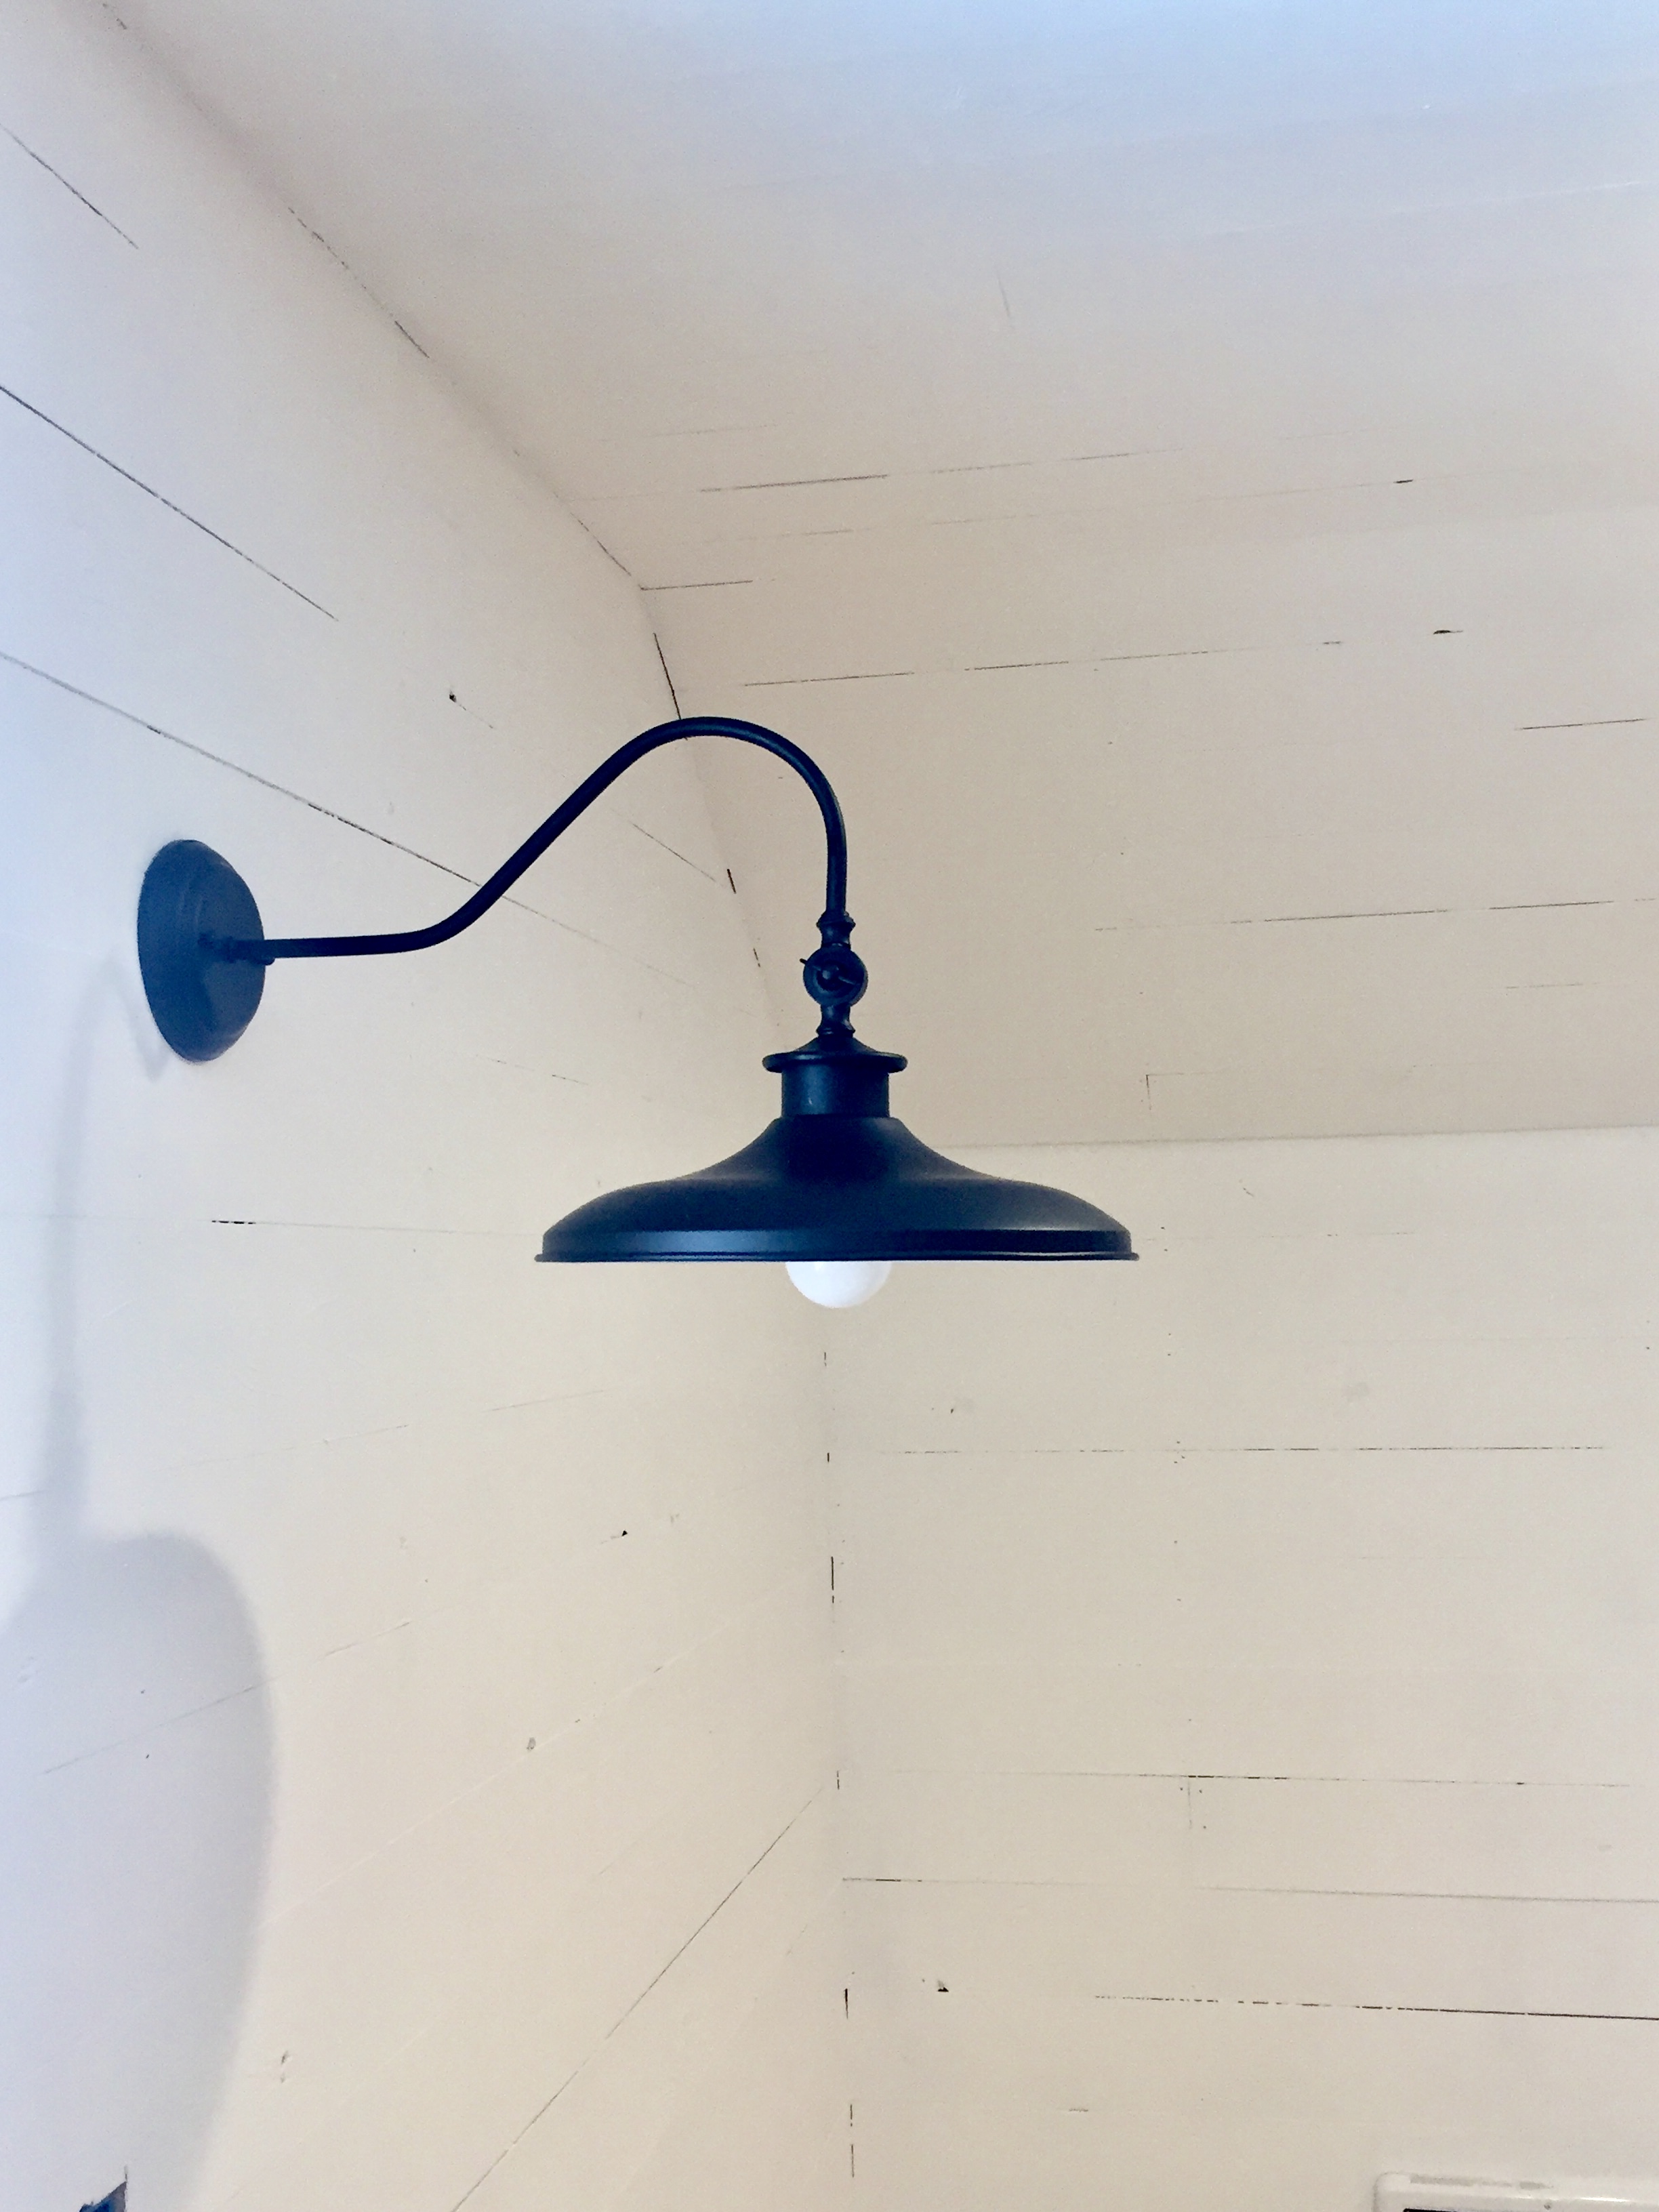
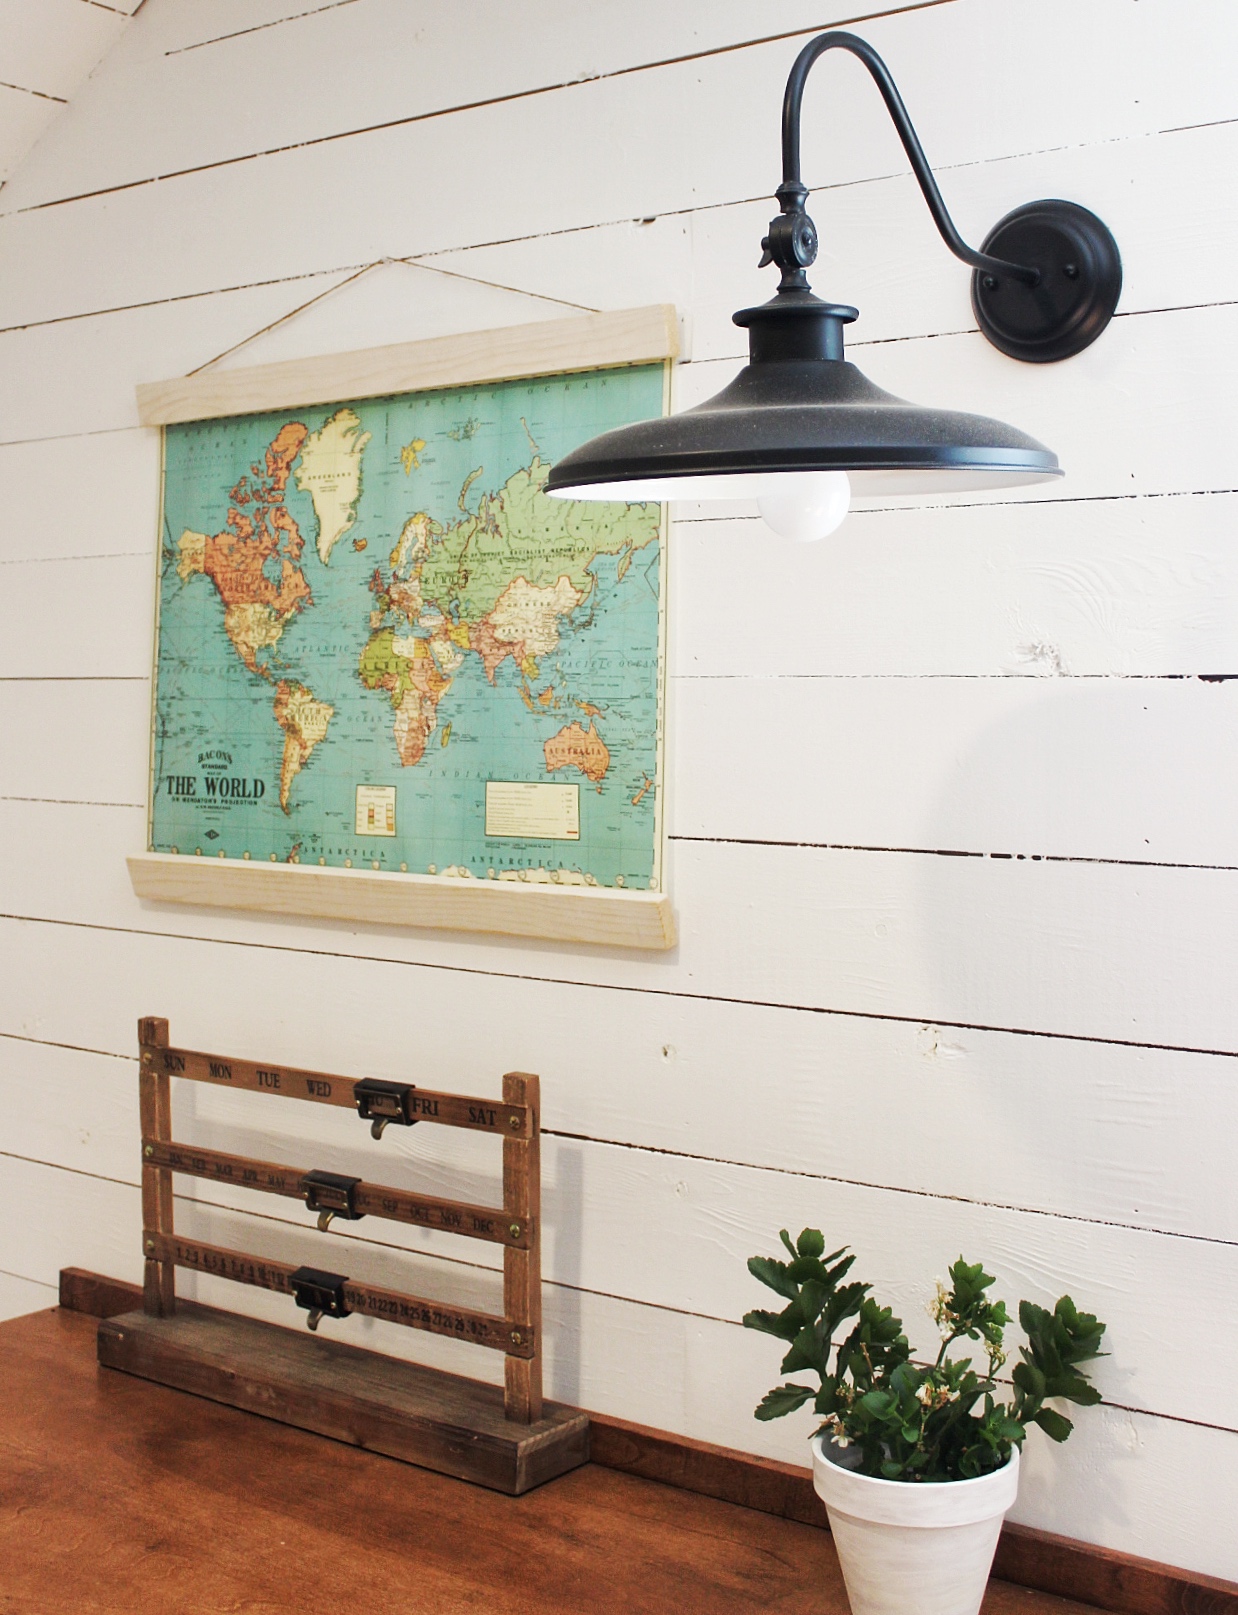
Farmhouse Lighting
To give the loft a modern farmhouse feel I opted for these Aedan Black Swivel Wall Sconce Lights
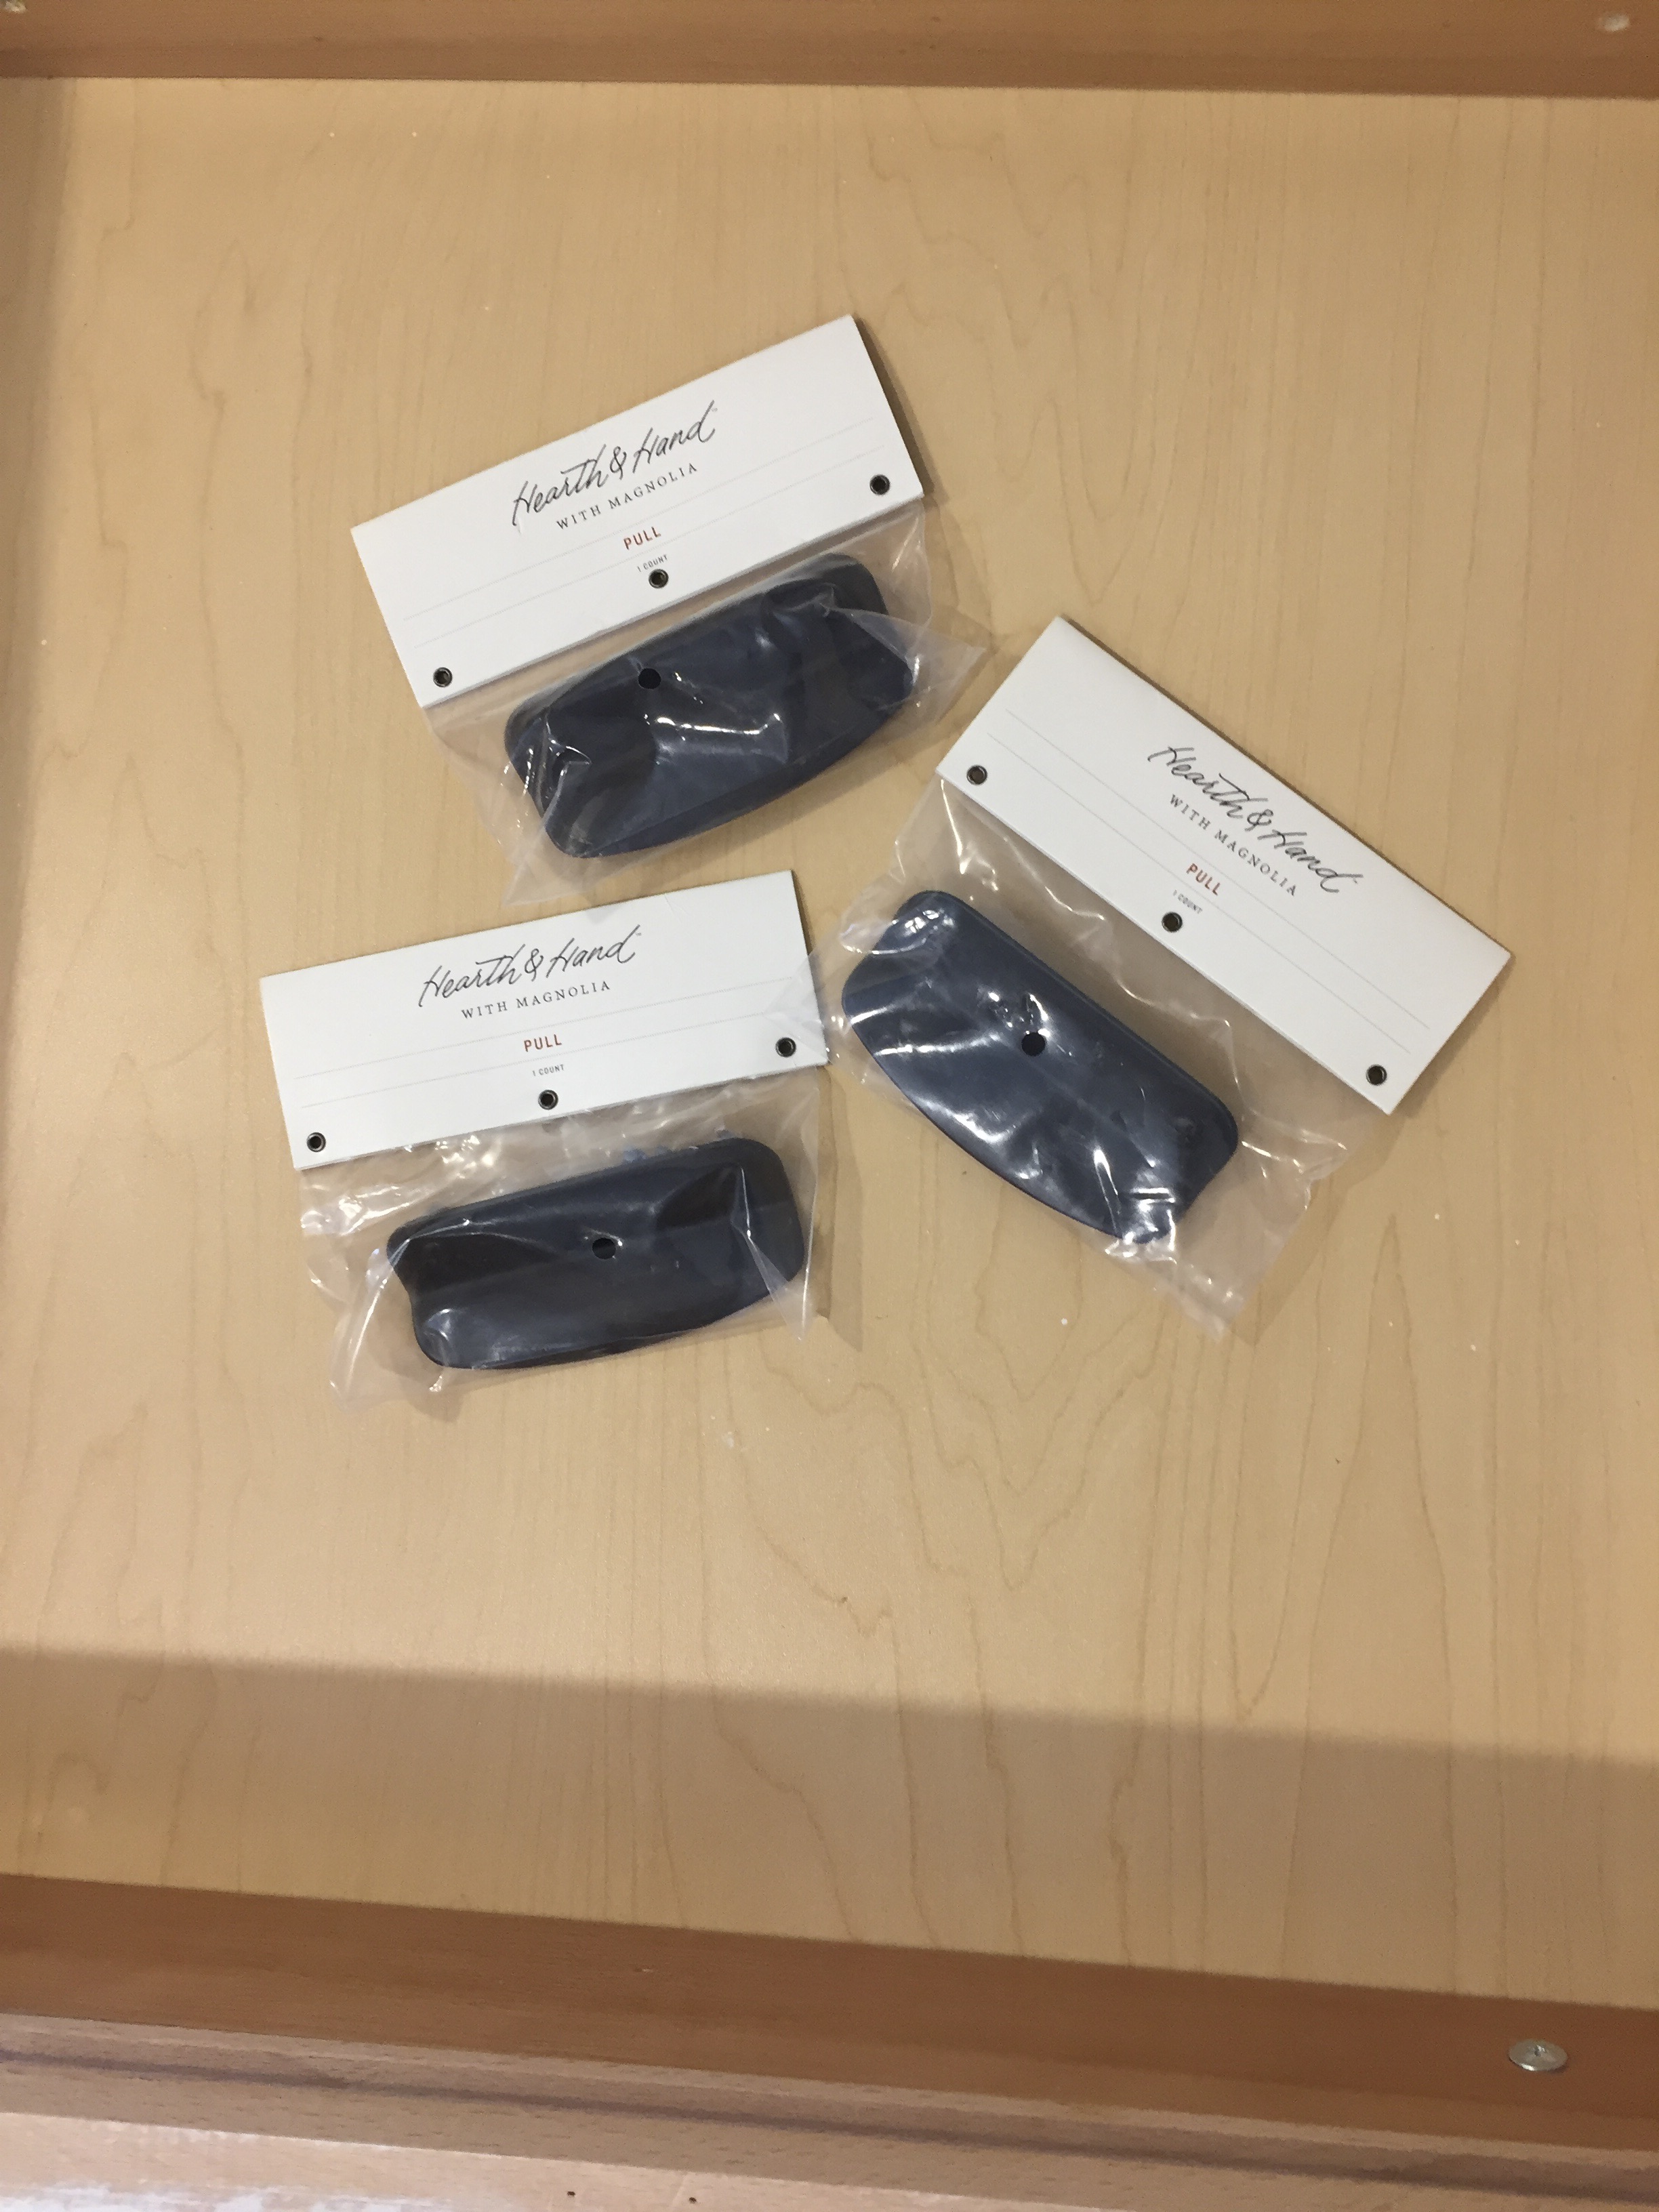
and chose black pulls from The Hearth and Hand from Magnolia line at Target.
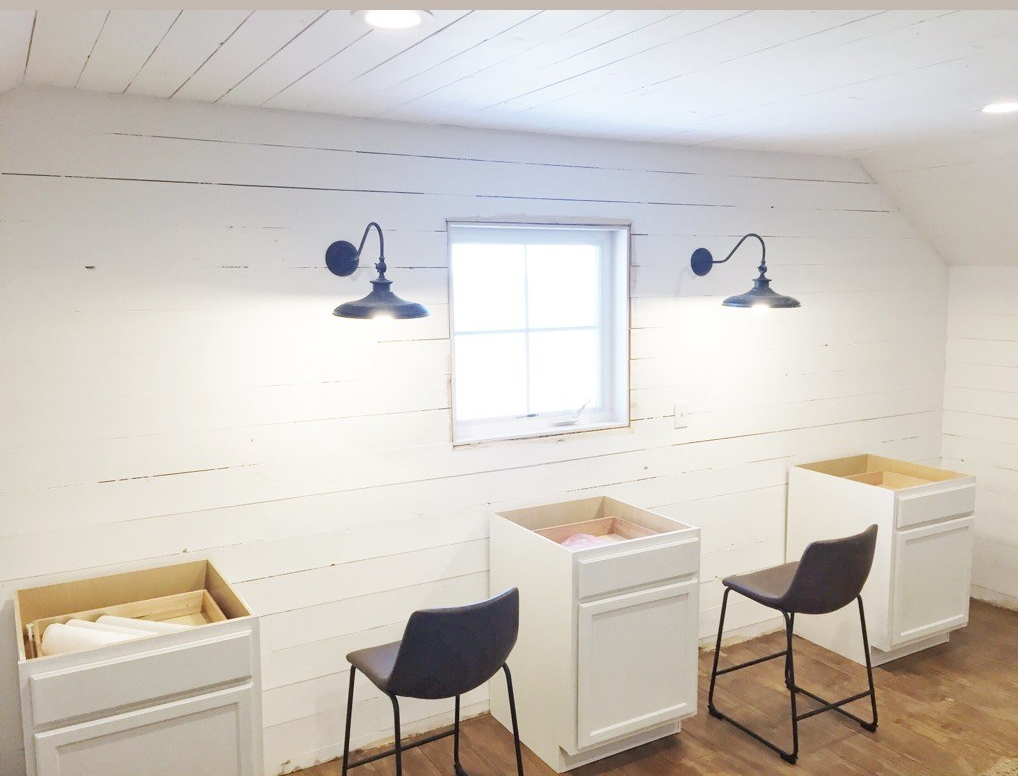
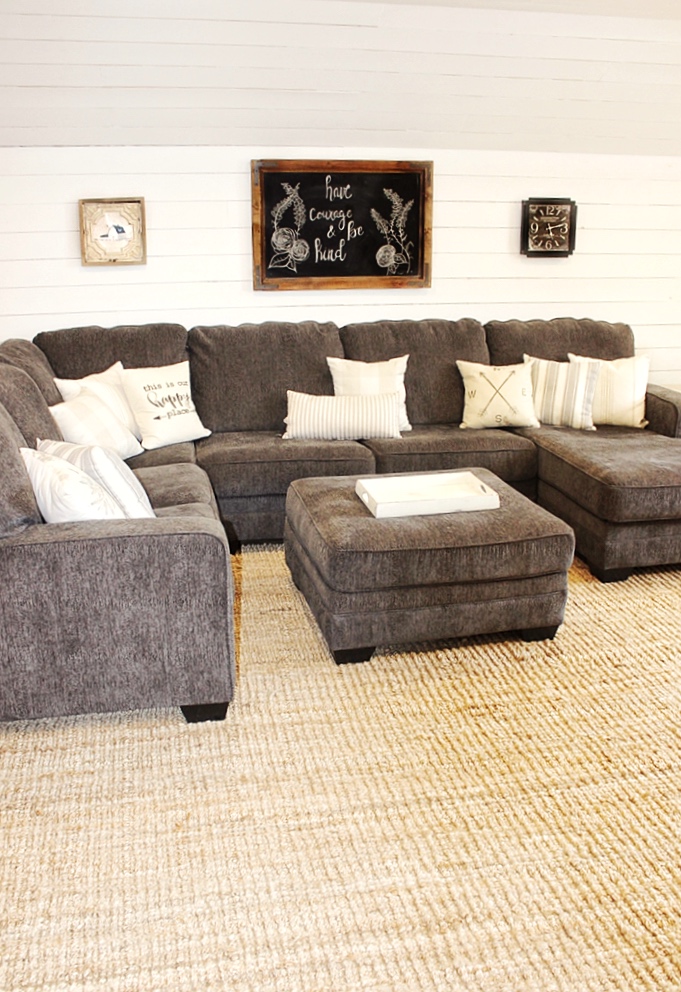
I decided to let my husband and kids pick out the furniture for this space. I really wanted a space where the kids and their friends could hang out and have food and not worry about mom’s white furniture. The barstools gave the space a more modern farmhouse feel that I love!
Next up we purchased a super comfy sectional and it works great for our family!

Our long DIY wall of desk space works fantastic for homework and for any other large project that the kids are working on for school!
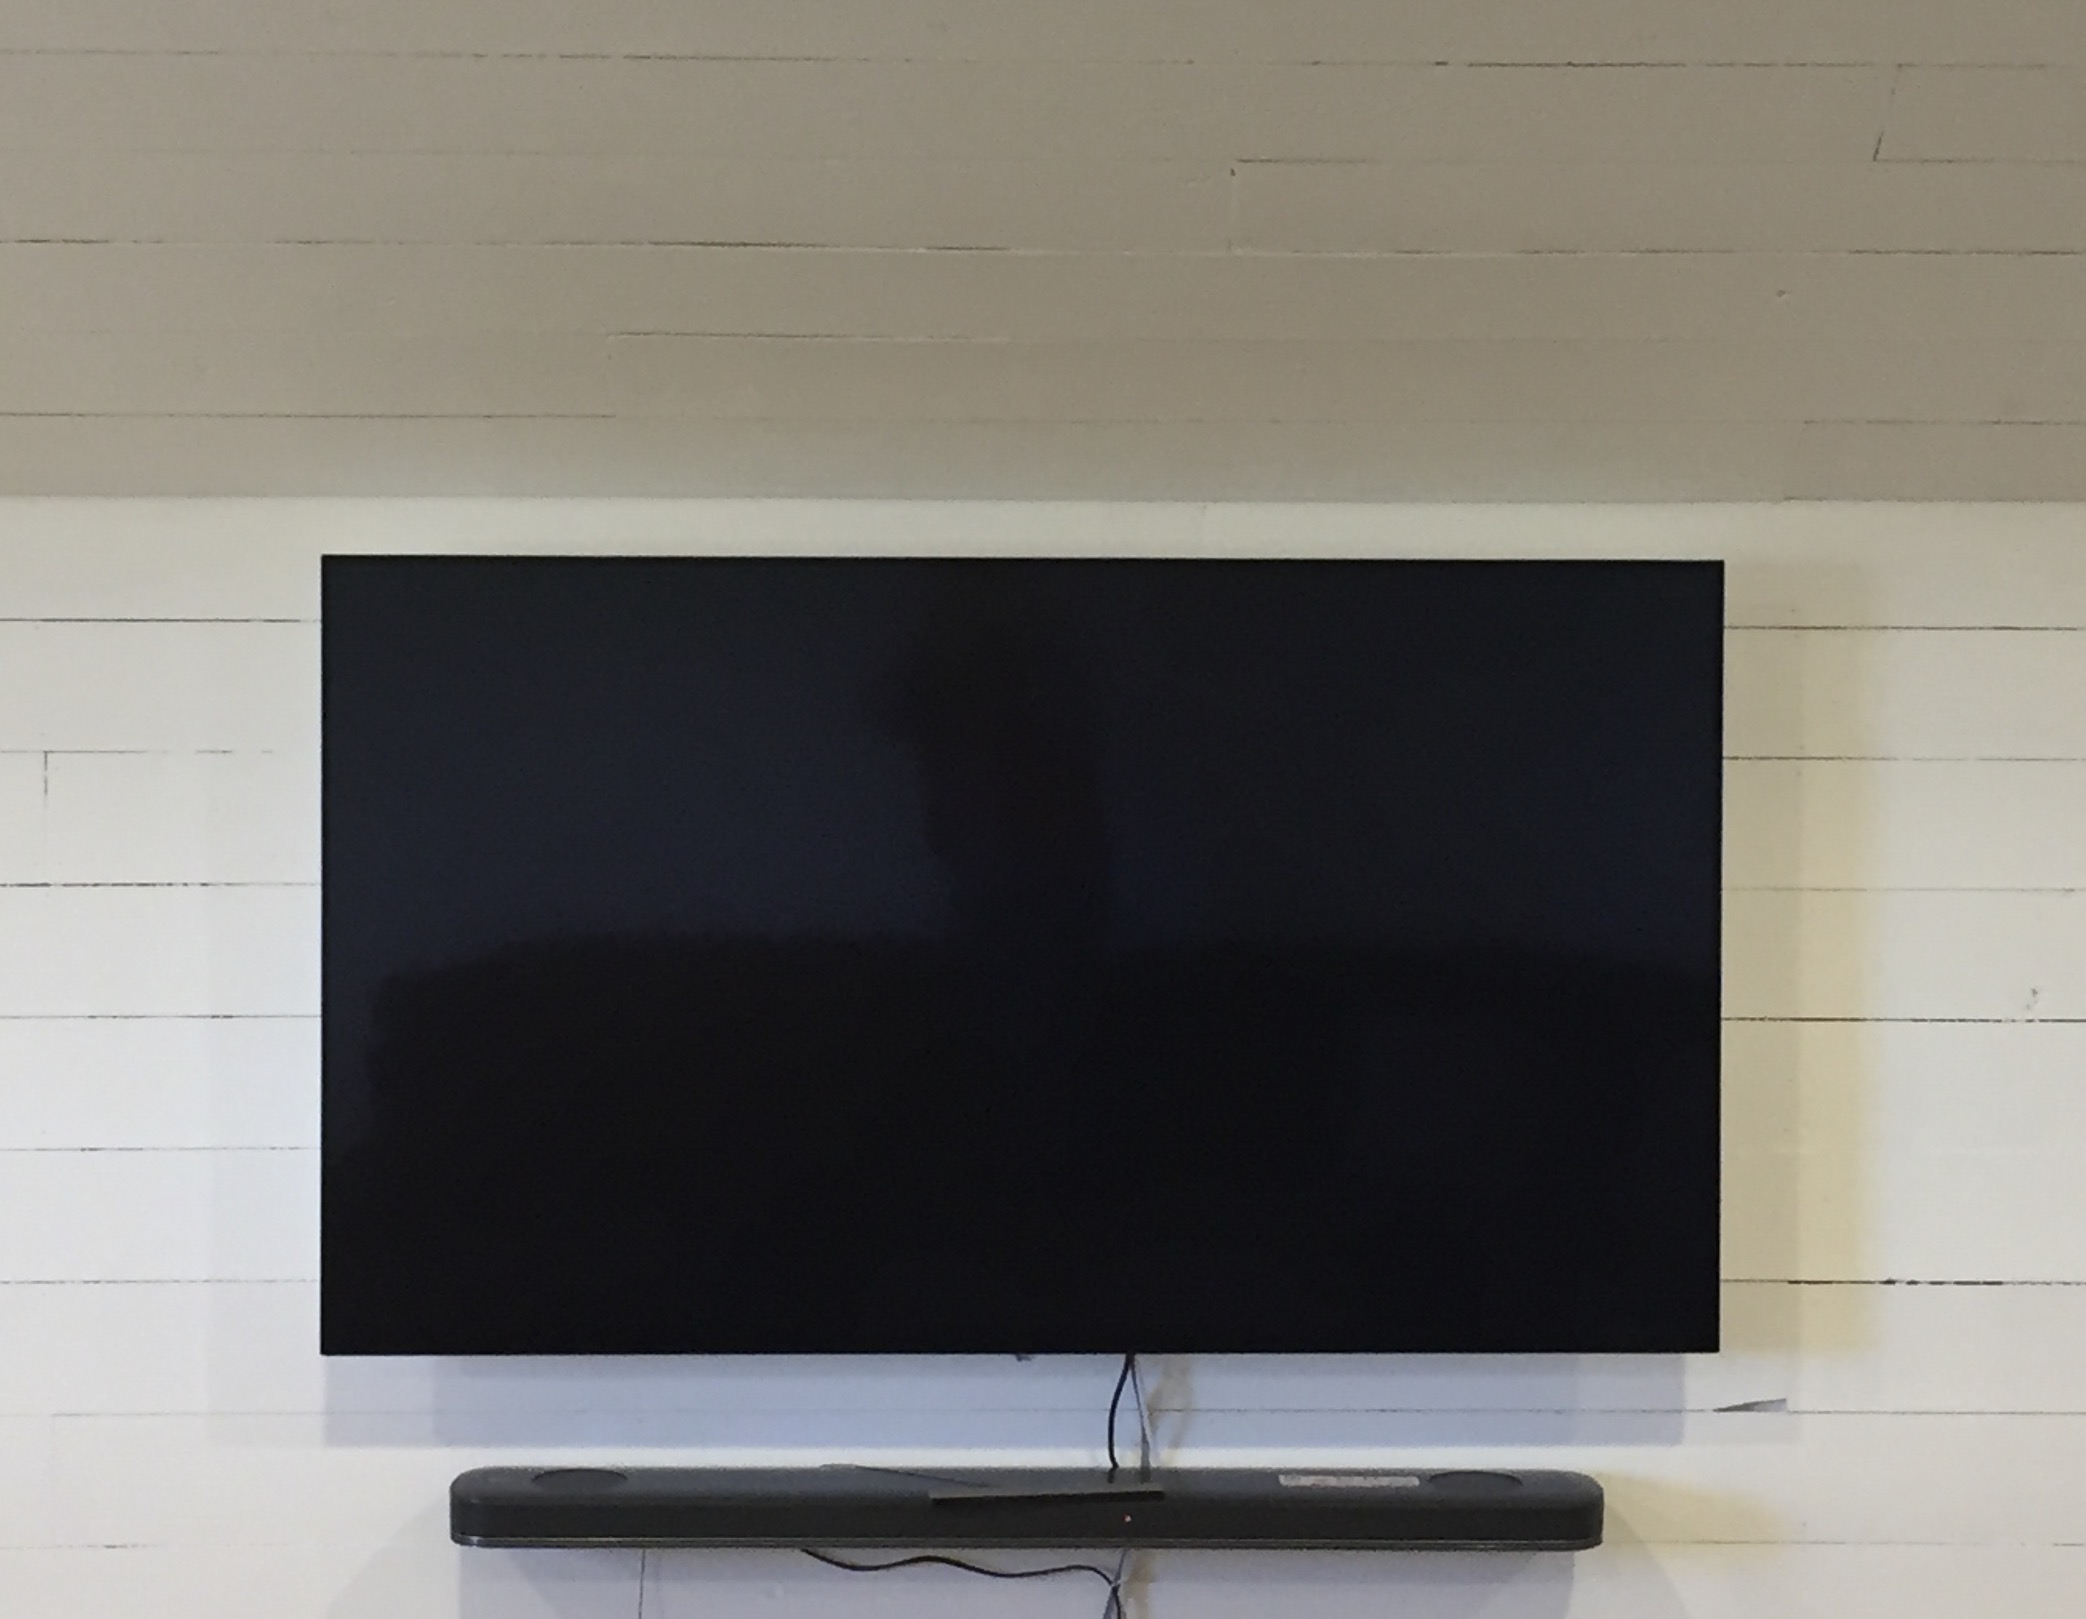
We still need to build some corner cabinets in both corners and some kind of game storage for under the TV, but so far we are super pleased with the loft! It really suits our family’s needs!!!
This space is unique because we actually can’t access it from inside the house even though it is directly above the house and not above the garage. We have a set of stairs from the attached garage that leads to the loft. So this space is on a separate heat source and is very insulated. That really helps with sound and makes our bonus room fantastic hangout for movie night!
We now use the bonus room as an office, family room, gym, a classroom for homeschooling and a movie room! I even have my weights, yoga mat, and my elliptical in the back corner behind the sectional and it works perfectly for all my at-home workouts!
Nothing like enjoying a larger than life episode of HGTVs Fixer Upper while getting in a workout!
I hope that you enjoyed this recap of how we finished our attic space and turned it into our family bonus room! We had a blast working on this project and we’ve had even more fun enjoying the space with our kiddos!
All About DIY Concrete Countertops And How To Know If They’re Right For You


We’re a group of volunteers and opening a new scheme in our community.
Your site offered us with valuable information to work on. You have done a formidable job and our whole community will be
grateful to you.
Hello I am so thrilled I found your blog page, I really found you by accident, while I was looking on Bing for something else, Anyways I am here now and would just like to say thanks a lot for a fantastic post and a all round interesting blog (I also love the theme/design), I don’t have time to go through it all at the moment but I have saved it and also included your RSS feeds, so when I have time I will be back to read more, Please do keep up the great job.|
Hi there! I’m at work browsing your blog from my new iphone 3gs! Just wanted to say I love reading through your blog and look forward to all your posts! Carry on the outstanding work!|
Magnificent site. Plenty of useful info here. I am sending it to some buddies ans also sharing in delicious. And naturally, thank you in your effort!|
Pretty nice post. I just stumbled upon your weblog and wished to say that I’ve really enjoyed browsing your blog posts. In any case I’ll be subscribing to your feed and I hope you write again very soon!|
Howdy! This is kind of off topic but I need some help from an established blog. Is it very difficult to set up your own blog? I’m not very techincal but I can figure things out pretty quick. I’m thinking about setting up my own but I’m not sure where to start. Do you have any points or suggestions? Appreciate it
Nice blog! I really like the article and very helpful for me. Thanks for sharing.
Nice post! Thanks a lot for sharing and keep sharing.
Great article 🙂
Hi- how tall are your ceilings in this space? We are considering doing our room over garage but concerned as it’s only 6’6” ceiling!