
After finding this vintage chair and ottoman a few years ago it’s finally time to give this beautiful french chair a DIY transformation.
I found this ornate, extra wide, french chair at a local market and while I love the chair because of its shape and the structure, the fabric and painted wood finish was pretty awful and needed a lot of work.

I knew it had potential so I spent a few days giving this beautiful french chair a total transformation! I have grown to love transforming and reupholstering old furniture. Saving beautiful, well made furniture is so rewarding!

Step 1- Remove all this red paisley fabric of the chair and ottoman
First thing…the fabric had to go! The red fabric the chair had previously been upholstered in had an orange under tone and it’s polyester (it’s pretty hideous)! I love red if it’s the right shade… this fabric however was not cutting it.

If you’re a beginner like me, it’s imprtant that you pay close attention to how you deconstruct the fabric on a chair. It will have a huge impact on how well you’re able to reupholster it.
I like to take pictures and notes on how everything came apart and in what order. I also label all the pieces if its not easy to tell where they came off of.

I started by removing all the double welt cord on both the chair and ottoman. I measured all the welt cord I removed so I’d have a close idea of how much to make later. This welt was glued on so it came off very easily.

I used an awl tool and staple puller to rip away the fabric as well as needle nose pliers to pull all the staples. I made sure to carefully save all the fabric pieces that I removed to use later as a template/pattern.
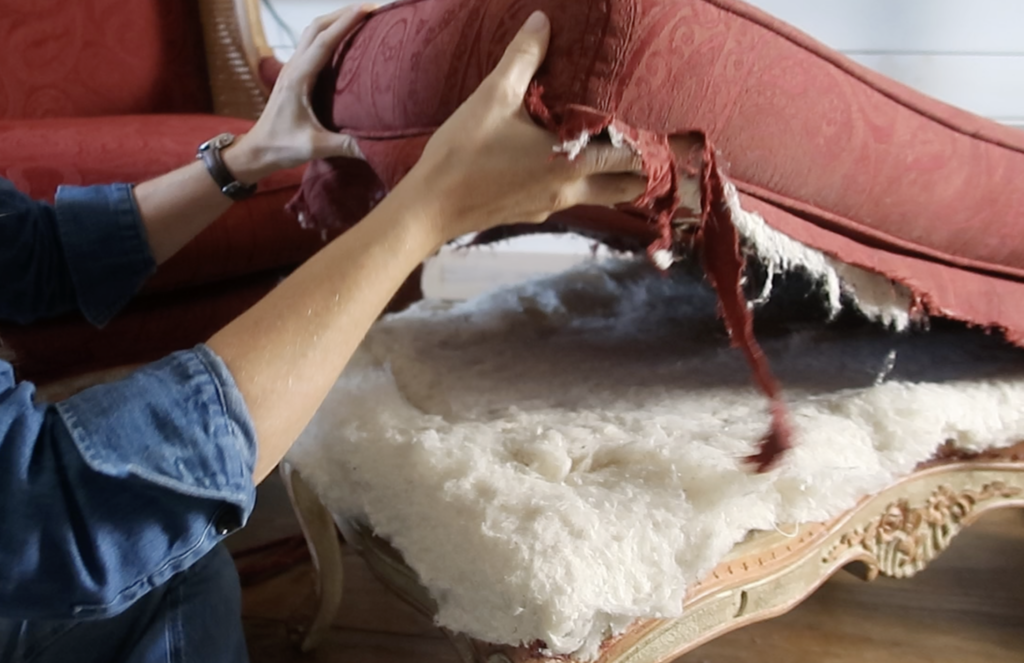
I carefully removed and saved all the batting and padding inside the chair and ottoman to reuse because it was in great shape.


Step 2- Assess the wood finish and come up with a plan
I wasn’t sure at first what to do about the wood itself. All the wood on both the chair and ottoman had been painted with a layer of cream paint, followed by a peach paint on just the raised portions of wood and then finished with a crackled like varnish or something similar.
It really wasn’t that obvious when the red fabric was on it, but as soon as I got all the red away from it all I could see was the peach paint and I knew I had to remove it.

The style is very French and while I really love the detailed carvings, the colors felt off and way too shabby chic for my taste. I wanted to simplify it a little by changing it to a beautiful medium brown stain. This decision played a huge part in this beautiful french chair DIY transformation!

I applied a layer of Citrus Strip to all the painted wood on both the french chair and ottoman, covered it all in plastic and let it do it’s magic for few hours. The first layer of stain remover did help to remove the top layer of paint.
I used wire bristle brushes to scrub away the stripper and peeling paint and then reapplied the Citrus Strip, covered with plastic and let it set overnight.

I repeated the same technique of using the metal bristle brush a second time, along with some wood kitchen kabob skewers to dig out the deep crevices and that did the trick. I cleaned up all the sticky residue with mineral spirits and let it dry out a while before testing stain colors.
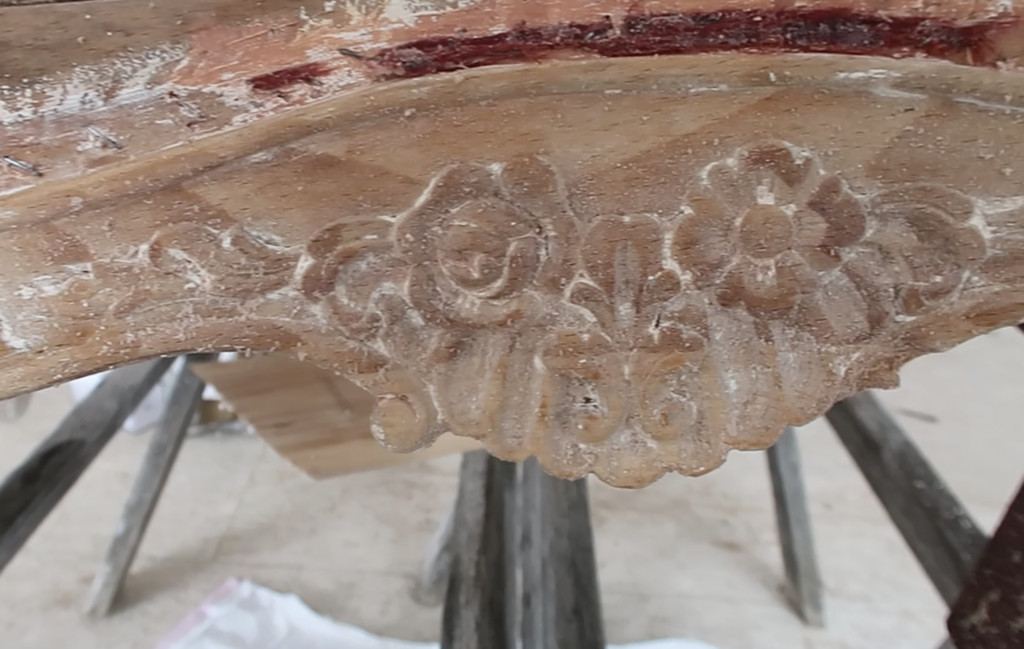
I like to avoid working with chemicals if I can and always sand vs. strip a piece of furniture whenever possible. Removing all the layers of paint and varnish took a lot longer than I had hoped and it was pretty grueling getting in every little crevice, but when I saw the raw wood all cleaned up I was SO happy I stuck with it and didn’t give up!
It was messy and very time consuming. I worked outside or in an open space (our new house is under construction still so I let it sit overnight there while the stripper worked). Full disclosure…ornate furniture is very difficult to strip and if you’re thinking of trying this project, be sure and set aside extra time to dedicate to it.
All things considered…I am so glad I didn’t leave the peach paint!
Step 3- Choose a stain color & stain all the wood
Stain can look very different from piece to peice and takes differently to different wood species. So I recommend getting a few samples of stain and trying out on an inconspicuous area on your furniture before committing to a color.
I’ve stained quite a few pieces of furniture over the years (and used so many different colors of stain), so I decided I’d take a chance ( and not follow my own advice) on a stain color and only got one color at the hardware store.
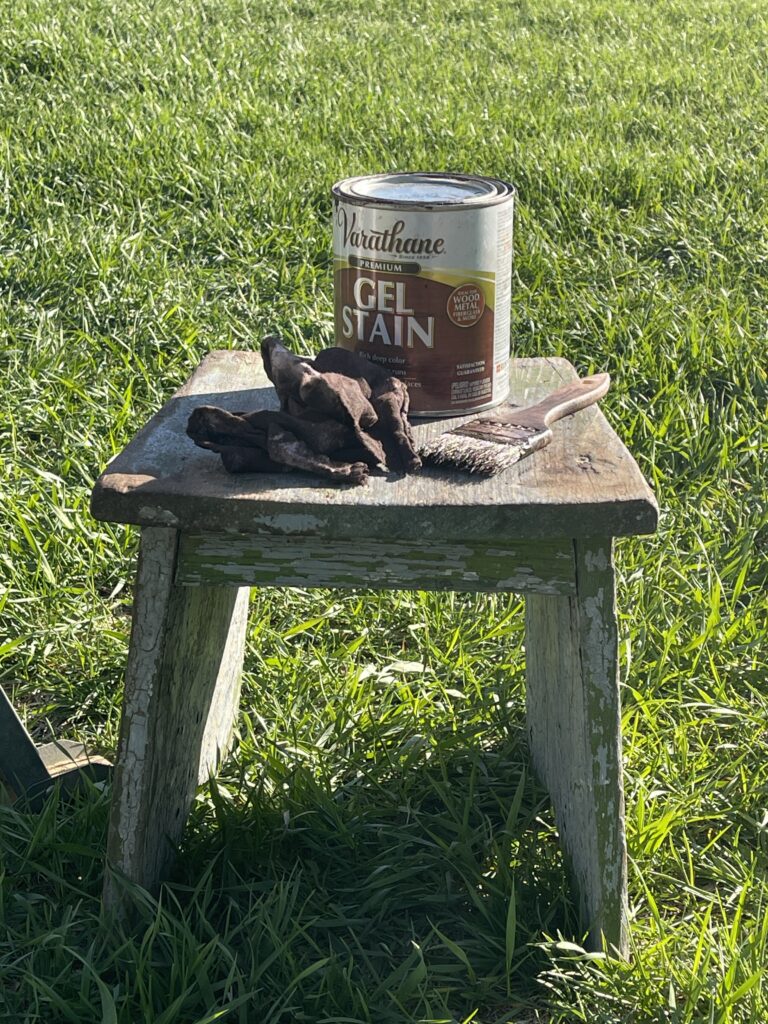
I tested a small area just to see how the chair and ottoman would take the gel stain. Thankfully the color I chose,”Hickory”, was absolutely perfect and just what I was looking for!

I used a small chip brush to apply the stain and wiped off the excess with a rag. I also used a toothbrush to get the stain deep down in the really small crevices and that worked great!

This beautiful french chair has caned sides of each arm and each arm is double layer of the cane so instead of keeping the cane light, I used the gel stain on the cane and it turned out really well!

It just didn’t look right with the darker wood next to the lighter tan cane and I’m so glad the cane took the stain evenly.
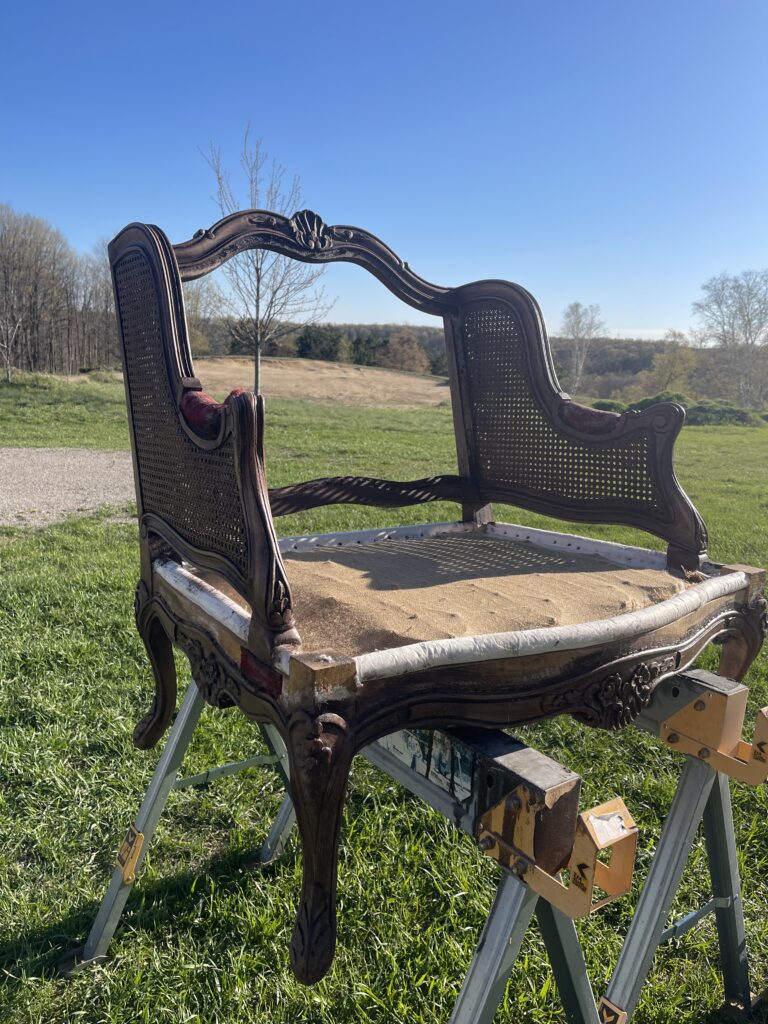
Getting this beautiful french chair deconstructed, stripped, stained and ready for upholstery was quite a project, but so worth it. I am so excited to share with you the beautiful KOVI fabric I chose to reupholster this chair and ottoman in the next post!

Click Here to see my INSPO pic for the chair and ottoman (I found on Pinterest) and be sure to watch the video below to see the entire process of getting this chair ready upholster and dont forget to subscribe to follow along for part 2 of this french chair makeover!
You can find the entire second half of this Chair Transformation in this video French Chair Transformation Part 2 HERE


